Set up your company
Do this once, when you start using Easy. You add the company, answer a short setup wizard, and then check the few settings that every document and return depends on. Allow about half an hour, longer if you are typing in opening balances now.
About the screenshots
Pictures of the wizard are from a test company, Tamarind Café. Pictures of settings are from Easy's demo company, Little Polynesian Café. Names, numbers and dates are examples.
Before you start
Have these ready:
- The company's legal name, its trading name if different, address, phone and email.
- Your RMD number (Revenue Management Division). If you have staff, also your CINSF employer reference.
- Whether the business is registered for VAT, and the day that took effect.
- The names you recognise your bank accounts by on a statement.
- Your closing balances from the old system, if you are moving across (they are covered in Opening balances).
Only the person who will own the company needs to do this. They become its Owner.
Step 1. Add the company
Open the company switcher at the top left and choose + Add a company (or sign up, if this is your first company).
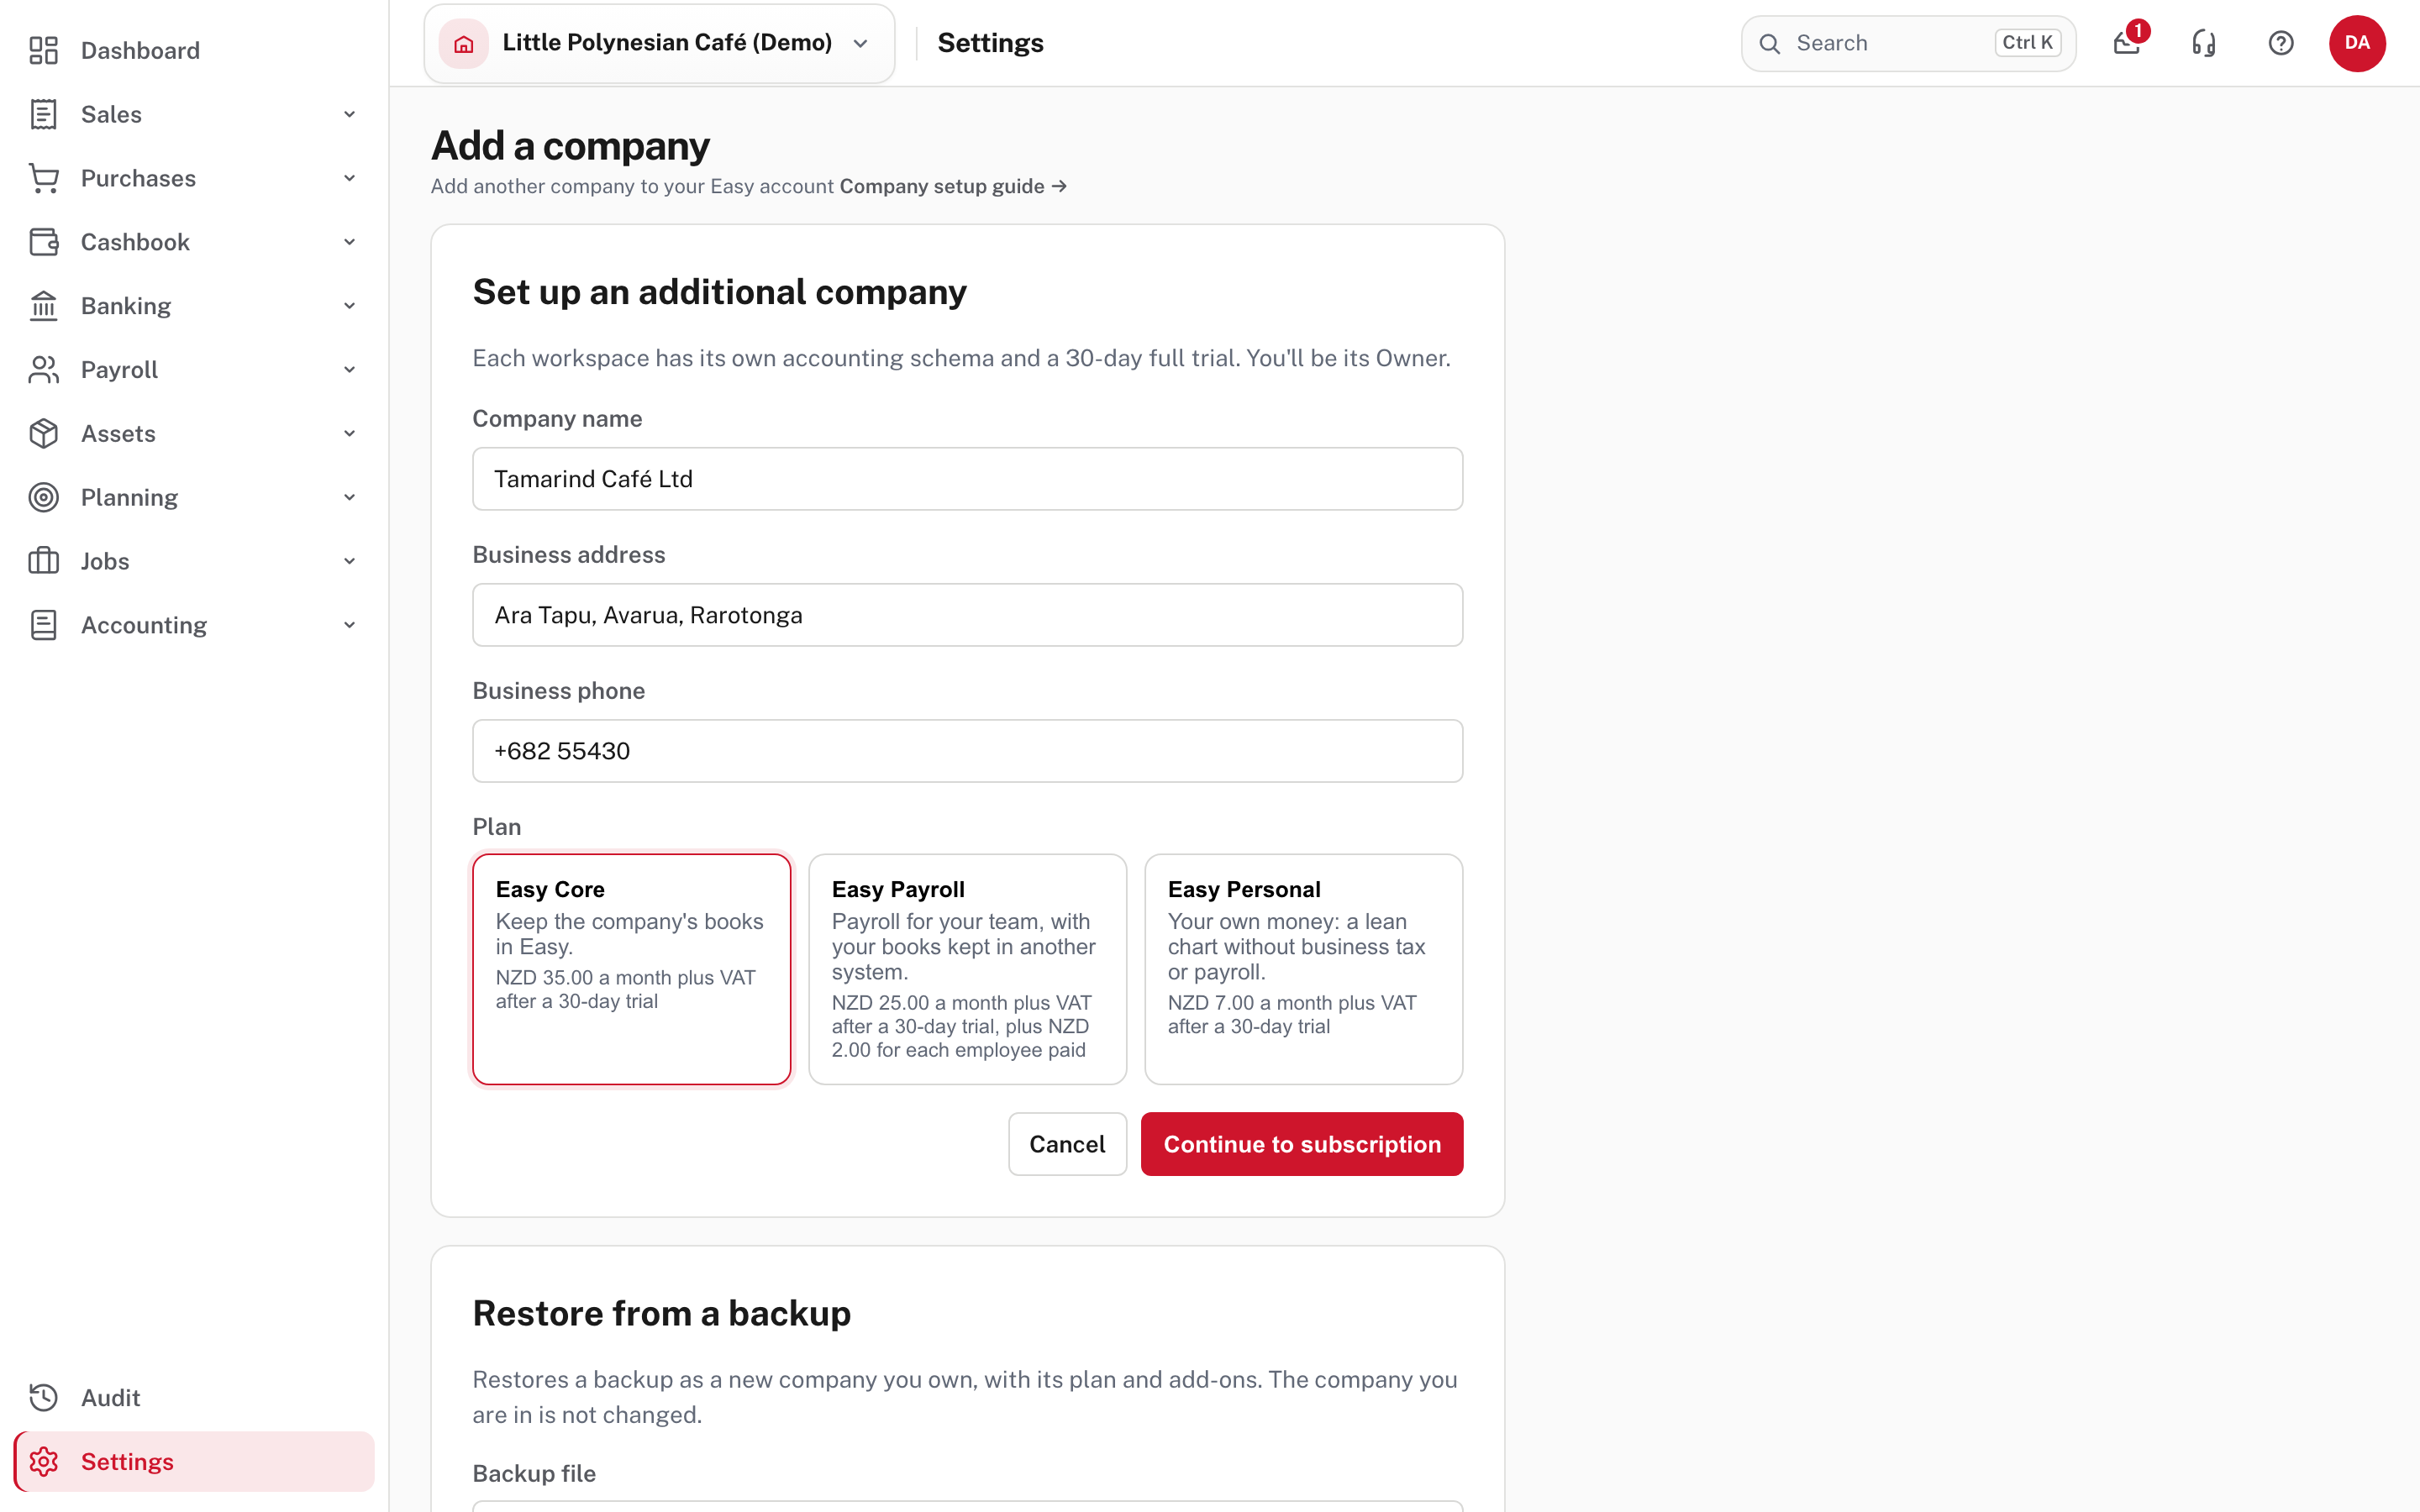
Enter the company name, business address and phone, then choose a plan:
- Easy Core: the company's books kept in Easy (sales, purchases, banking, the full ledger).
- Easy Payroll: payroll for your team, with your books kept in another system.
- Easy Personal: your own money, with a lean chart of accounts and no business tax or payroll.
Choose Continue to subscription. Every company starts with a 30-day trial. Nothing is charged until the trial ends, and you can change the plan under Billing & plan.
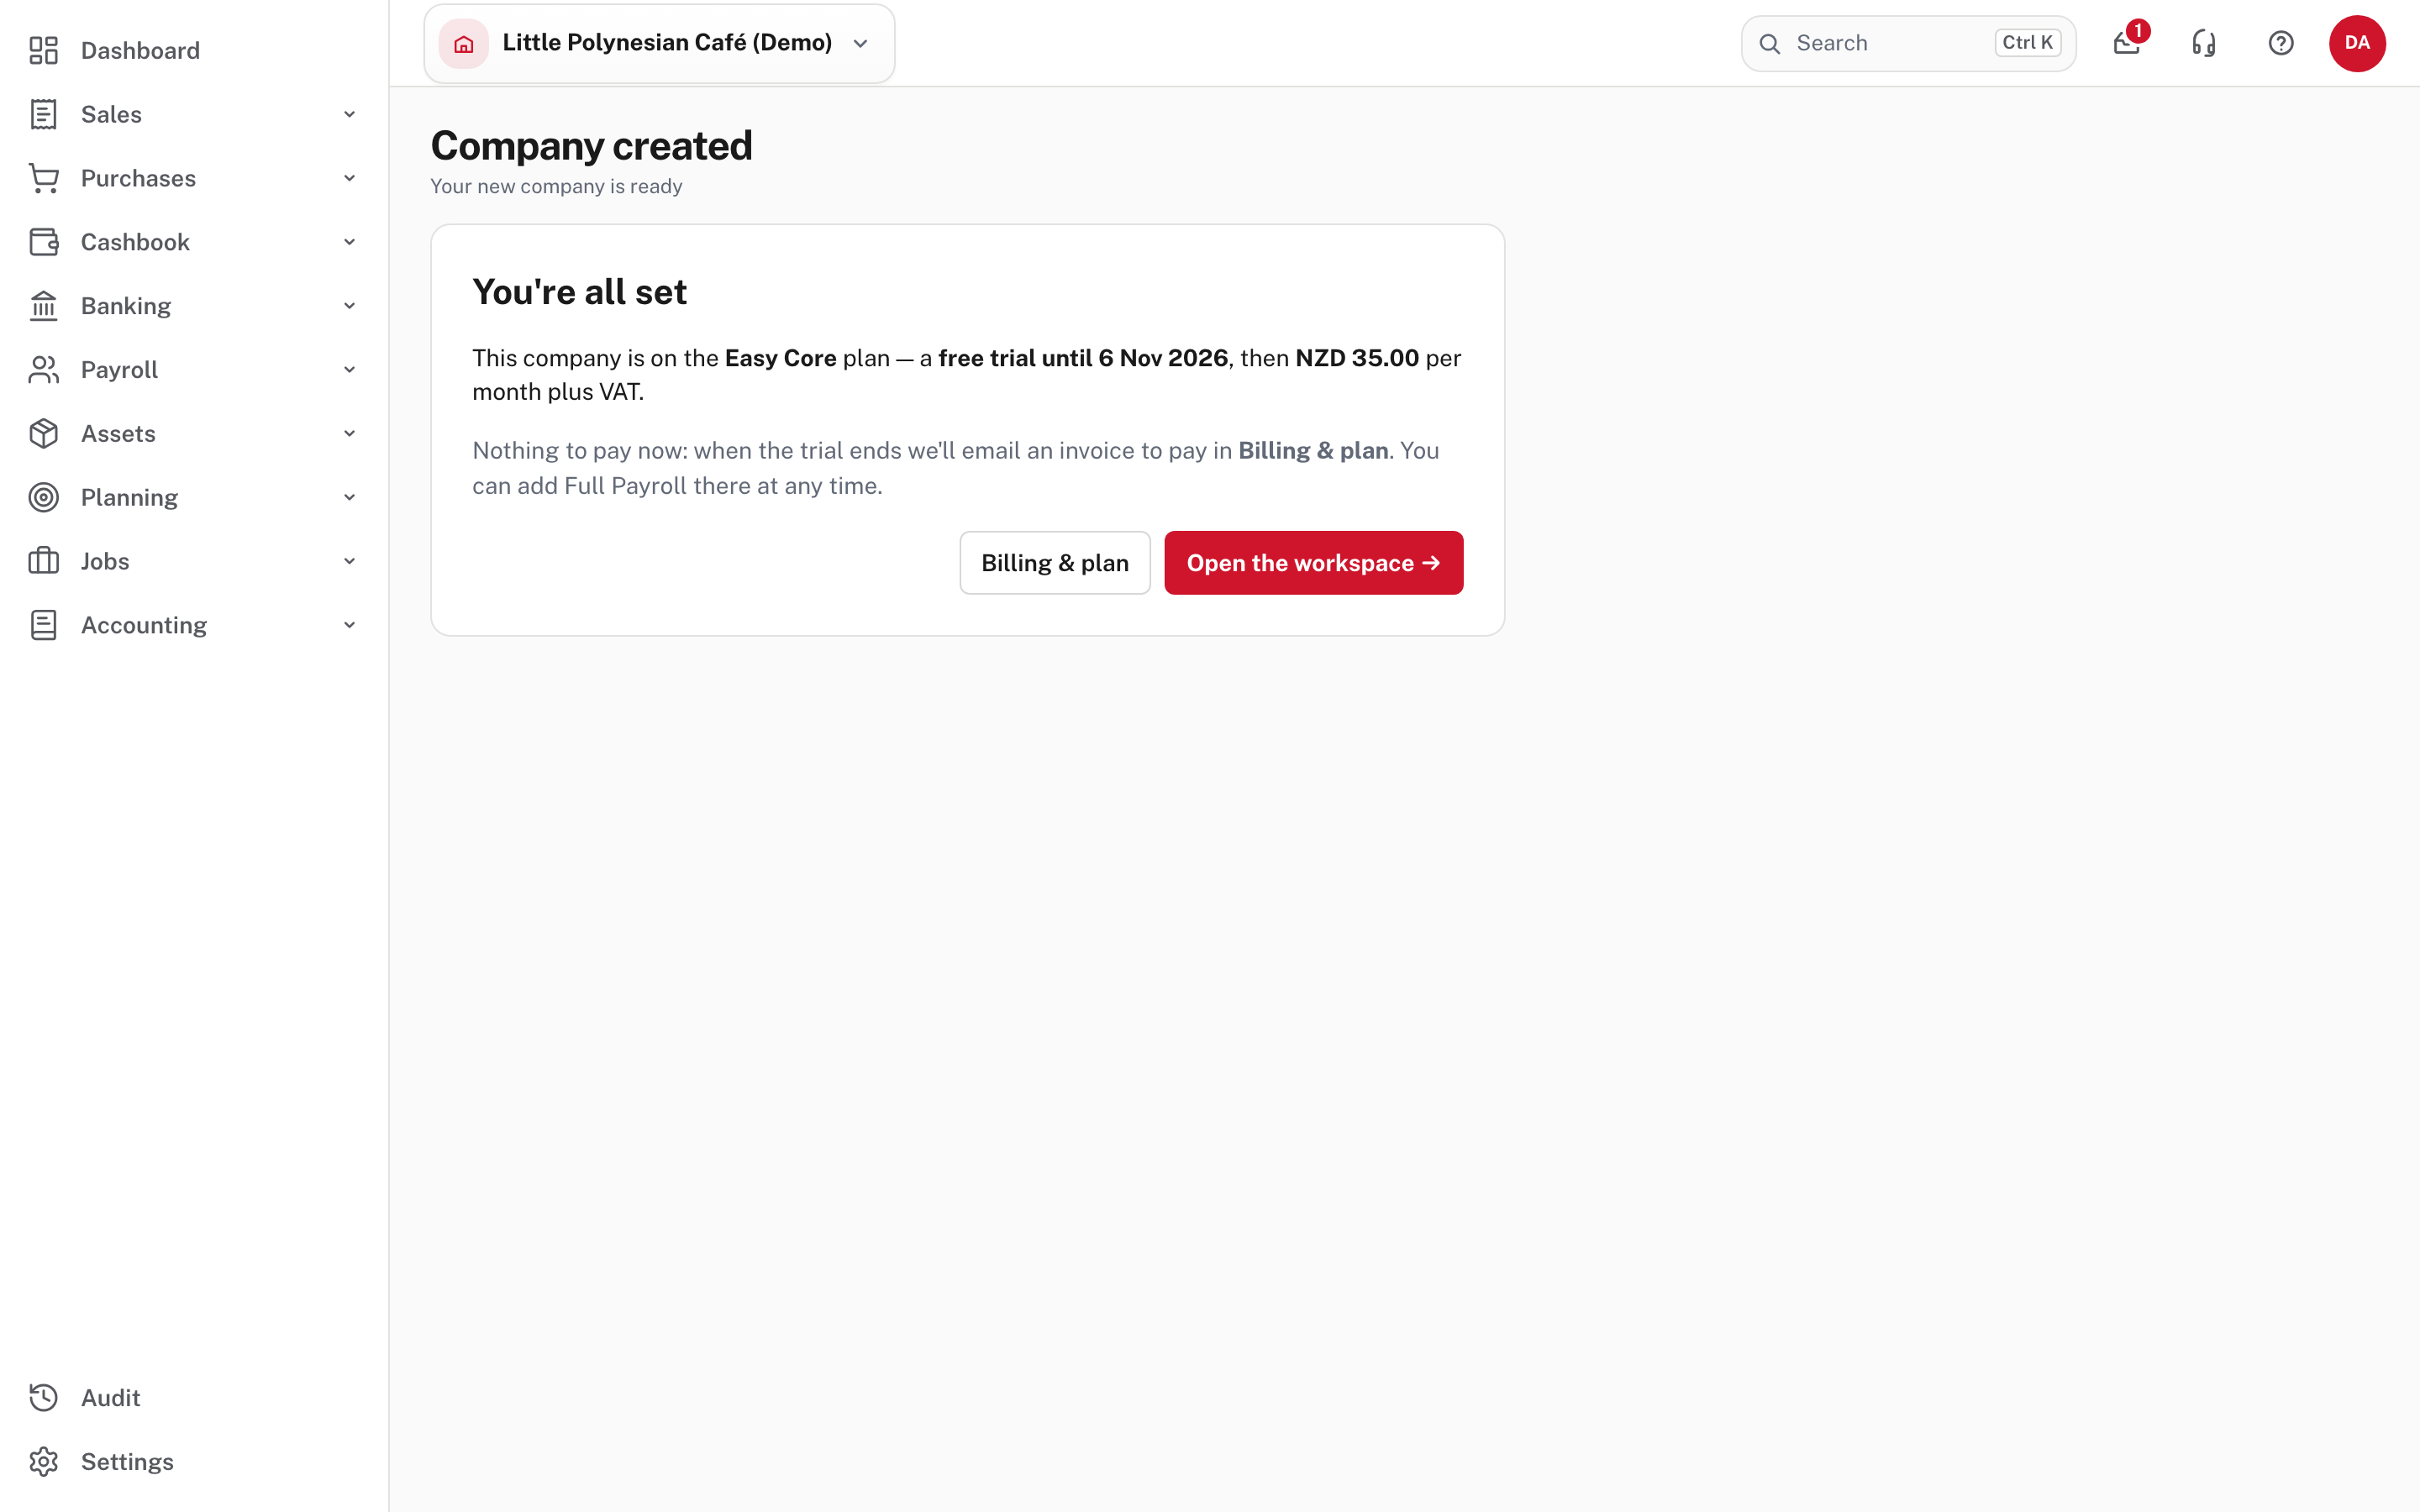
Choose Open the workspace → to go on to the setup wizard.
Company names are unique
If the name is already taken, Easy says so and asks you to have that company's Owner grant you access instead.
Step 2. Answer the setup wizard
The wizard has nine steps along the top: Type, VAT, Plan, Details, Chart, Bank, Balances, Team, Done. Type is already done by the plan you chose. You can leave at any step with Finish later; the dashboard then shows a Finish setting up your books banner with how many steps are done and a Continue → button to pick it up again.
VAT
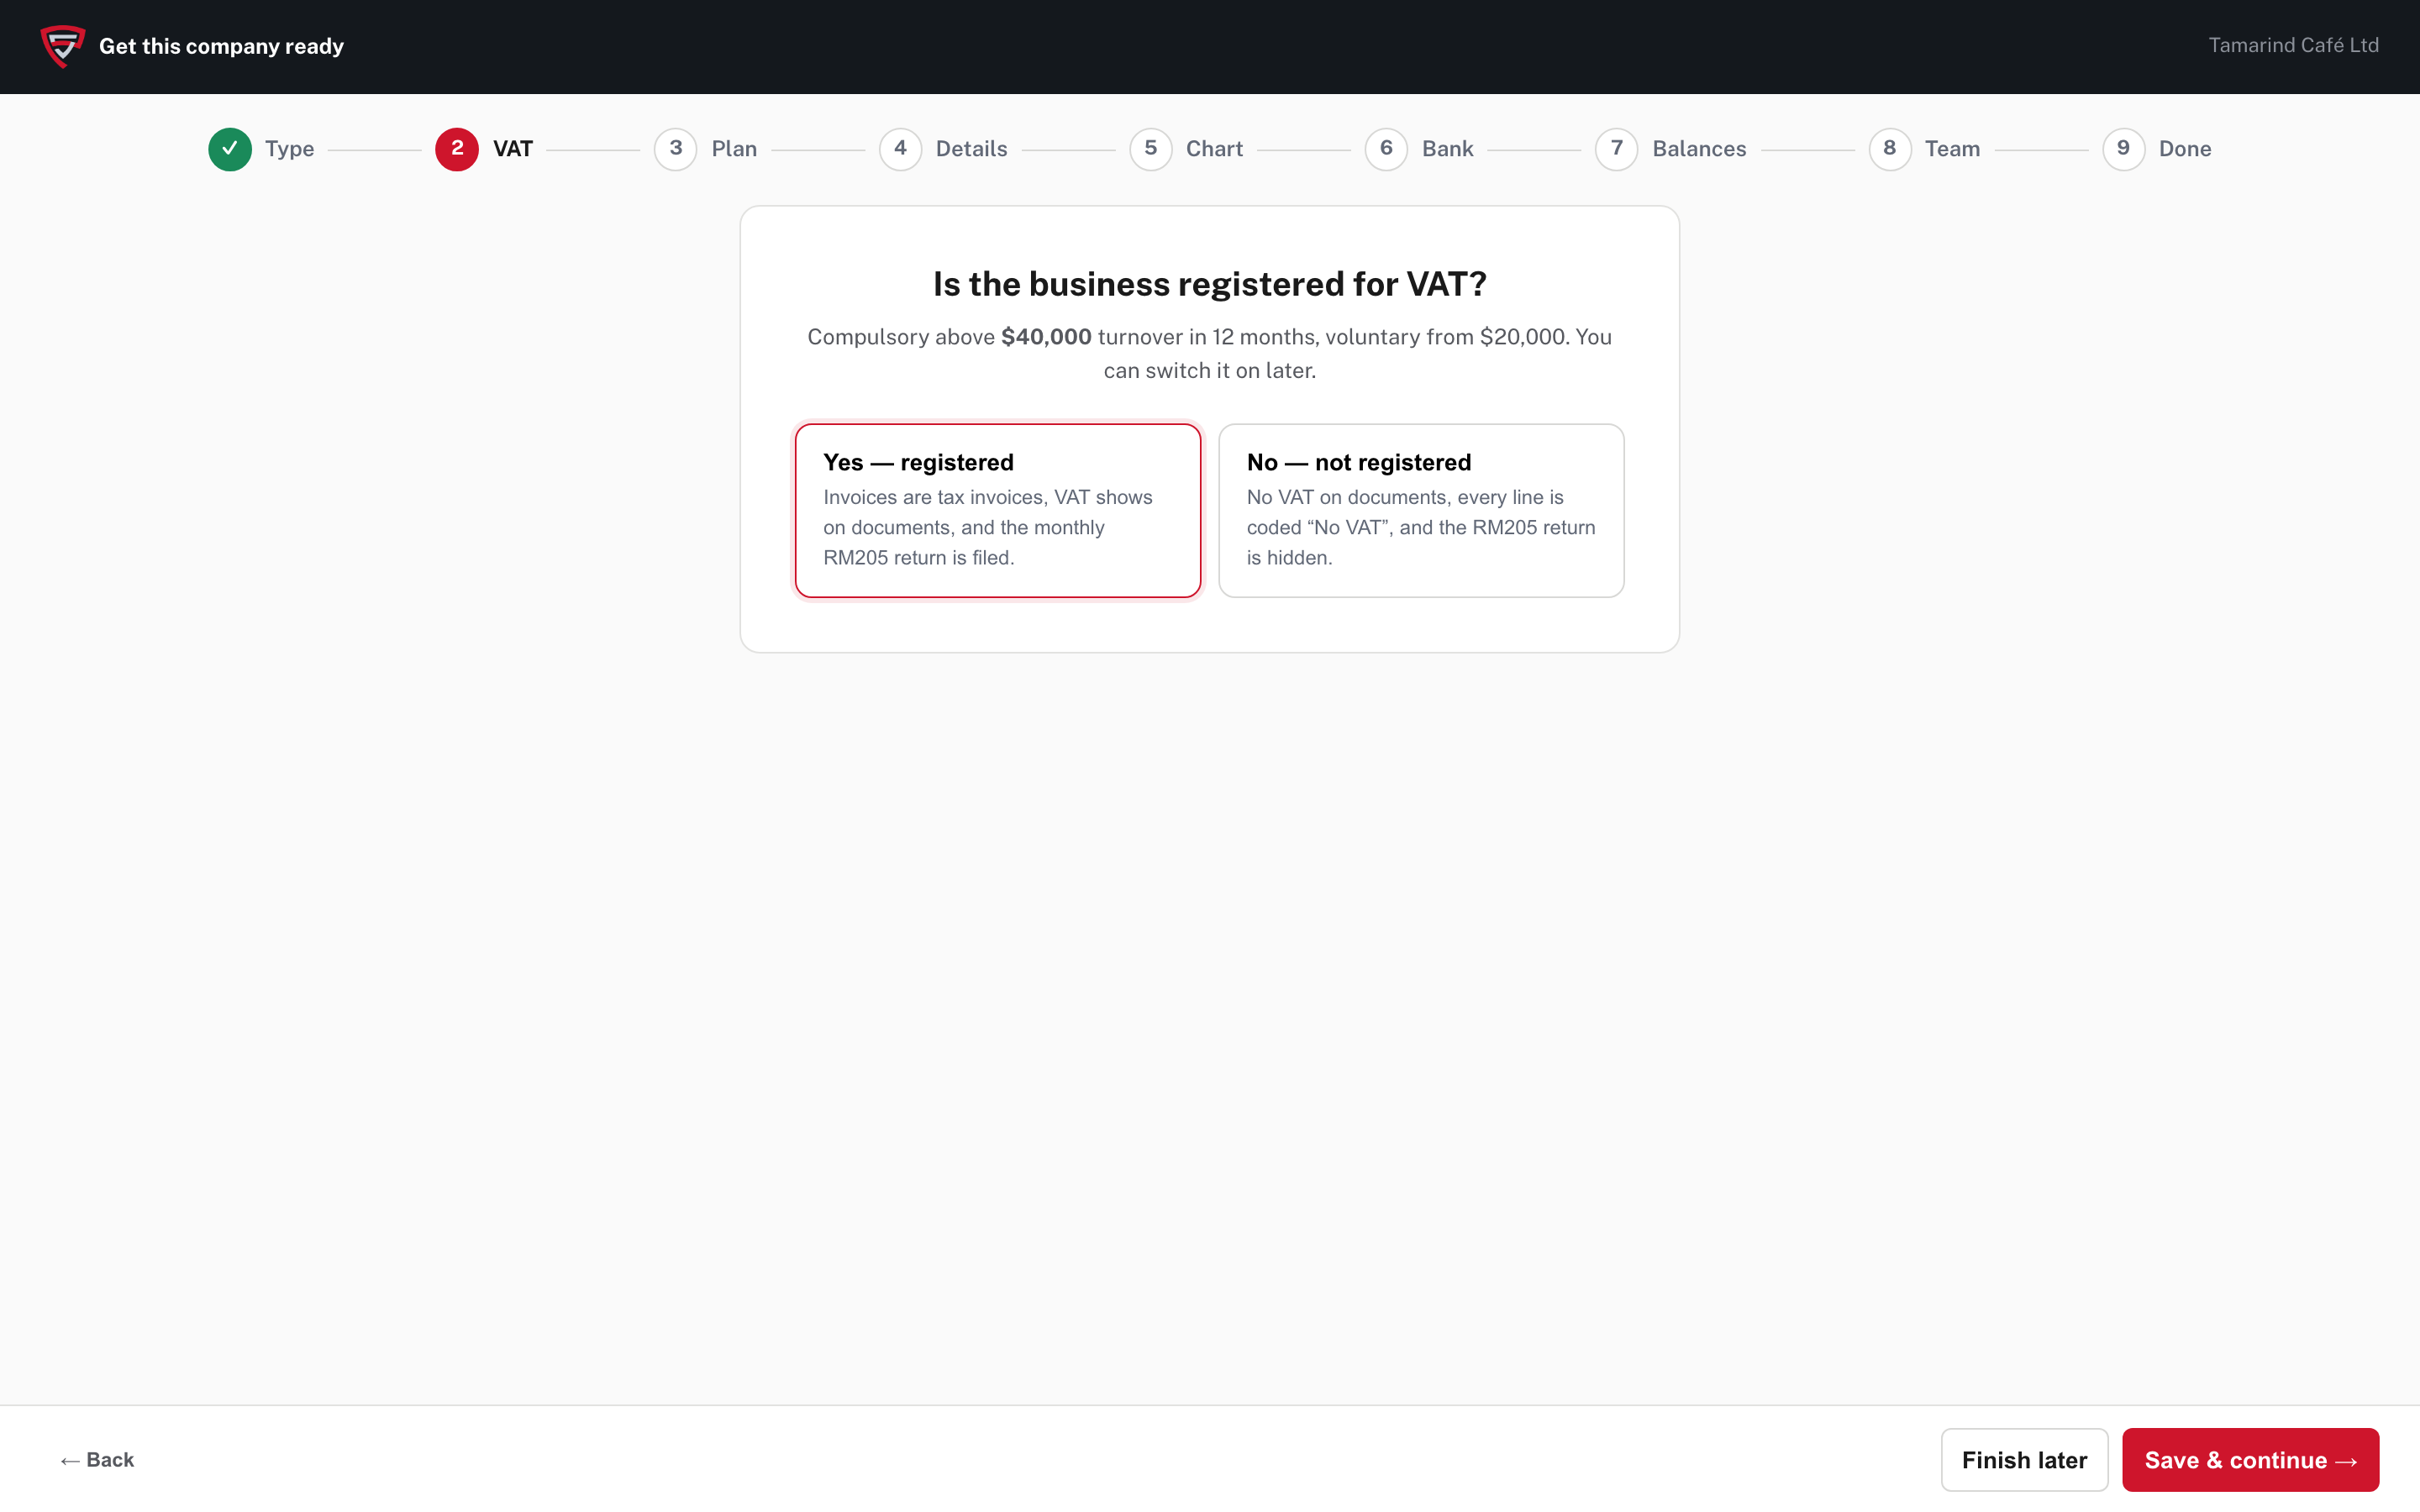
Choose Yes: registered or No: not registered. Registration is compulsory once turnover from taxable activity tops $40,000 in any 12 months, and voluntary from $20,000.
- Registered: invoices are tax invoices, VAT shows on documents, and the monthly RM205 return is filed.
- Not registered: no VAT on documents, every line is coded No VAT, and the RM205 return is hidden.
You can switch VAT on later, on the day it takes effect (step 4 below).
Plan
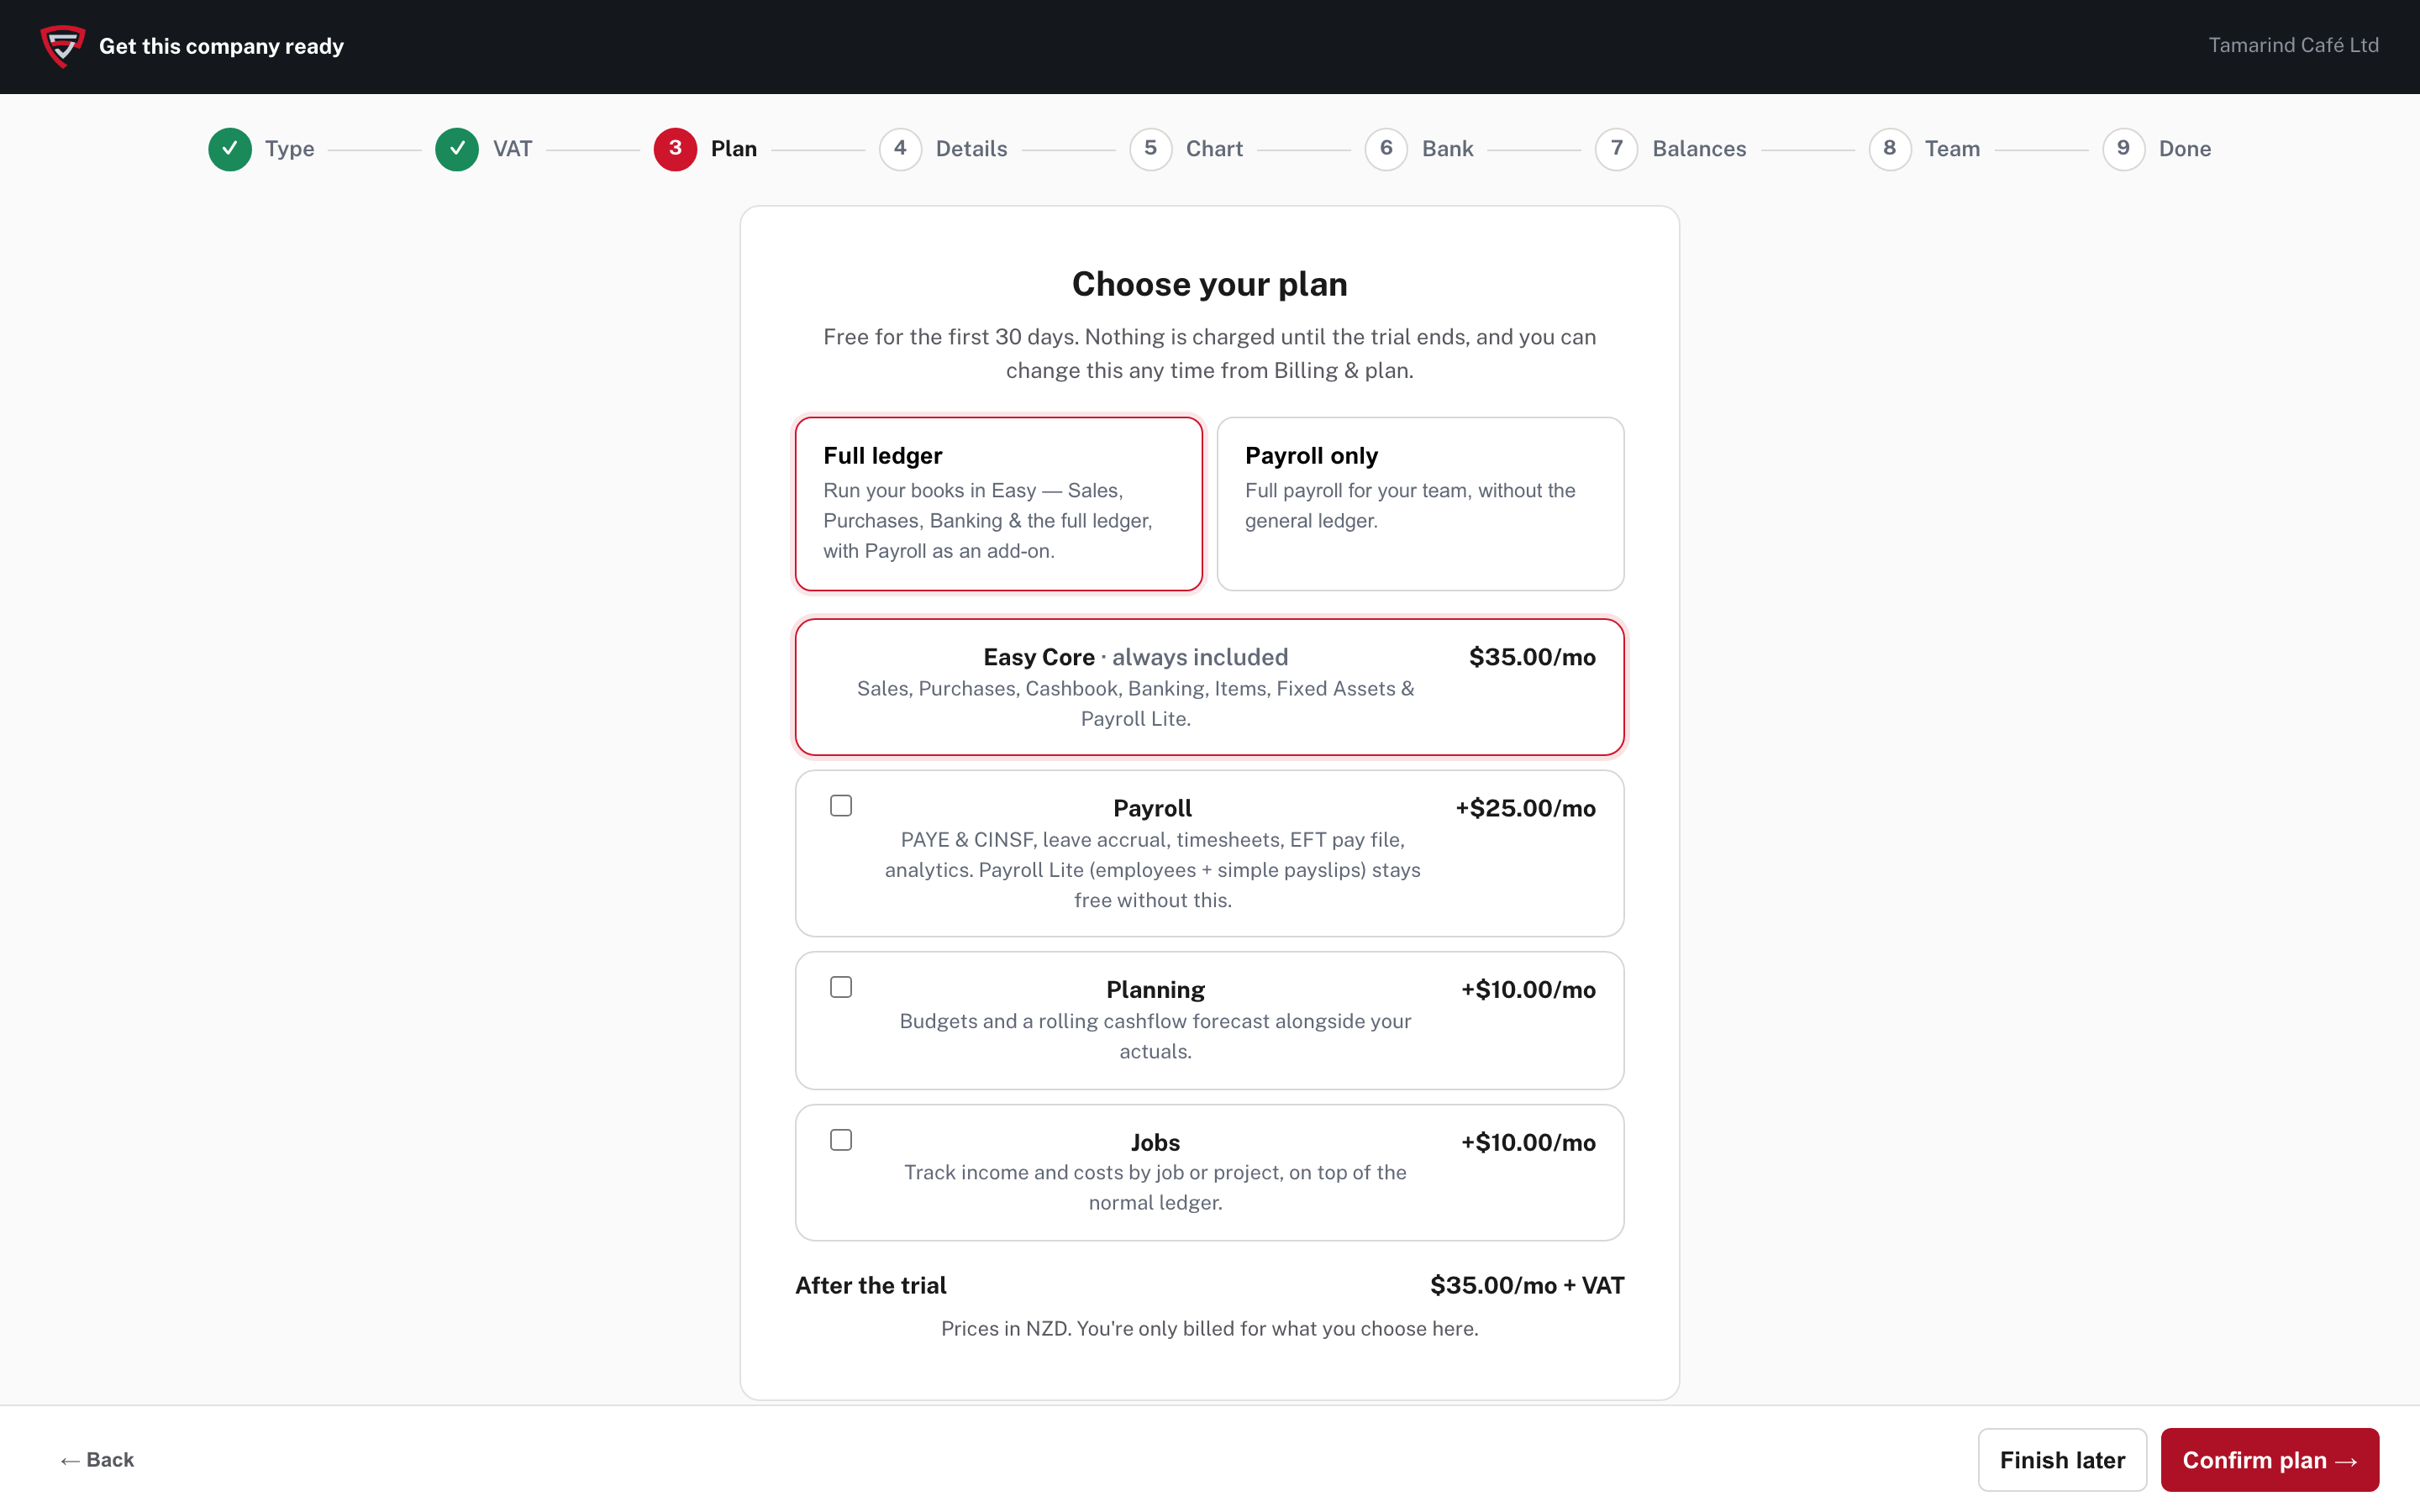
Choose Full ledger (run your books in Easy) or Payroll only. Easy Core is always included in the full ledger. Tick the add-ons you want: Payroll (PAYE and CINSF, leave, timesheets, bank file), Planning (budgets and a cash-flow forecast) or Jobs (income and costs by job). The page shows what you will pay after the trial. Payroll Lite, which records simple payslips, stays free without the Payroll add-on.
Details
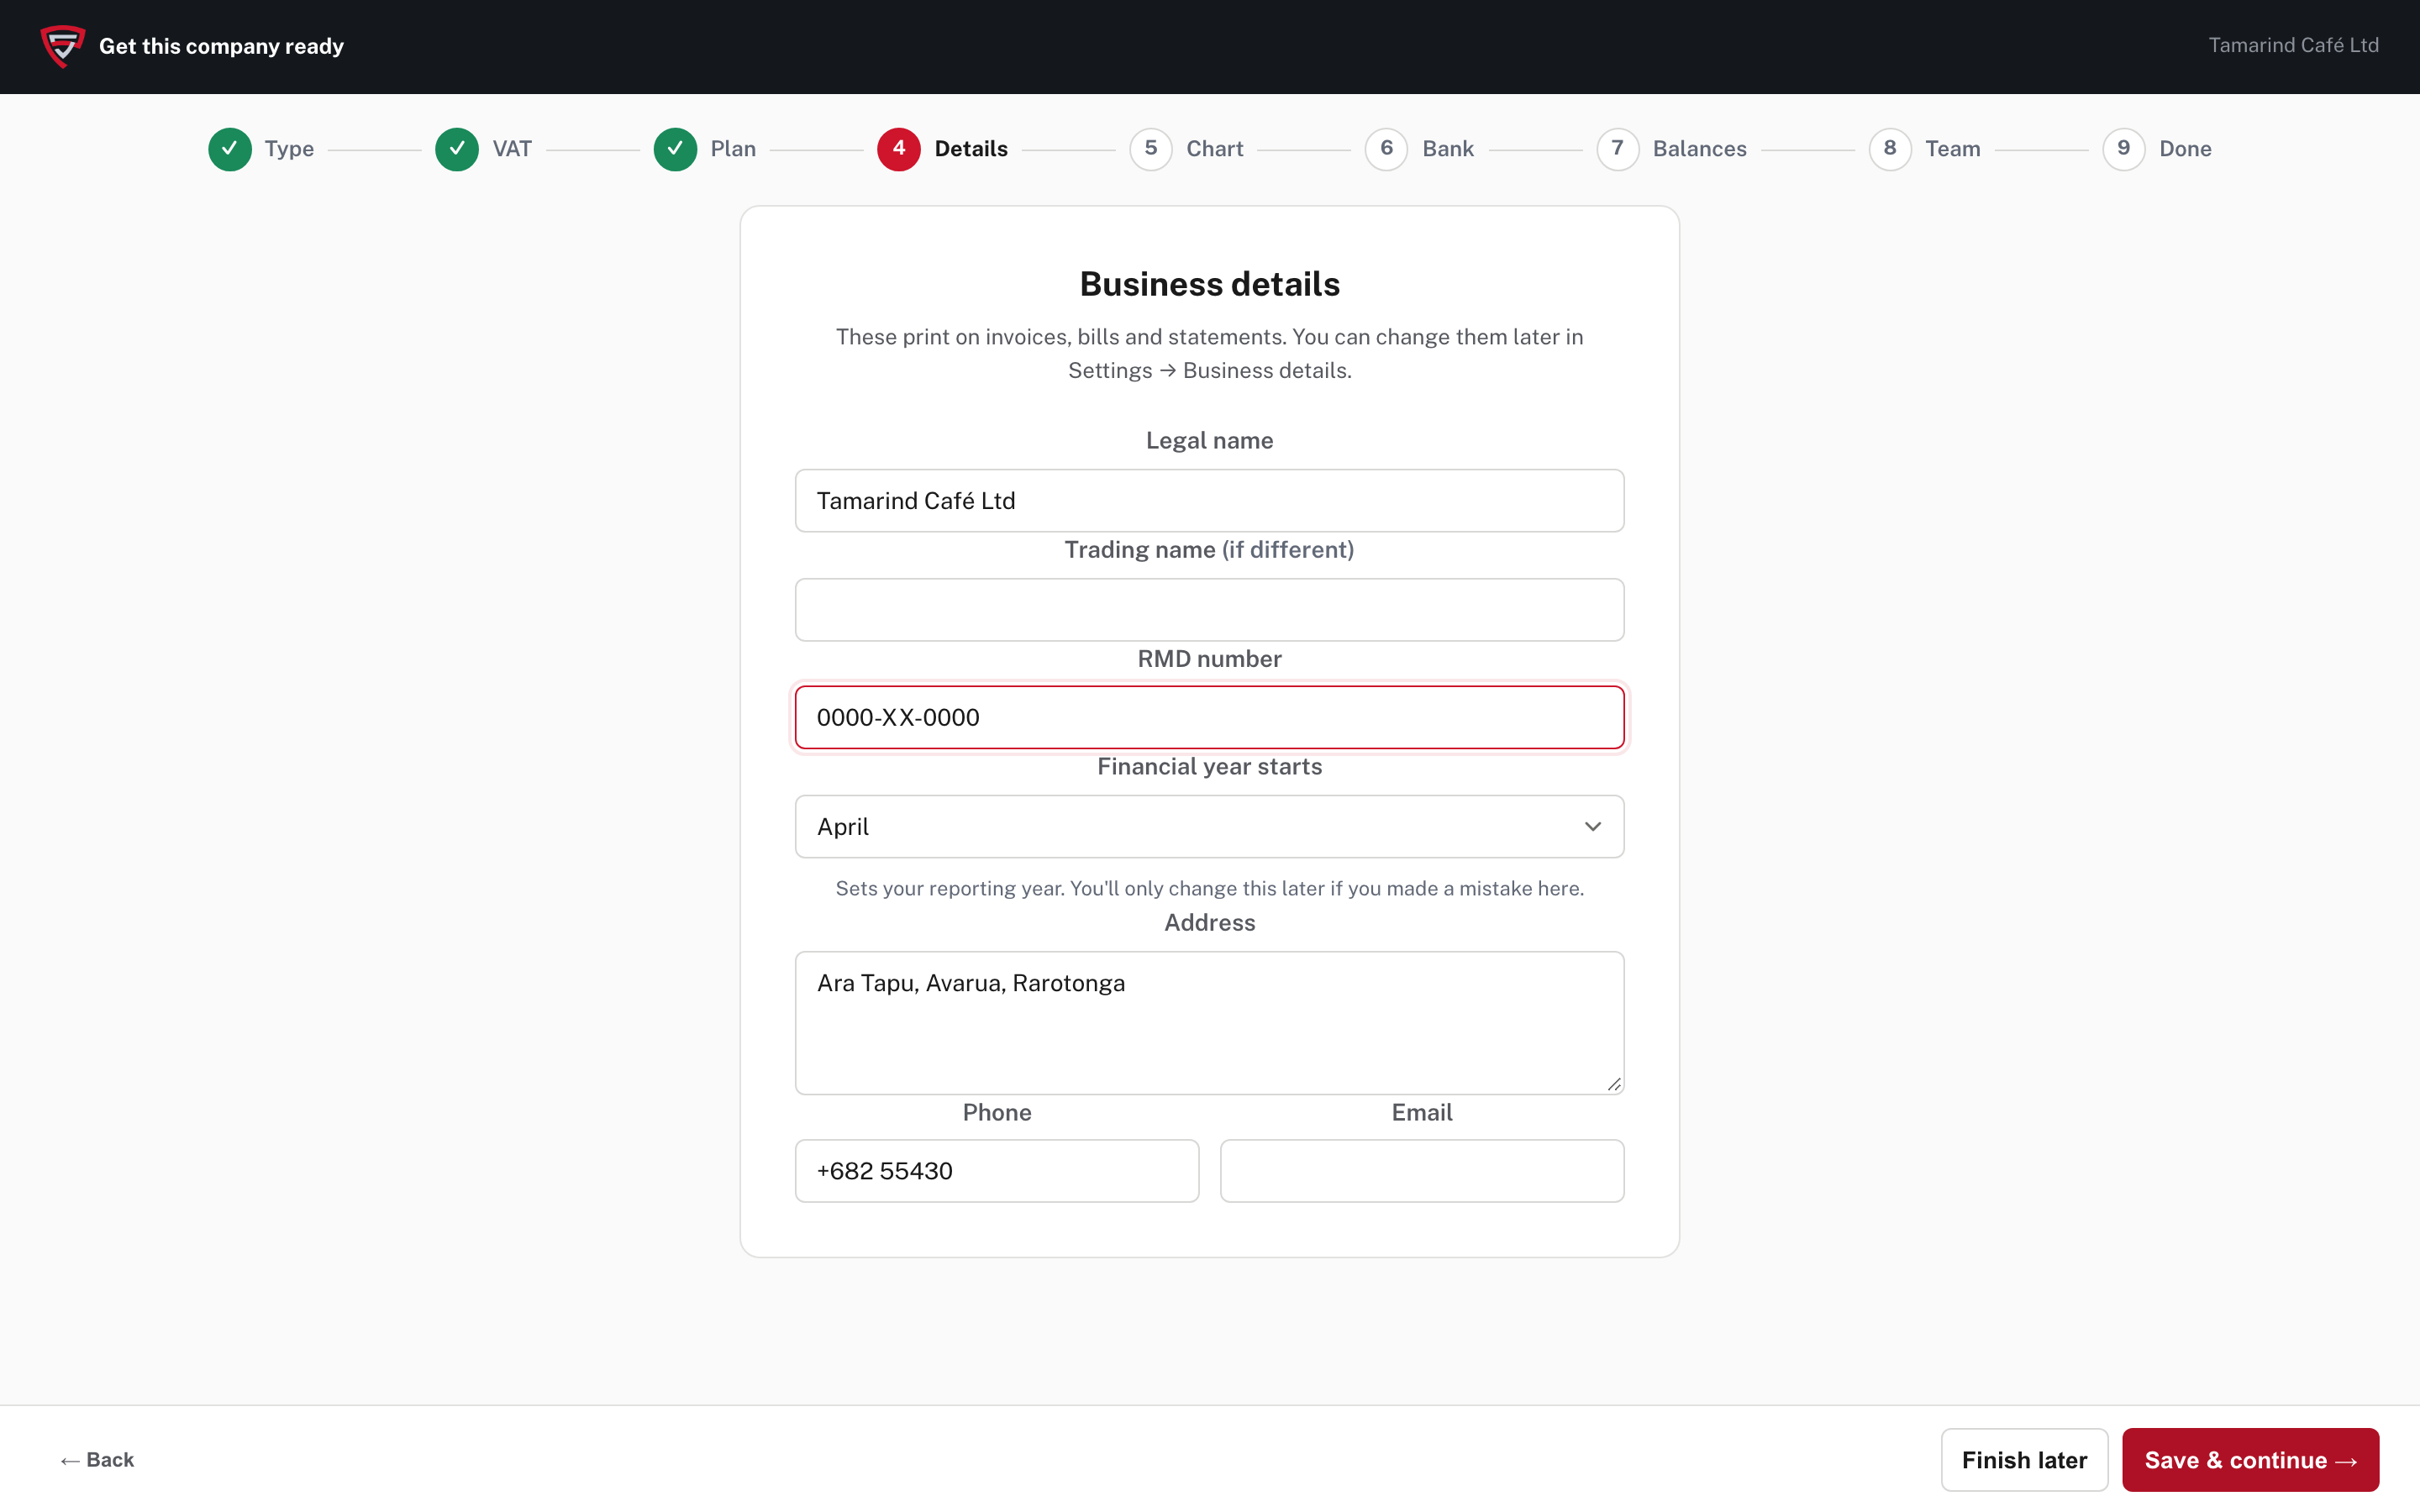
Check the legal name and enter a trading name if you use one, your RMD number, the month your financial year starts (April, in the picture), the address, phone and email. They print on invoices, bills and statements, and you can change them later in Settings → Business details.
Financial year start
This sets your reporting year. Change it later only if you made a mistake here.
Chart
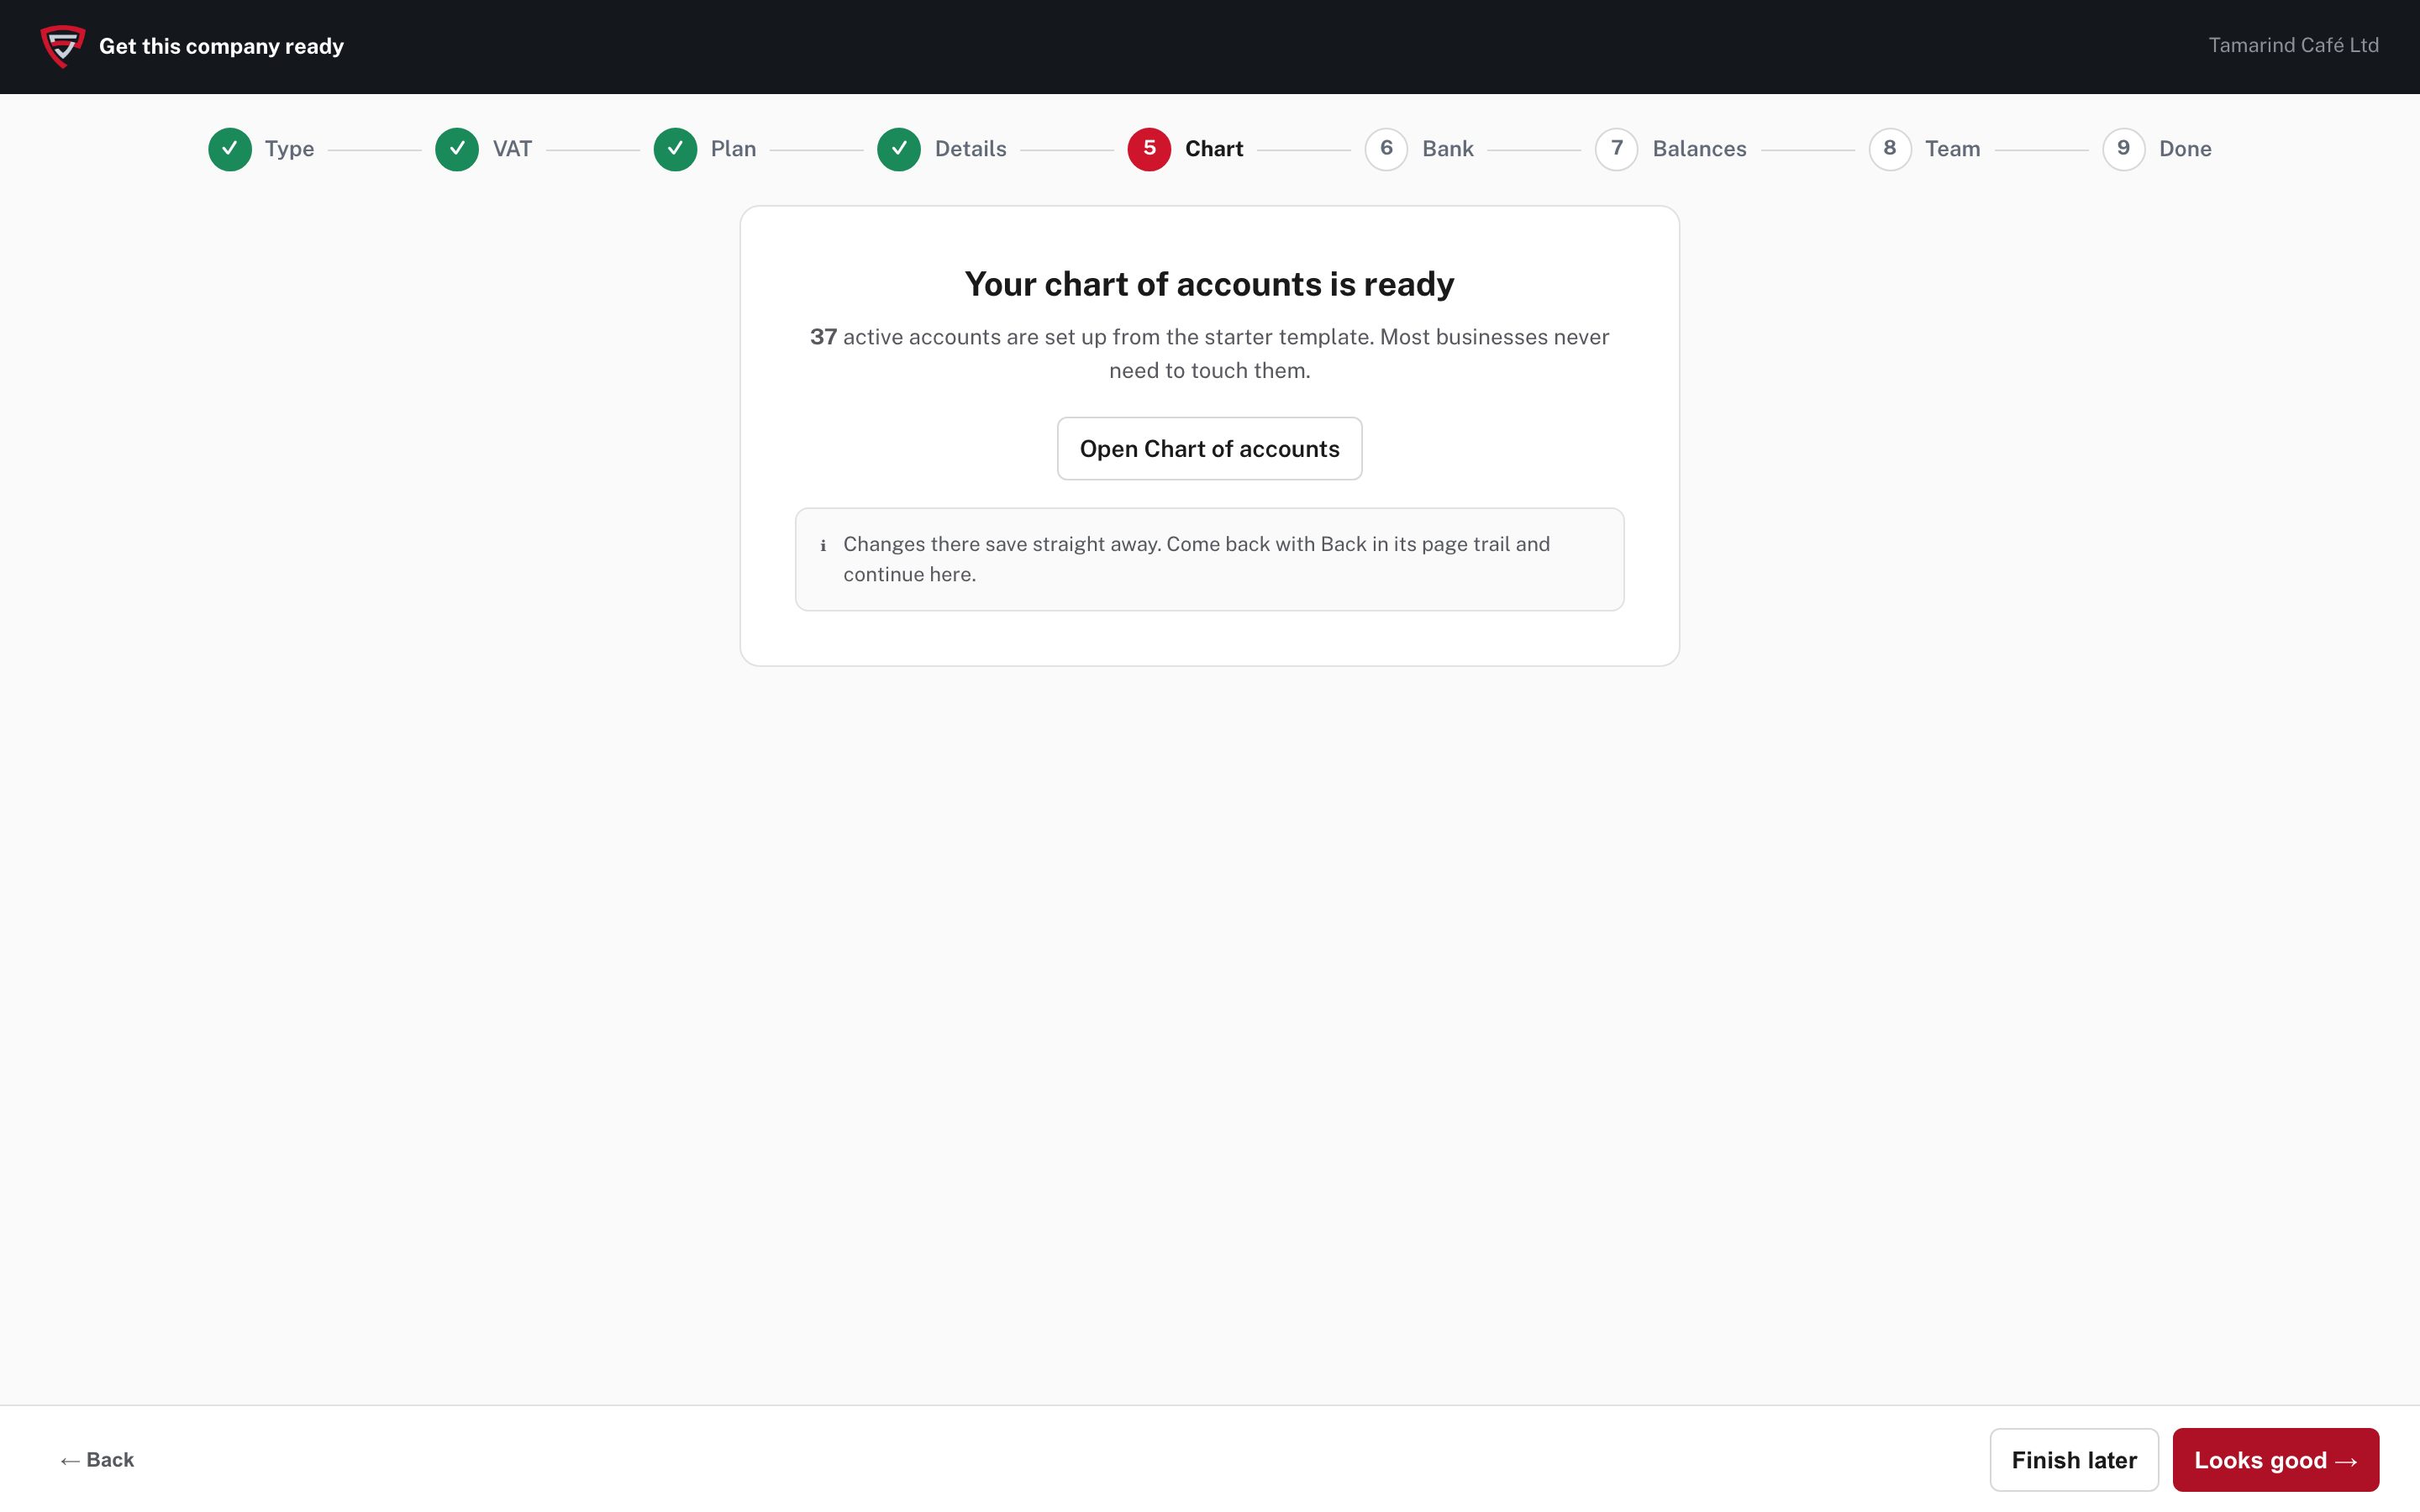
Easy sets up a starter chart of accounts for the kind of company you chose and tells you how many accounts it made (37 in the picture). Most businesses never need to touch them. Open Chart of accounts if something specific is missing; changes there save straight away, and the page trail takes you back to the wizard.
Bank
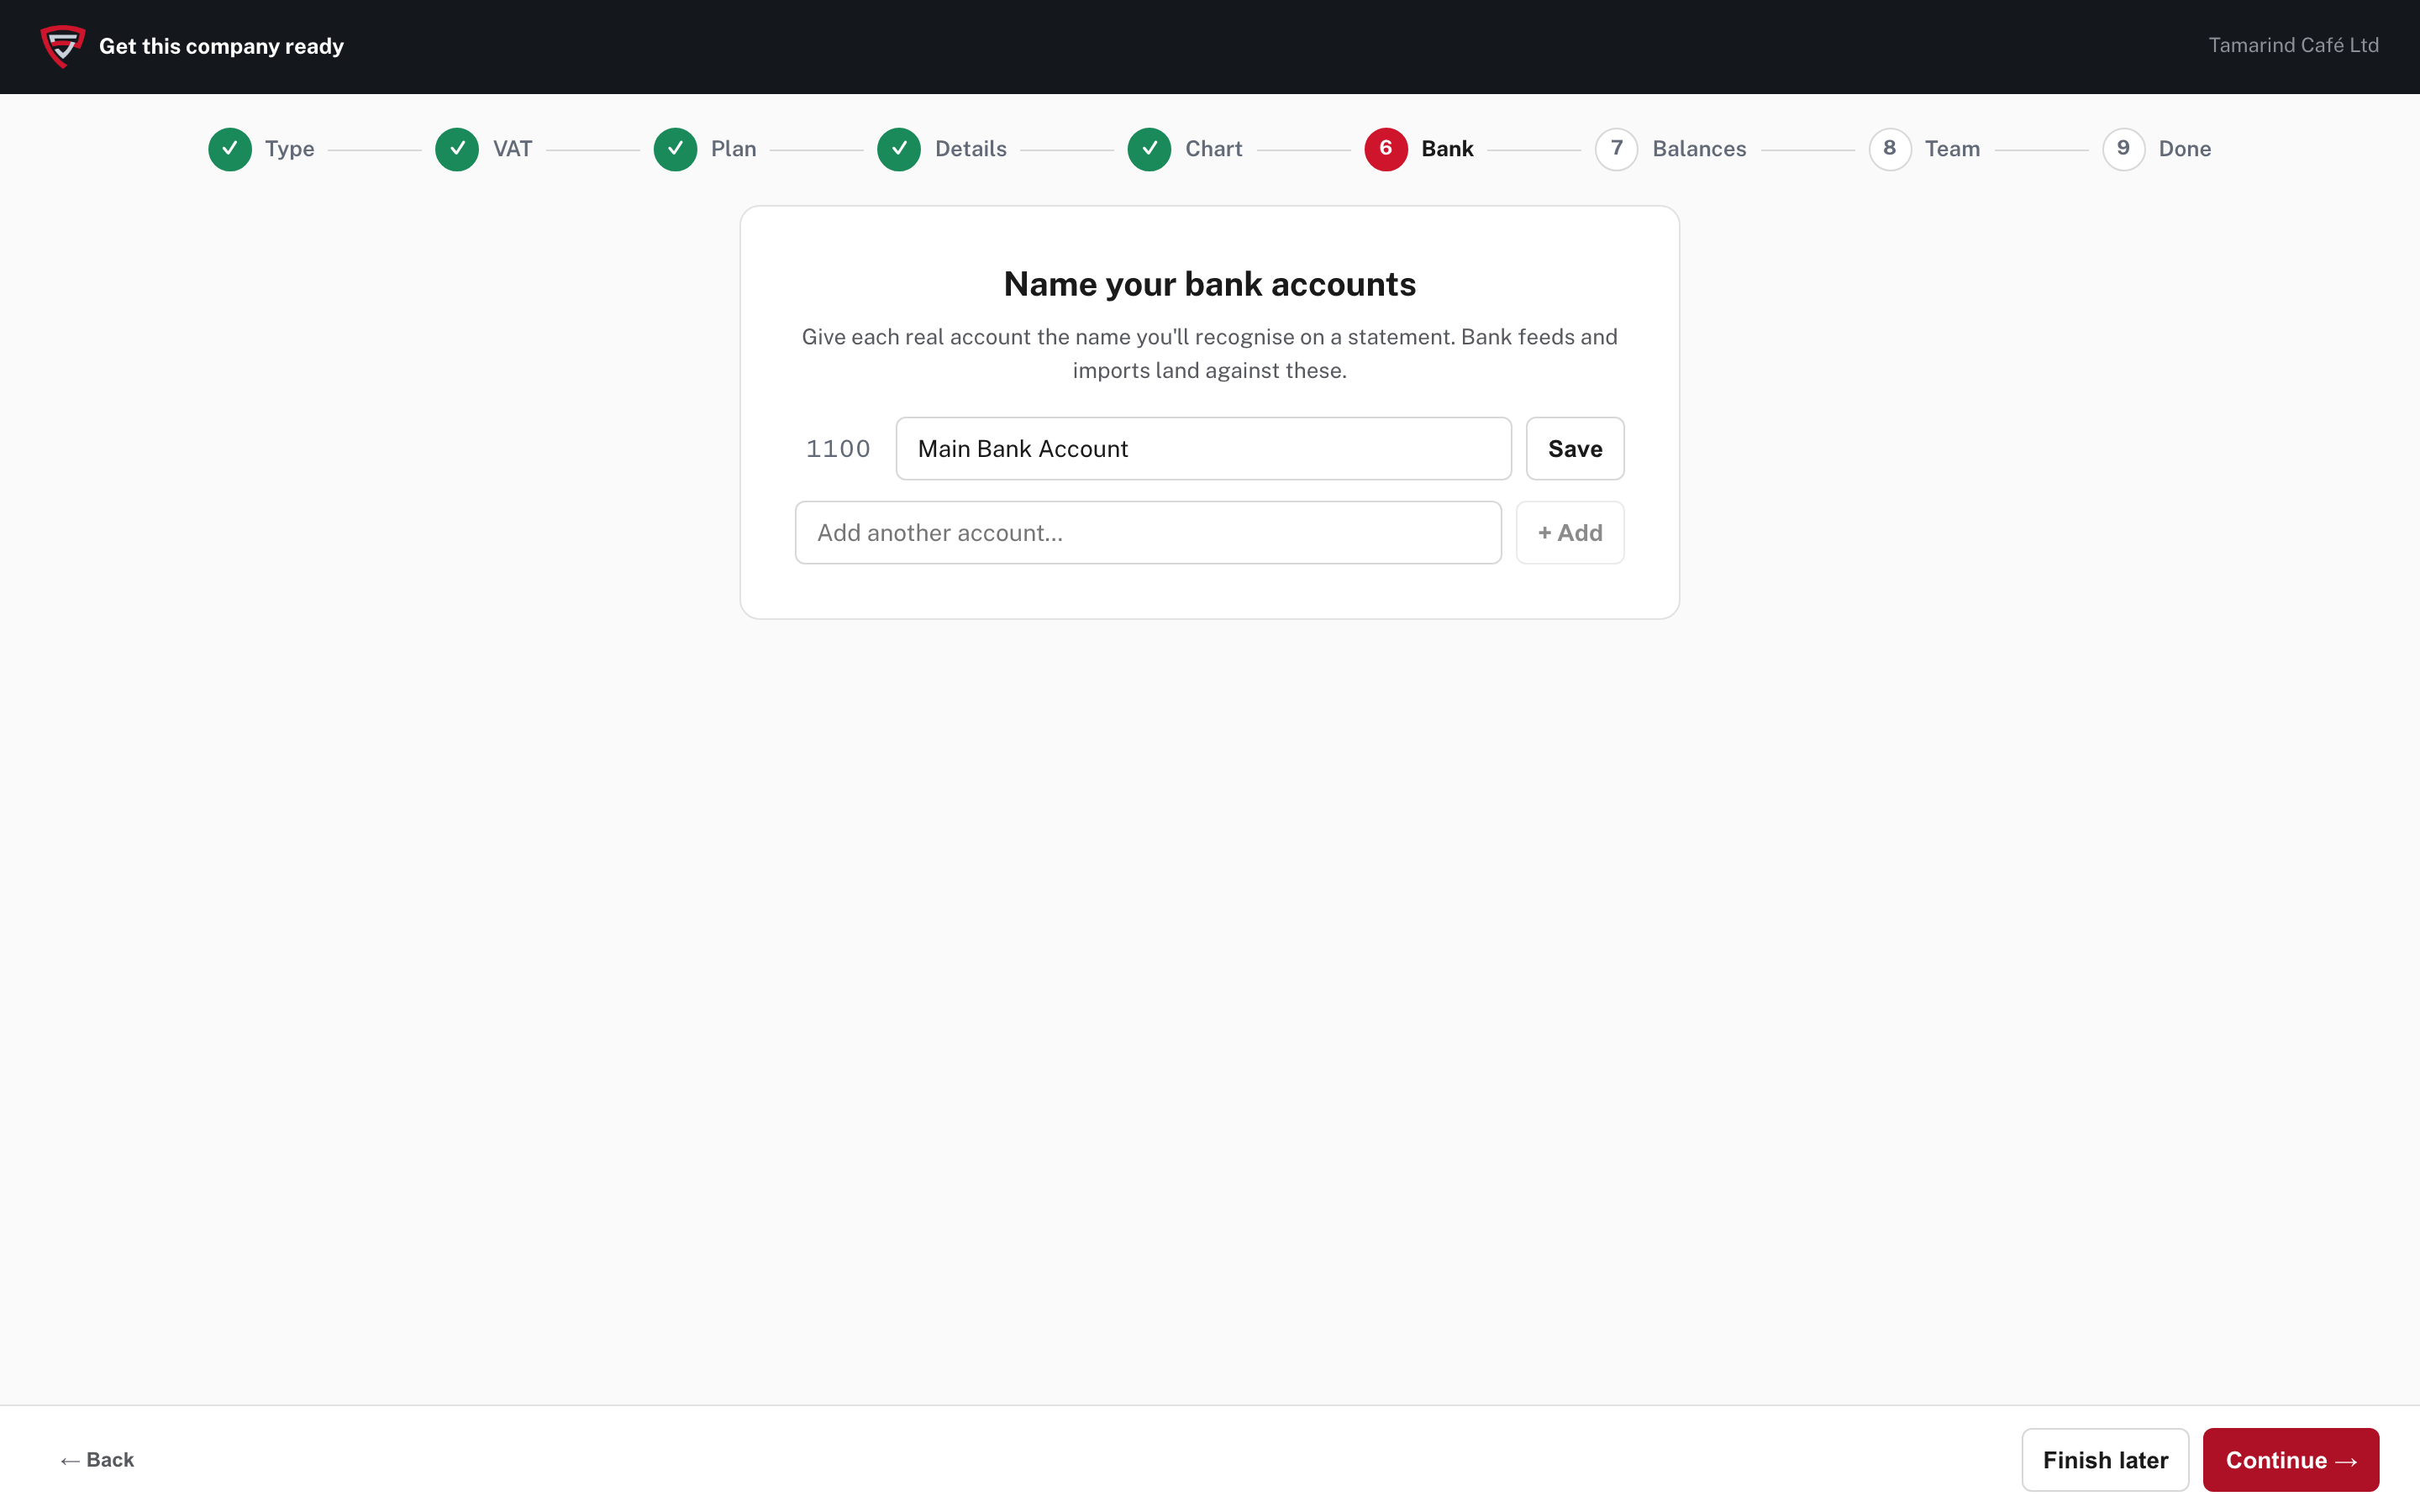
Give each real account the name you will recognise on a statement. Imported statements land against these accounts. + Add adds another.
Balances
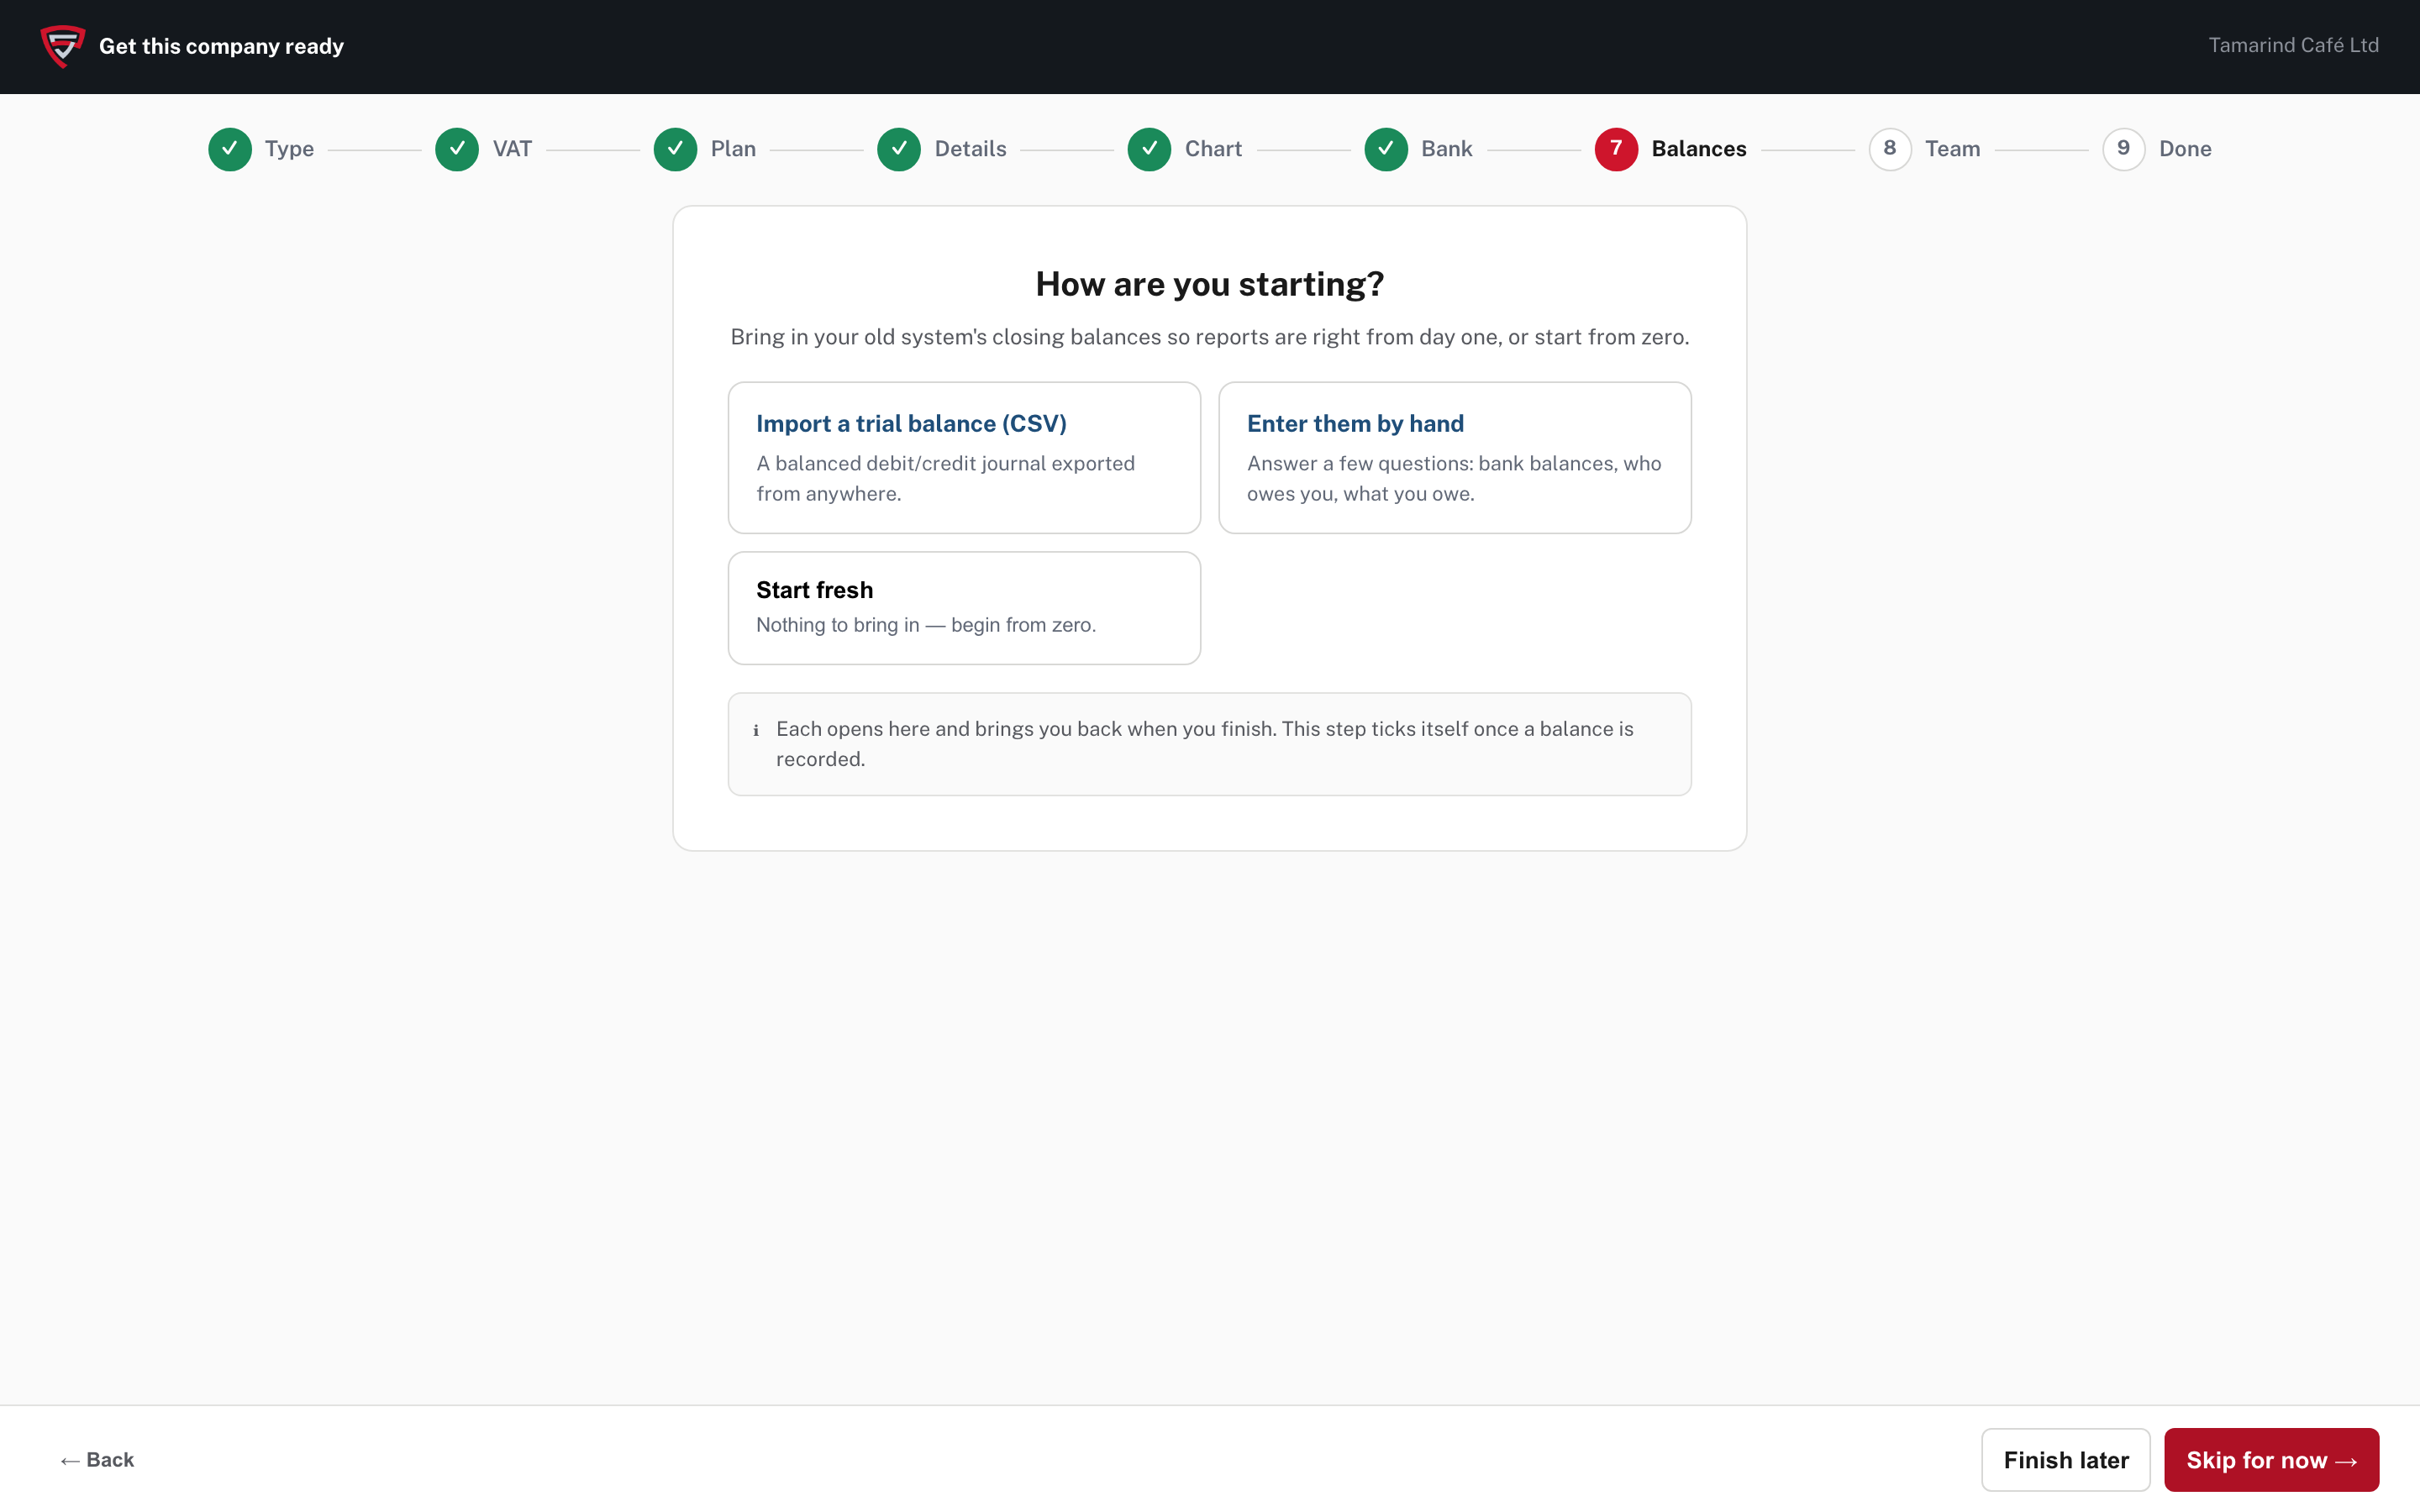
Choose how to bring in the closing balances from your old system, so reports are right from day one:
- Import a trial balance (CSV): a balanced debit and credit journal exported from anywhere.
- Enter them by hand: a few questions about bank balances, who owes you and what you owe.
- Start fresh: nothing to bring in.
Each opens here and brings you back when you finish. This step ticks itself once a balance is recorded, or you can Skip for now. The full process is in Opening balances.
Team
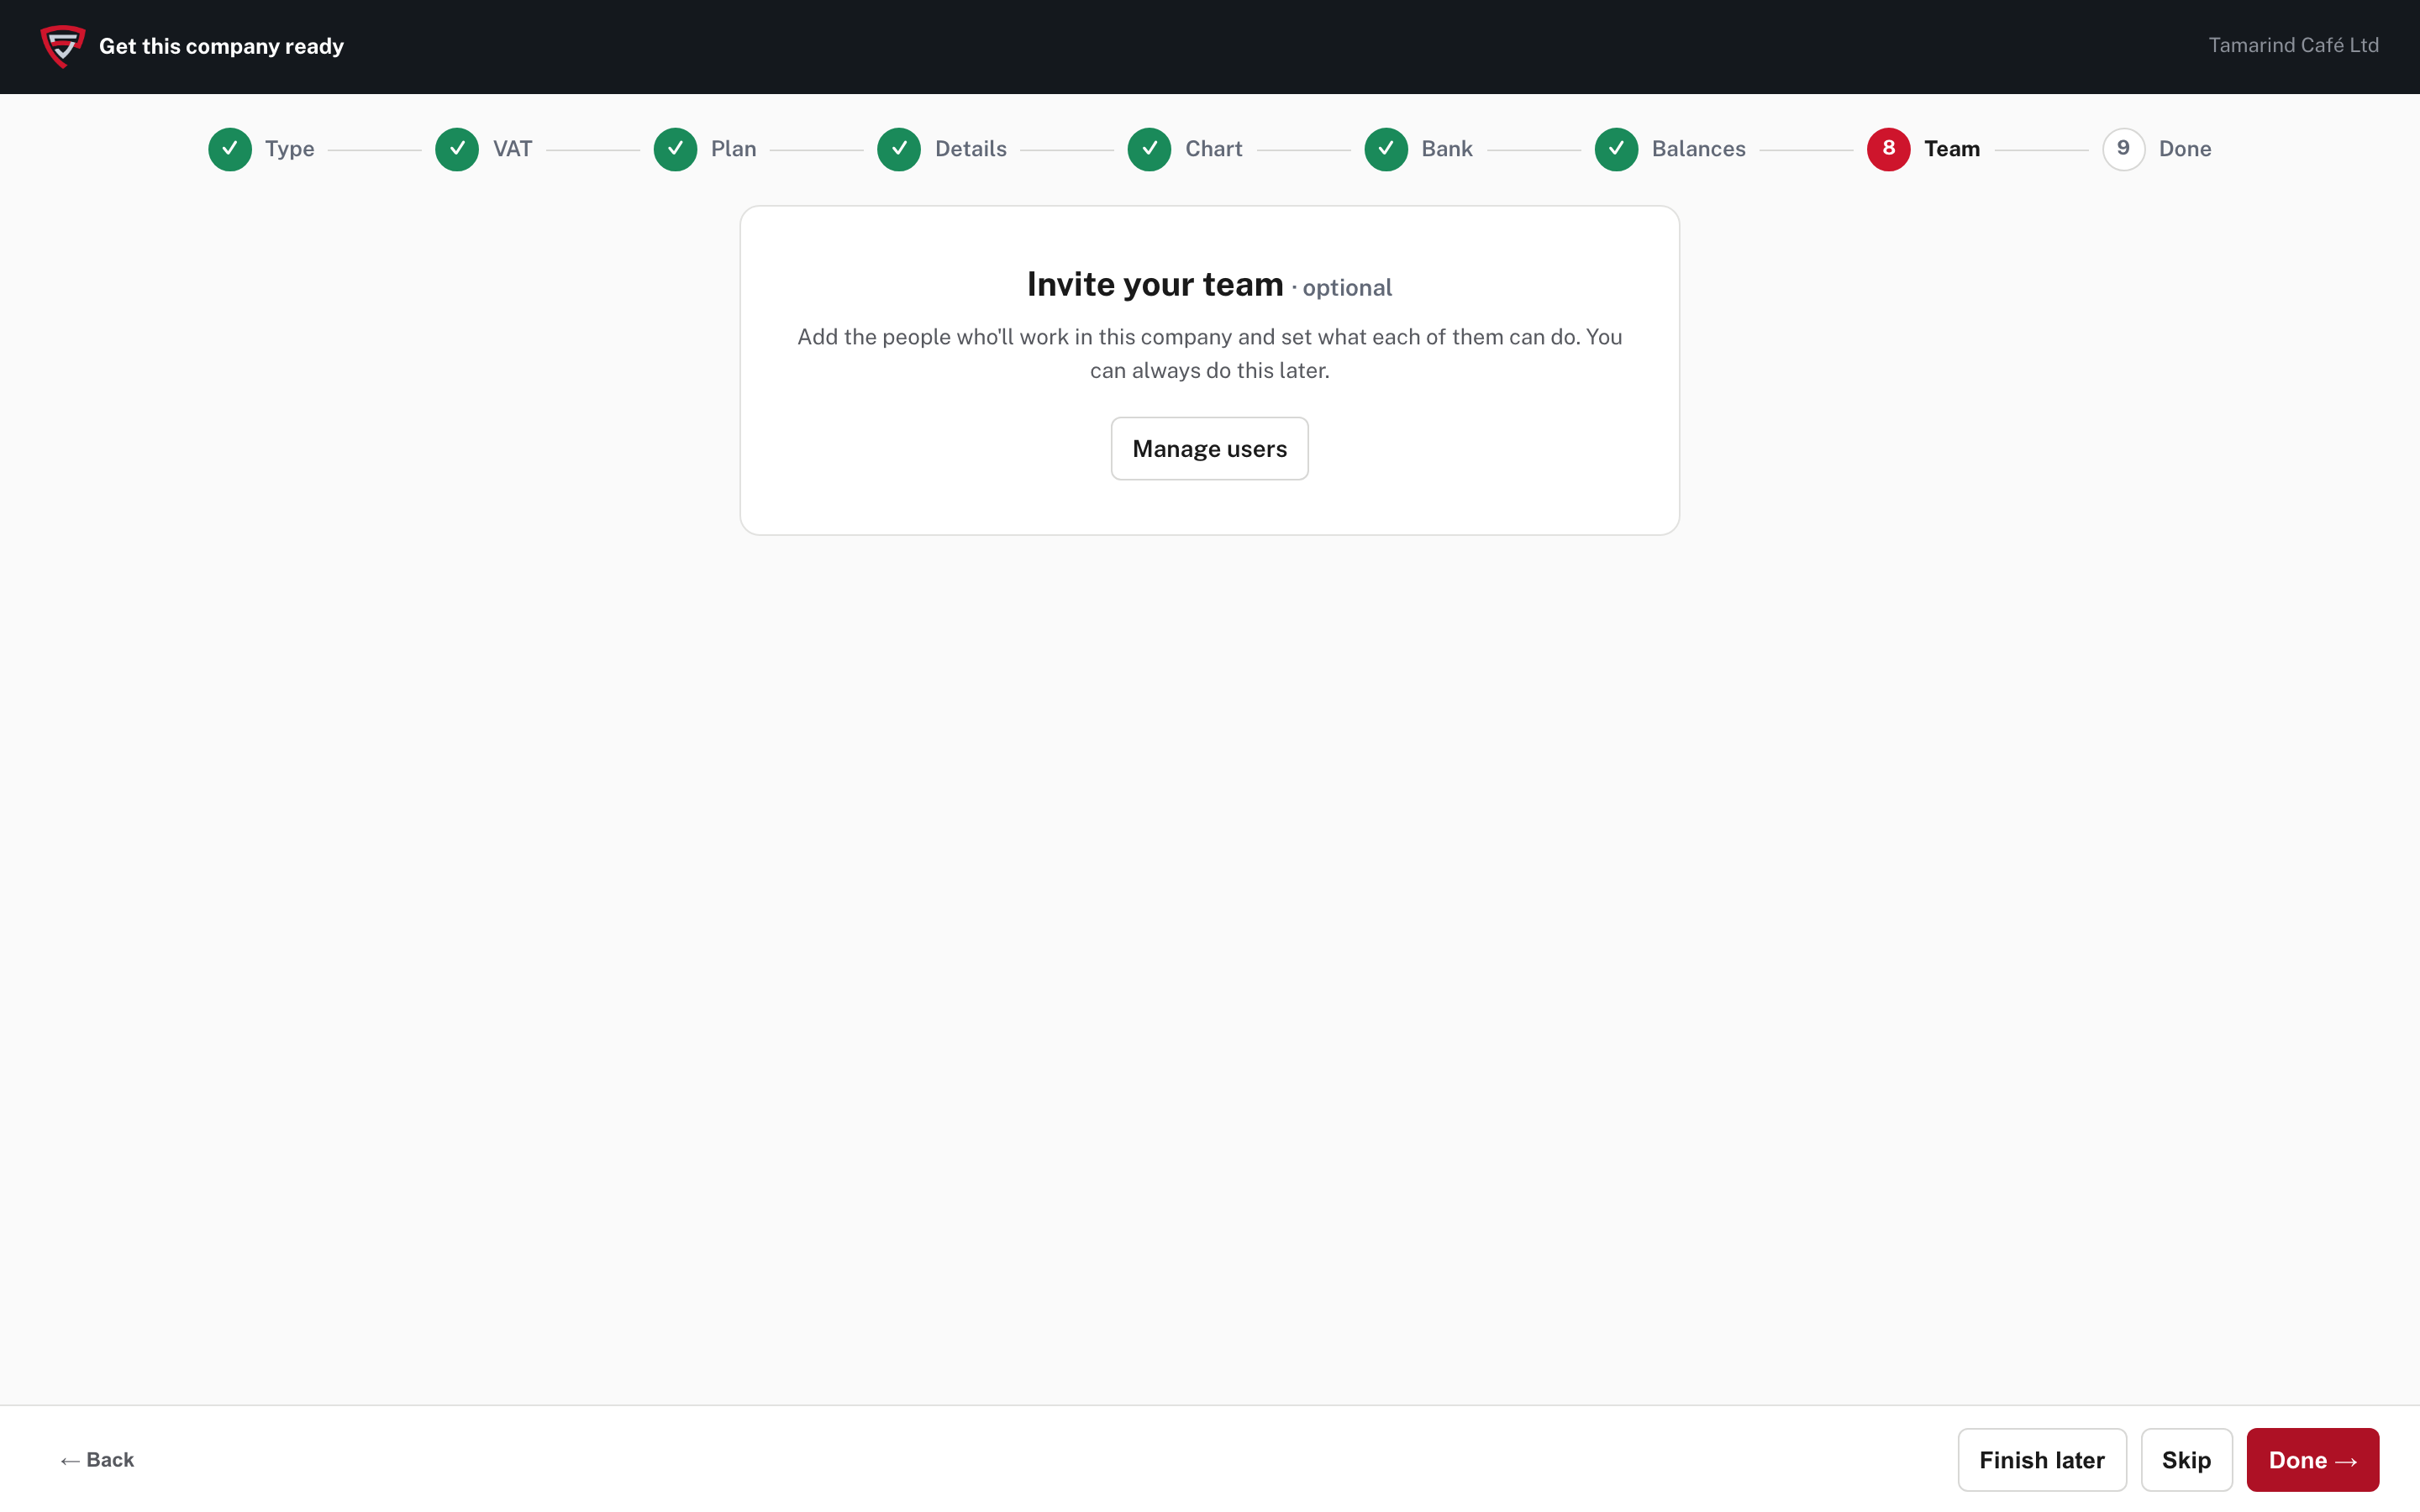
Optional. Manage users adds the people who will work in the company and sets what each can do. You can do this later (see People, roles and access).
Done
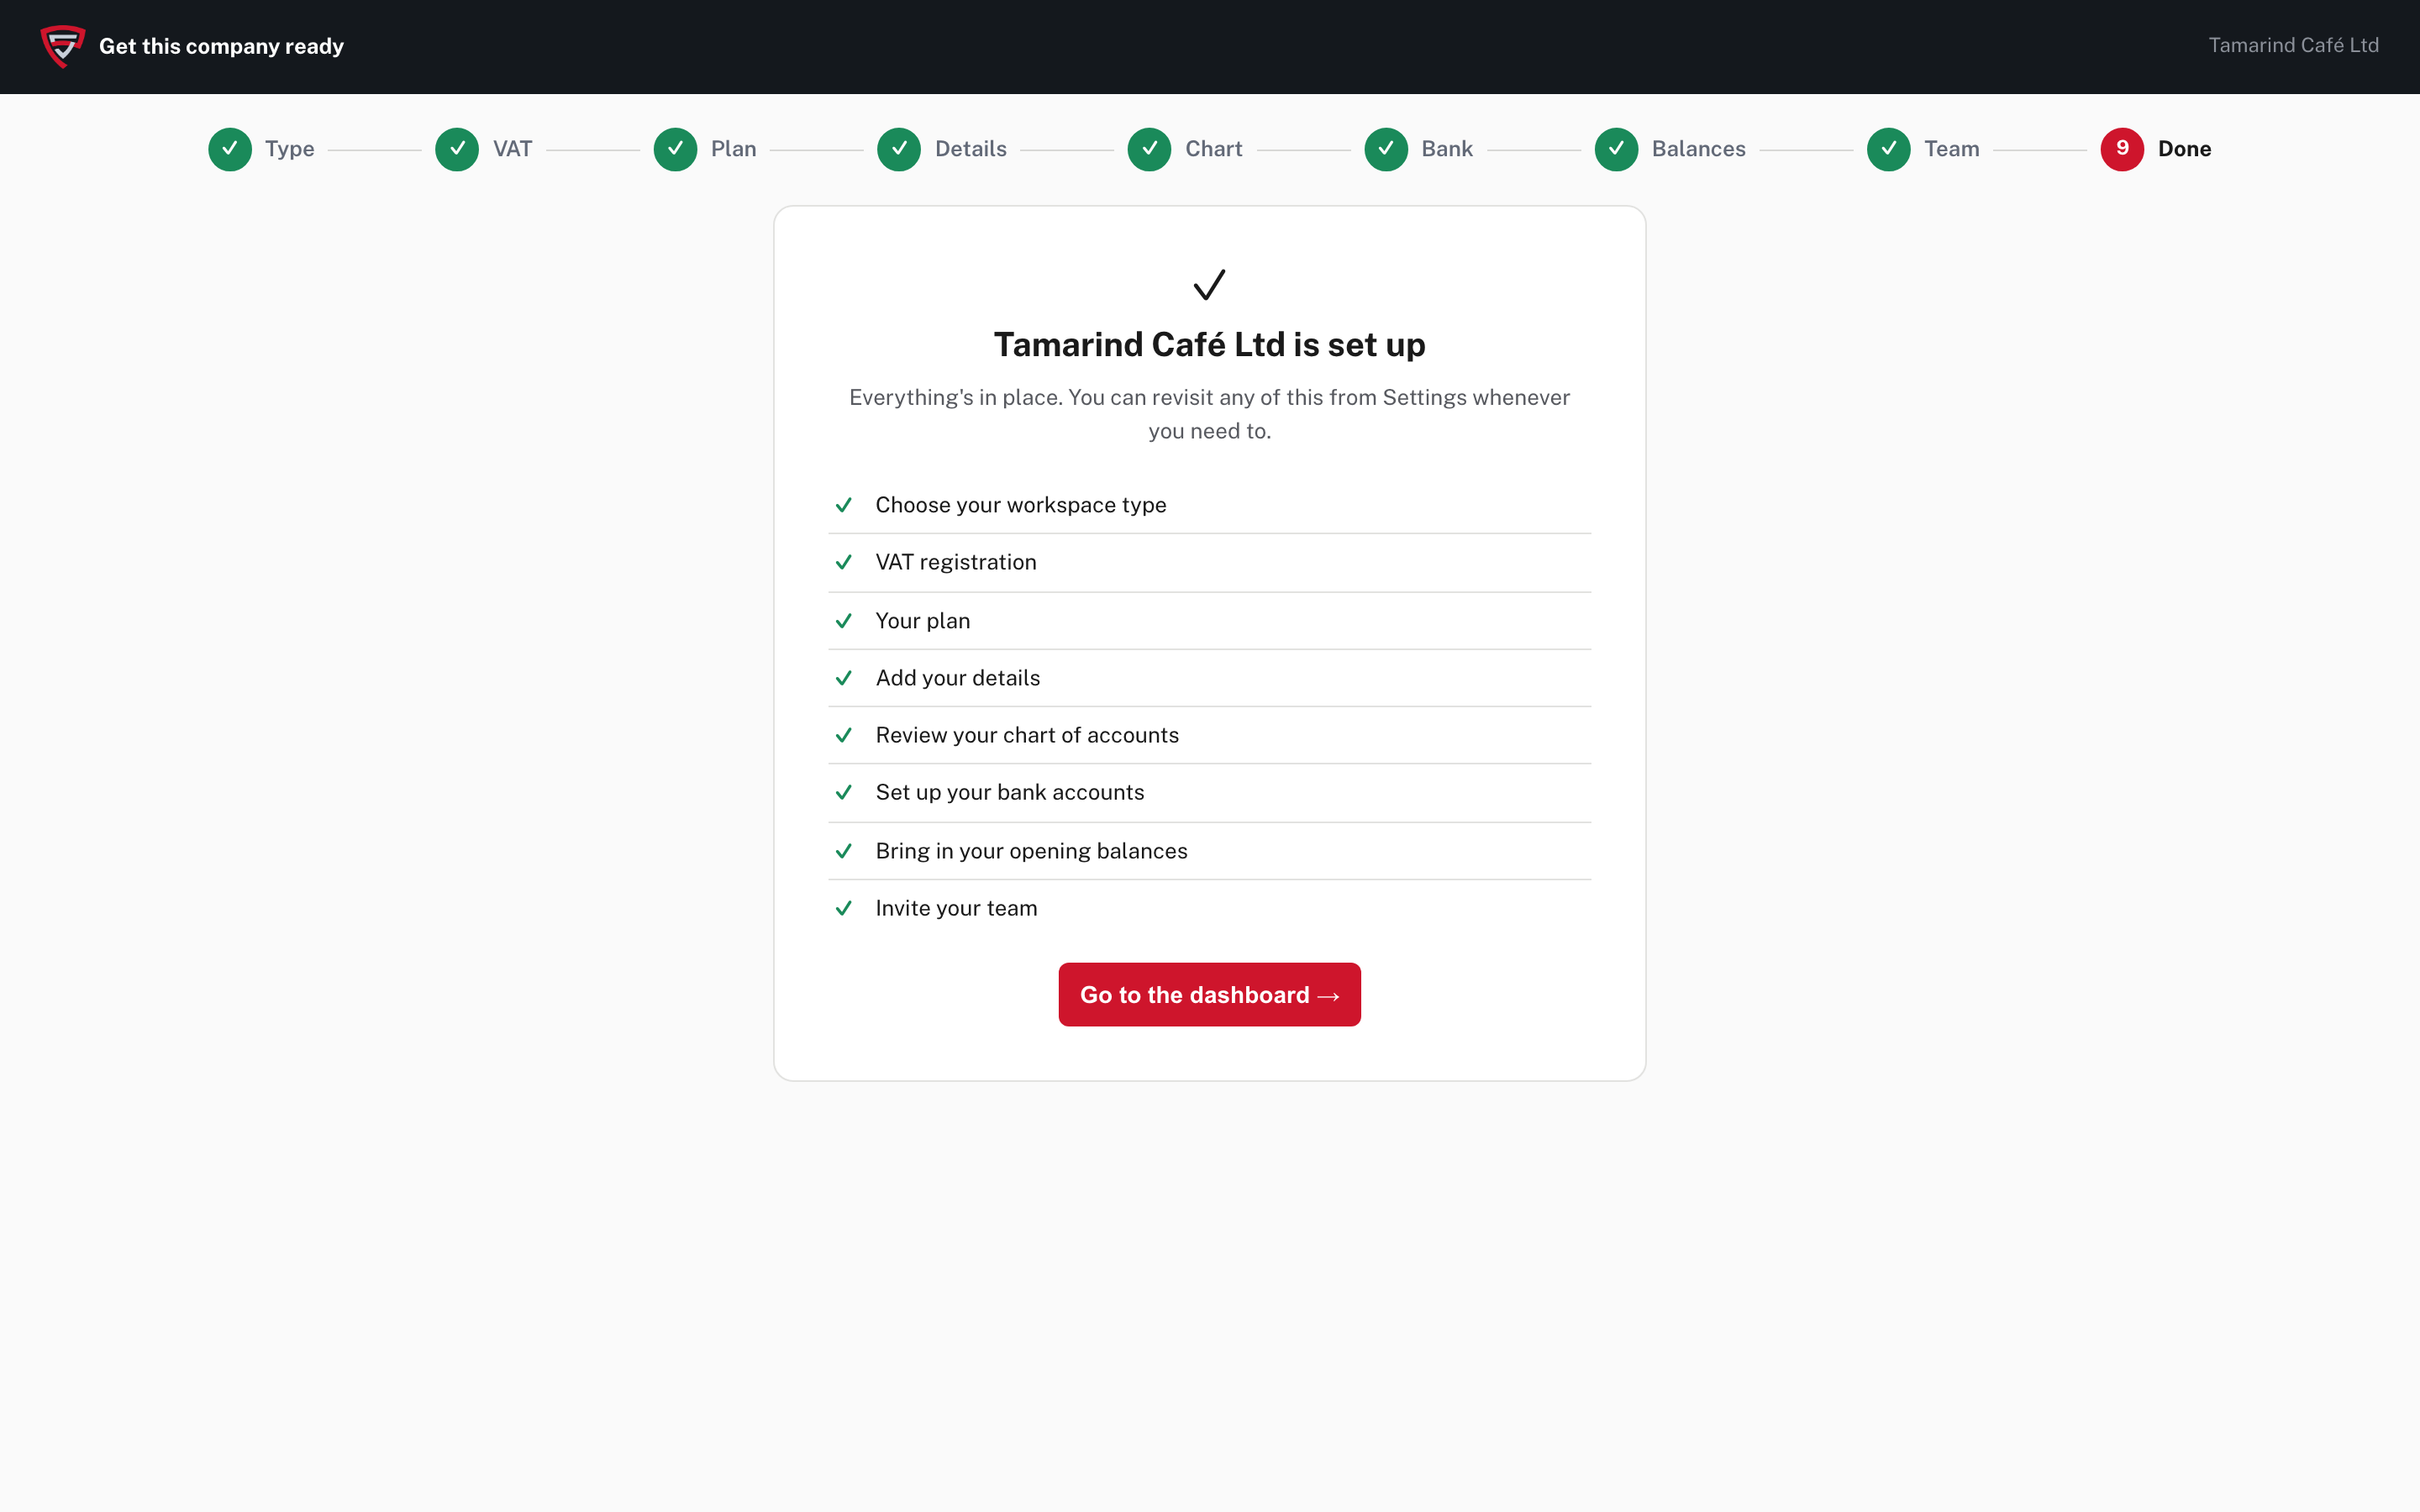
The last page lists what was done. Choose Go to the dashboard →.
Step 3. Your first dashboard
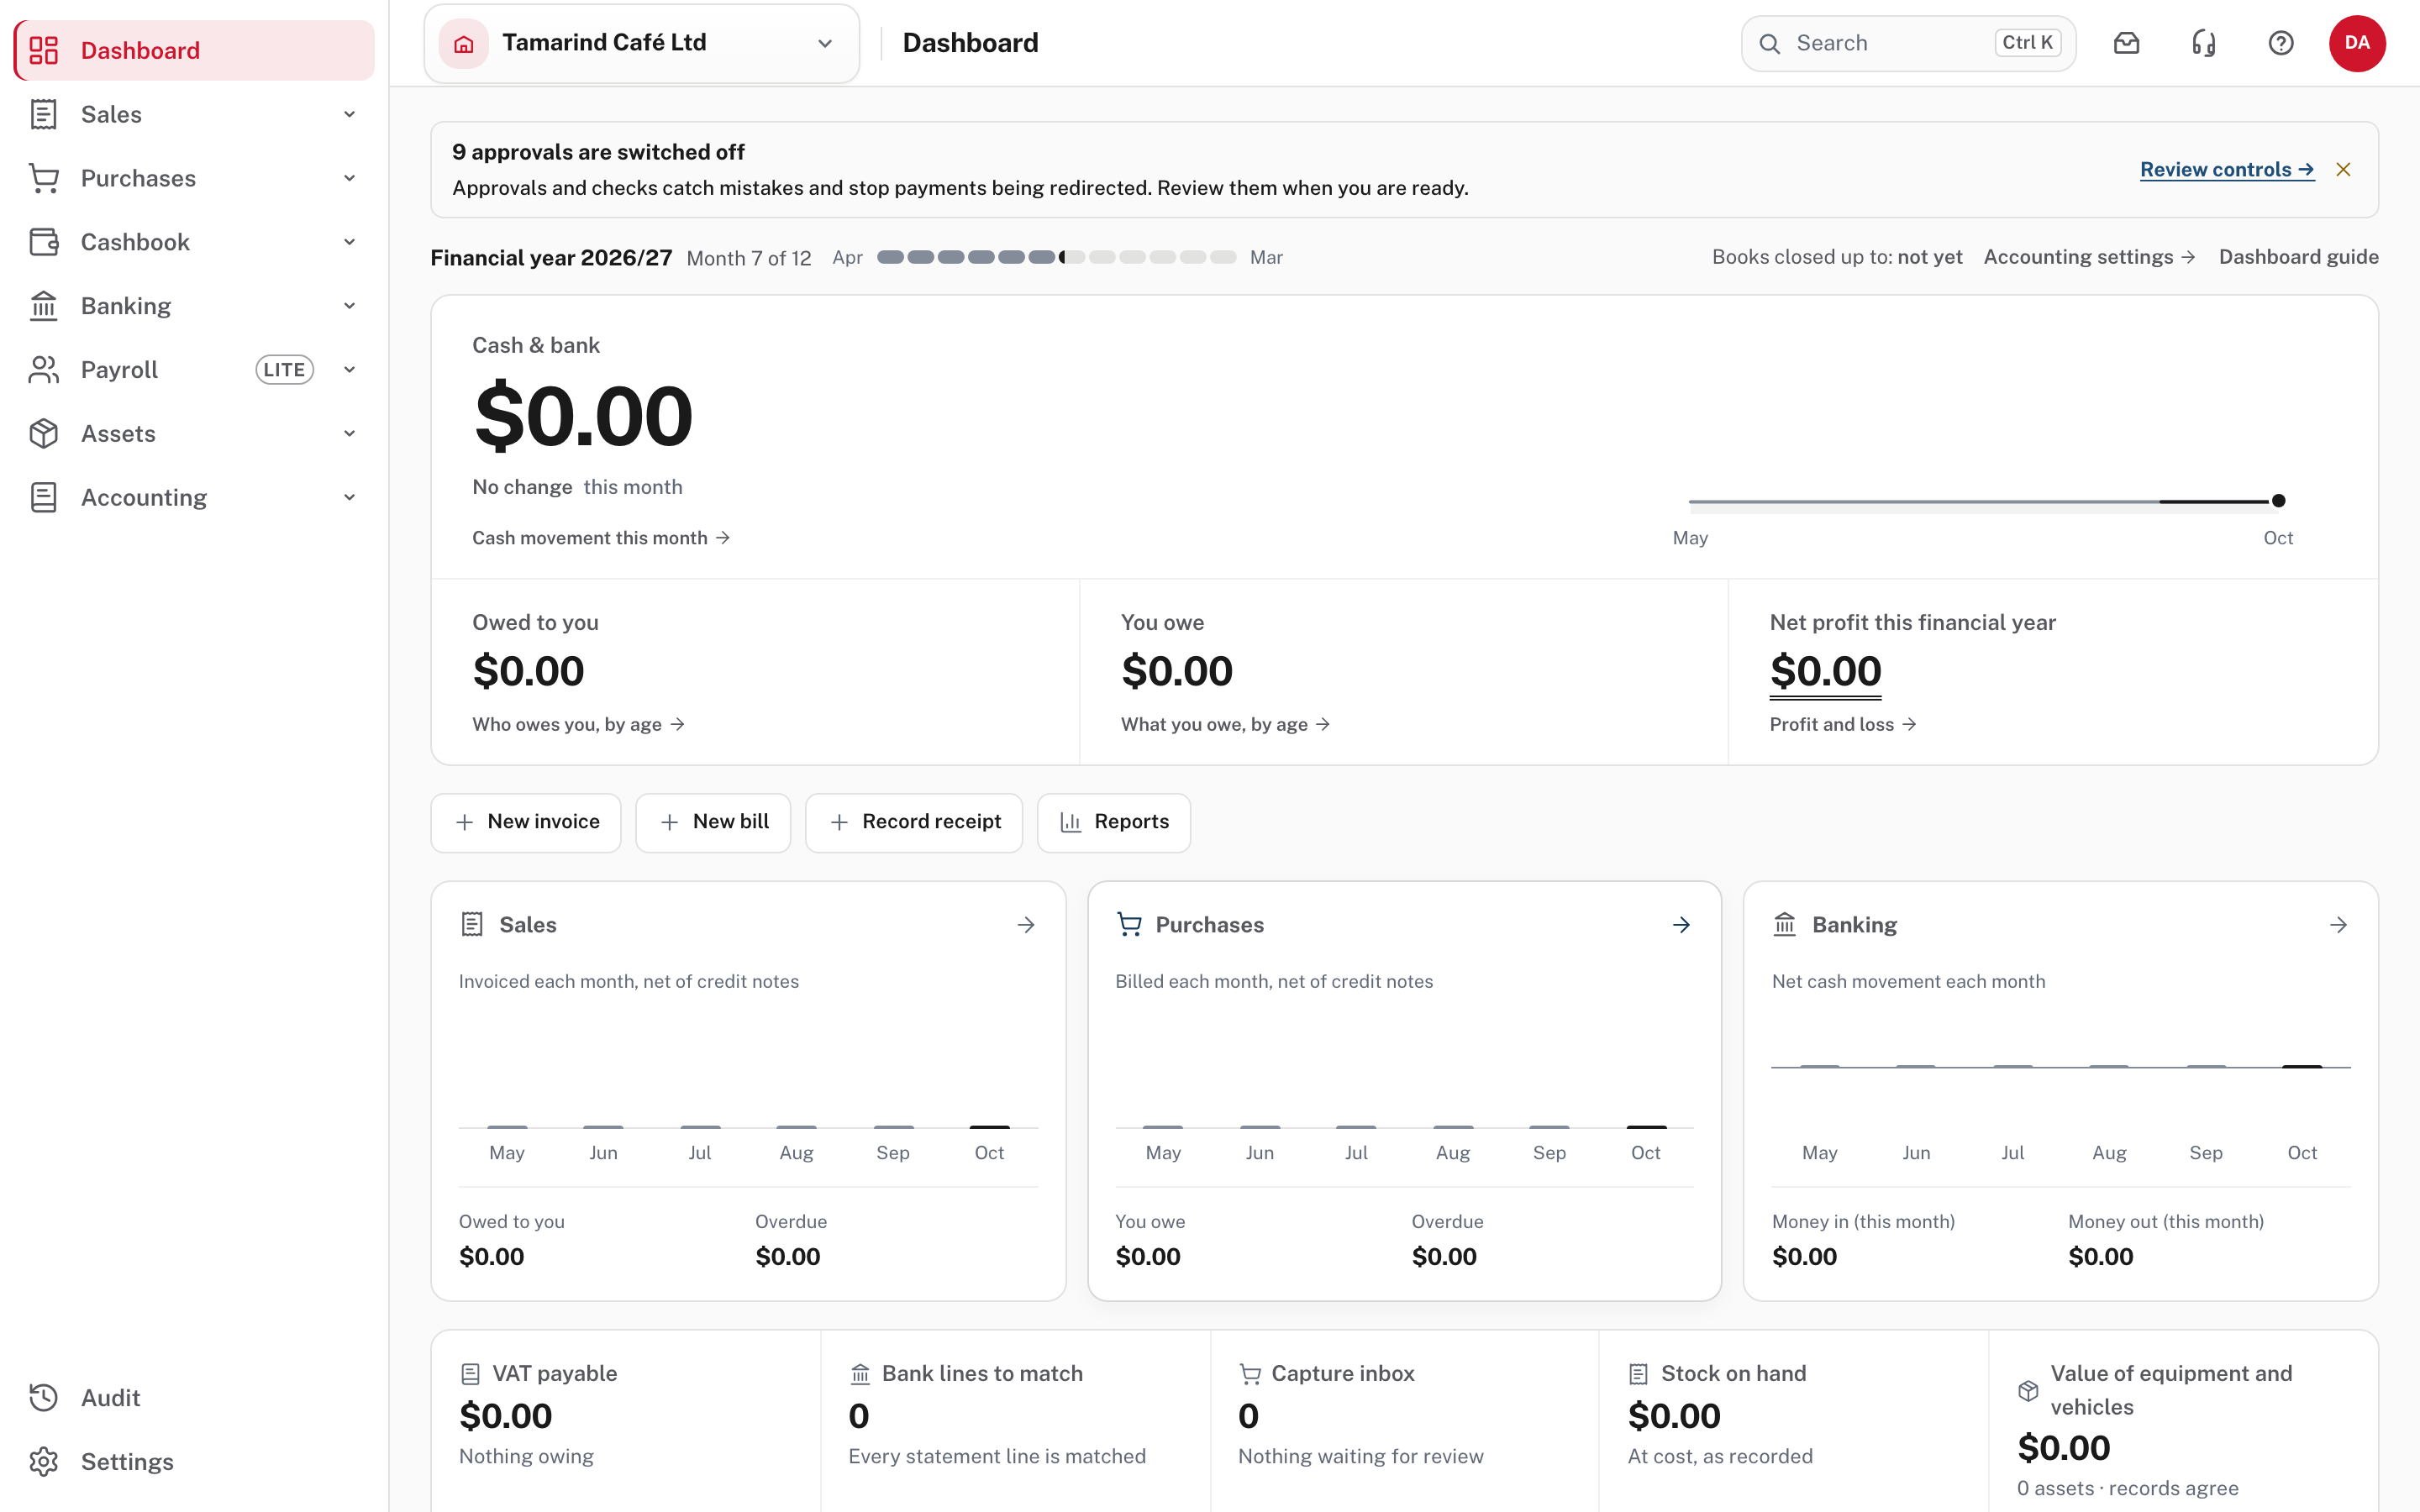
A new company's dashboard is empty. Near the top it says that the approval controls are switched off. They stay off until you turn them on; Review controls → takes you to them. Turn the important ones on before real money moves.
Step 4. Finish the settings that documents depend on
Settings lists every setting by area. Use the search box or the area headings.
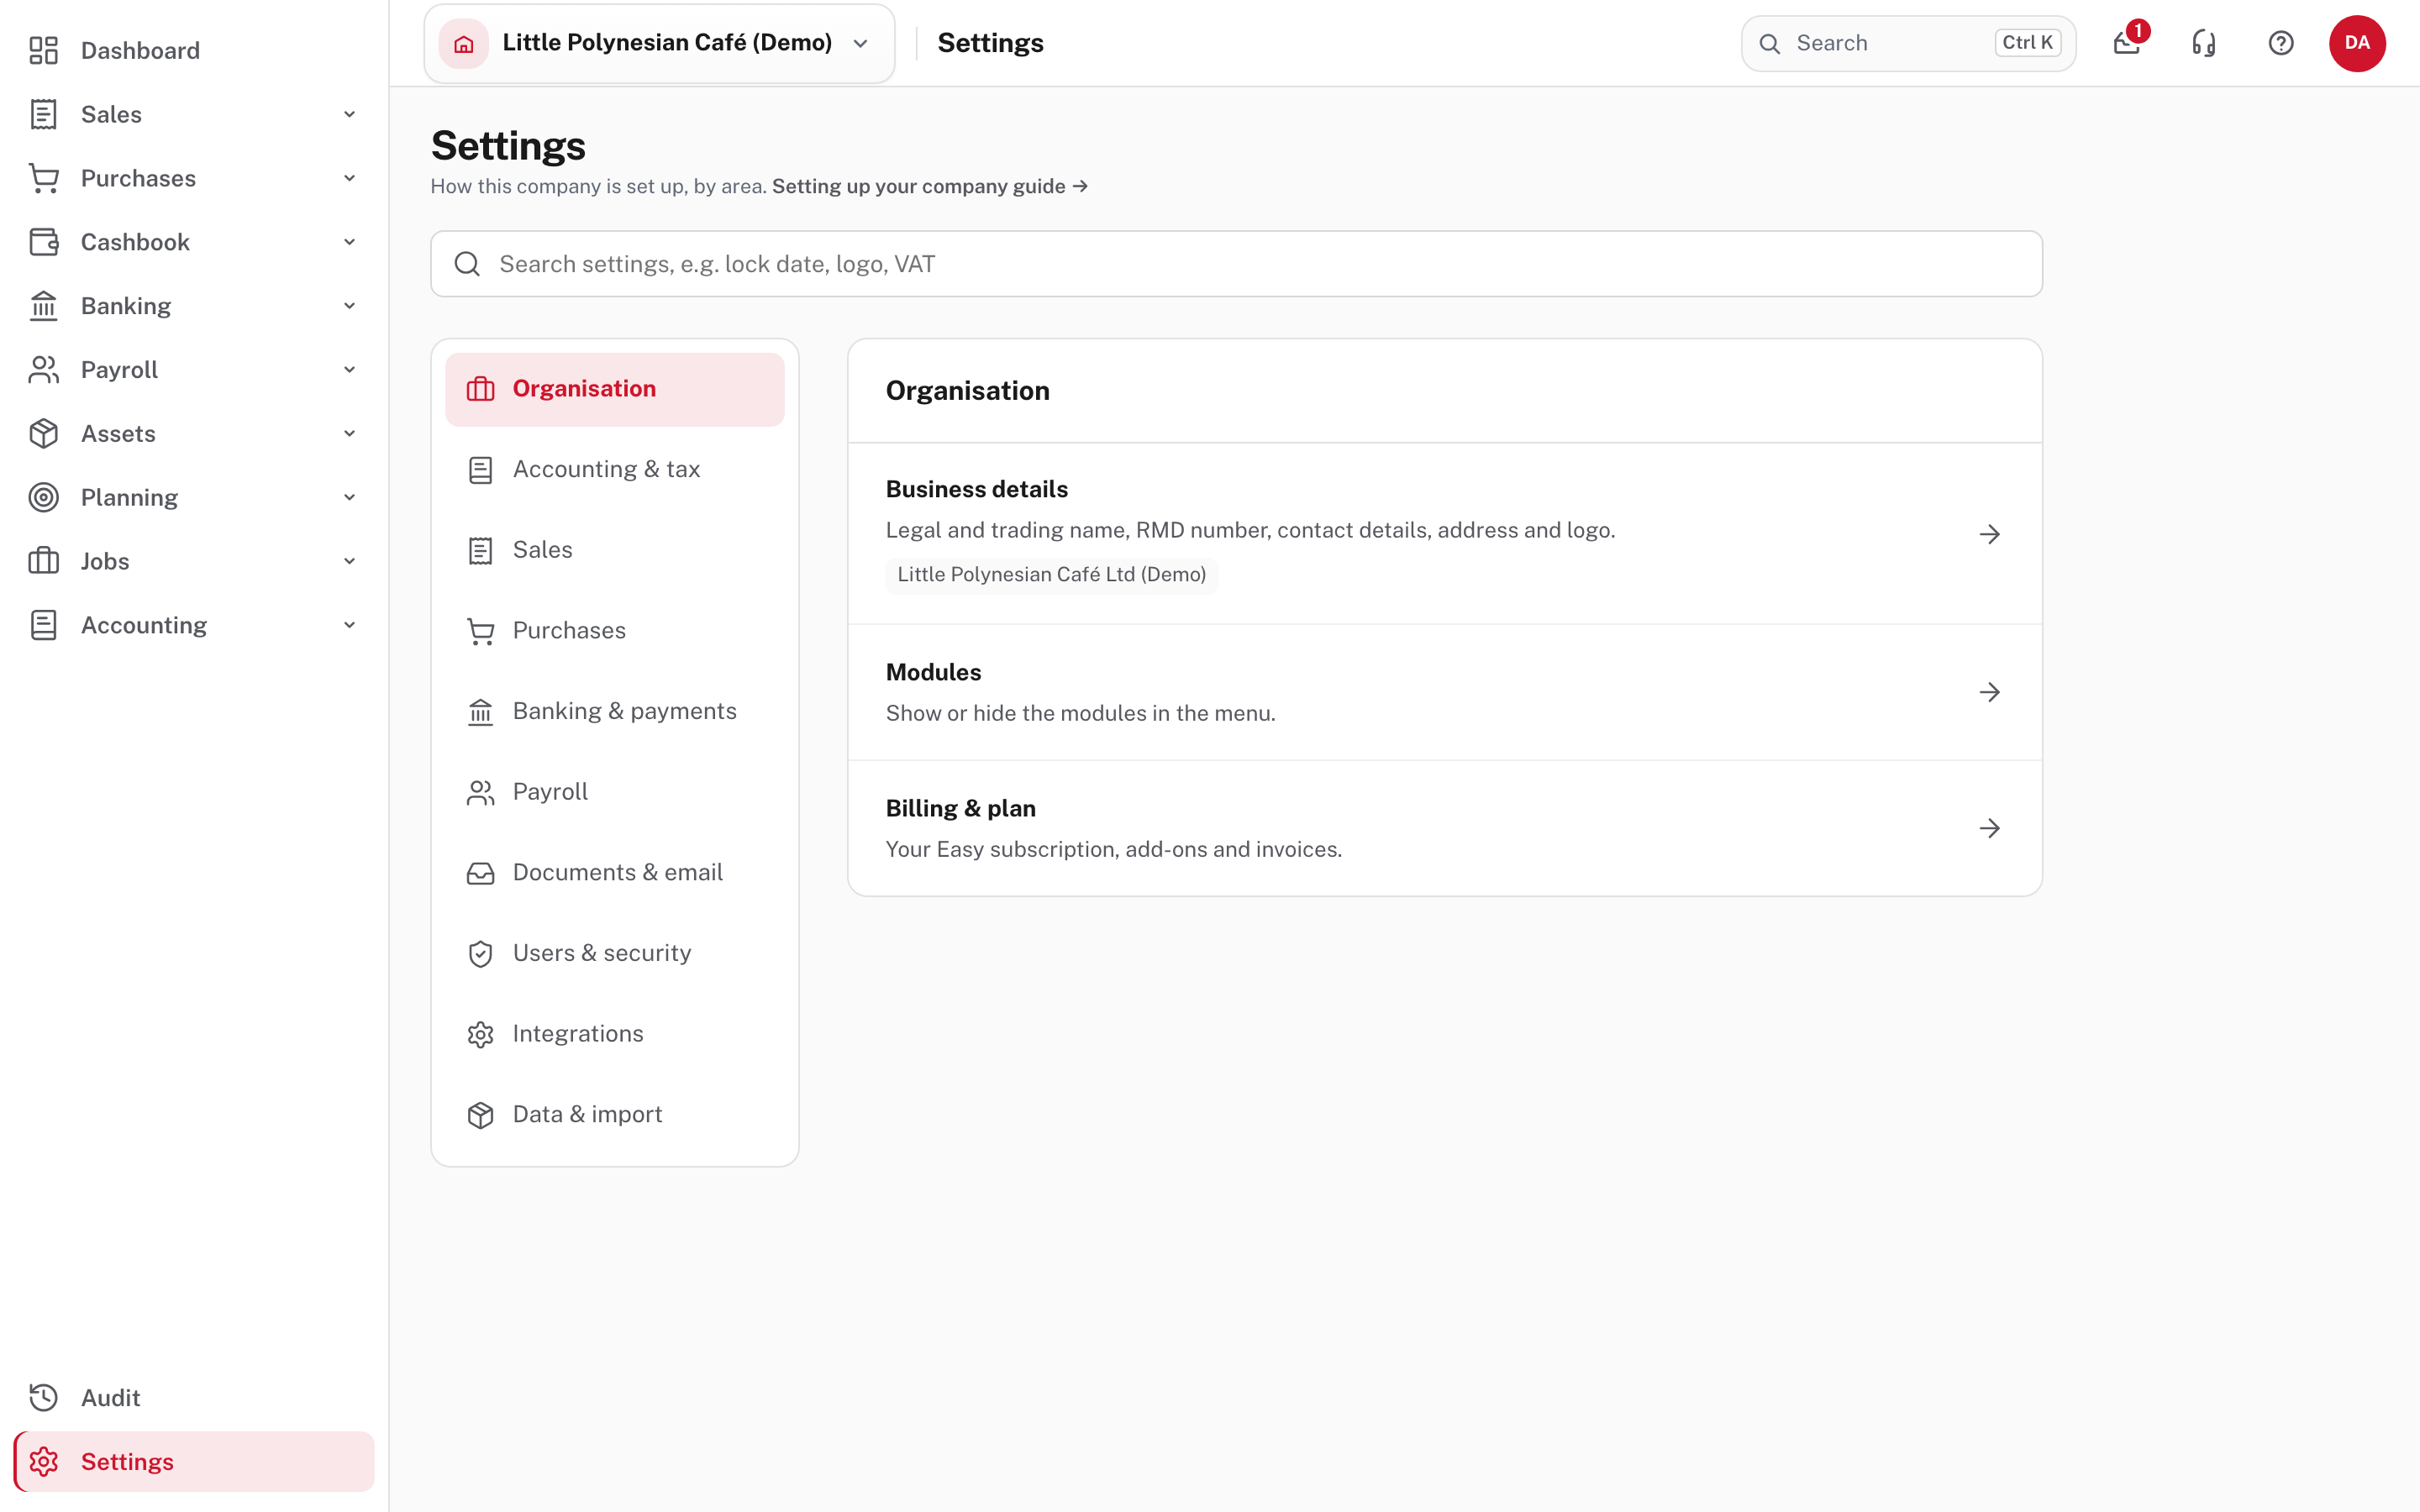
Business details
Settings → Organisation → Business details.
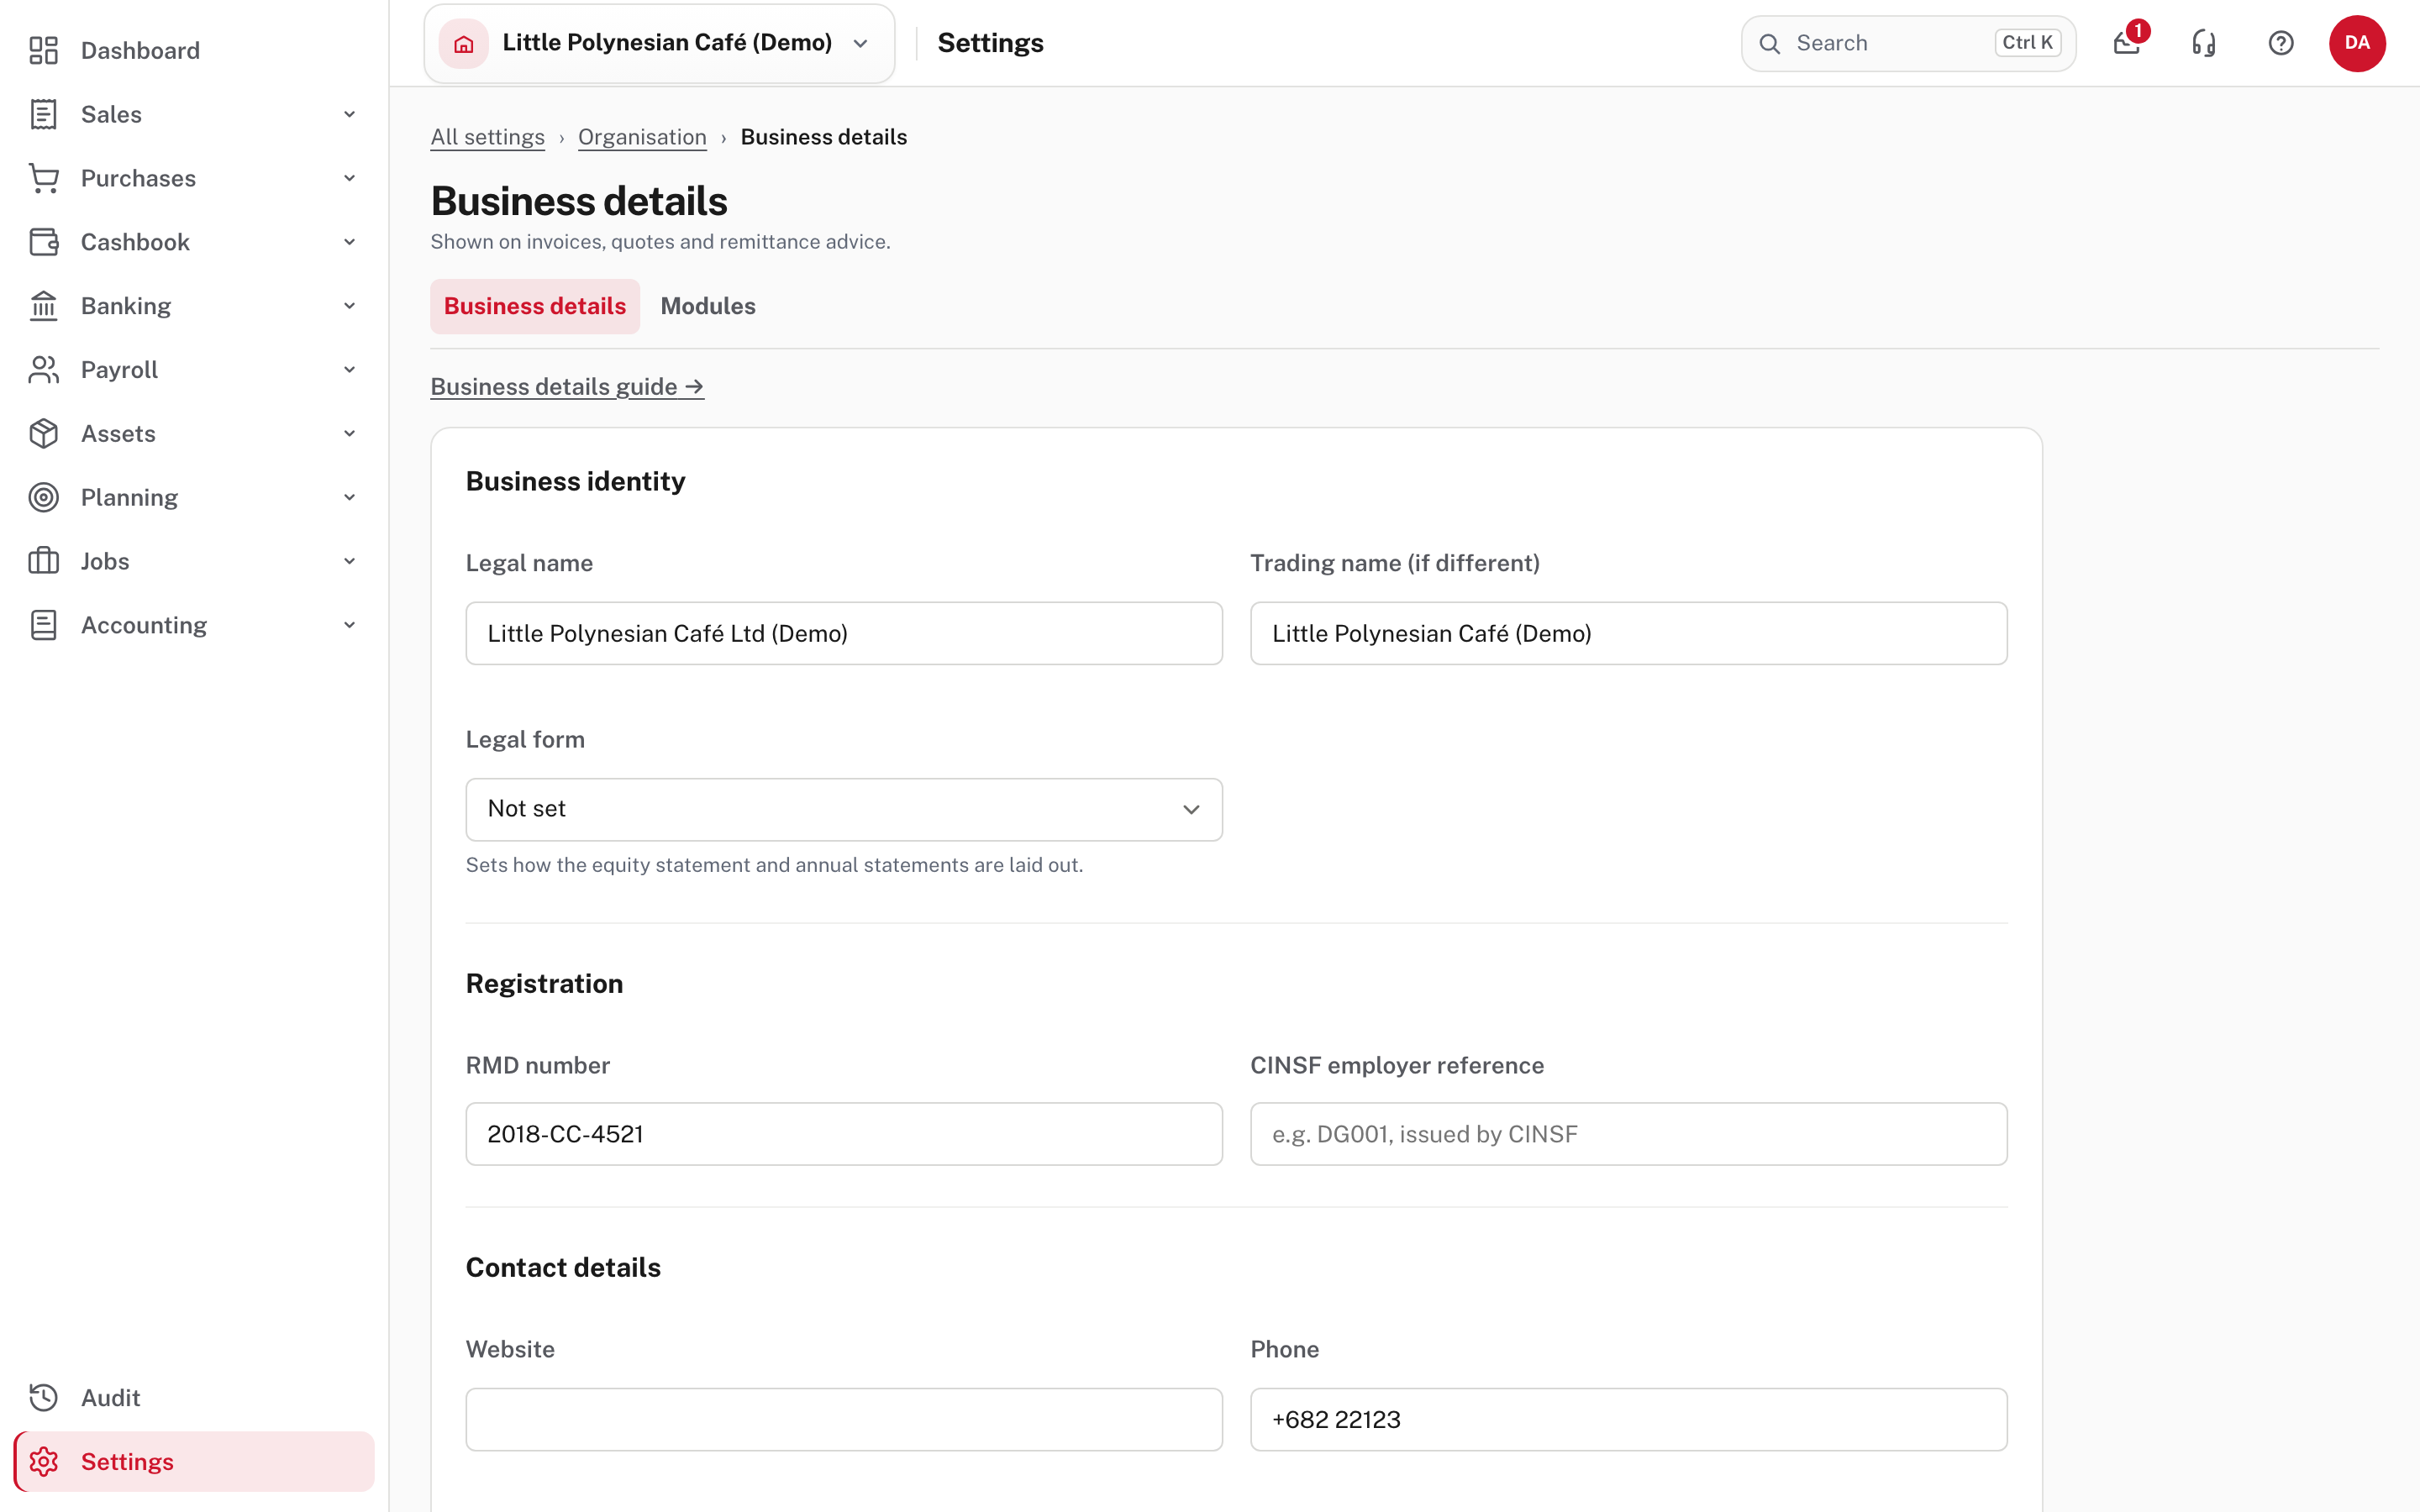
Add what the wizard did not ask for:
- Legal form: sets how the equity statement and the annual statements are laid out.
- CINSF employer reference: needed for the monthly CINSF file and the payroll return (Payroll chapter 3).
- Website, address, and the logo (a PNG, JPEG, WebP or GIF under 500 KB). The logo appears on quotes and invoices.
This page holds the company's identity only. VAT is on Settings → Tax, the bank account printed on invoices is under Getting paid, and the reply-to address is under Email.
More detail: Business details.
VAT registration
Settings → Accounting & tax → Tax.
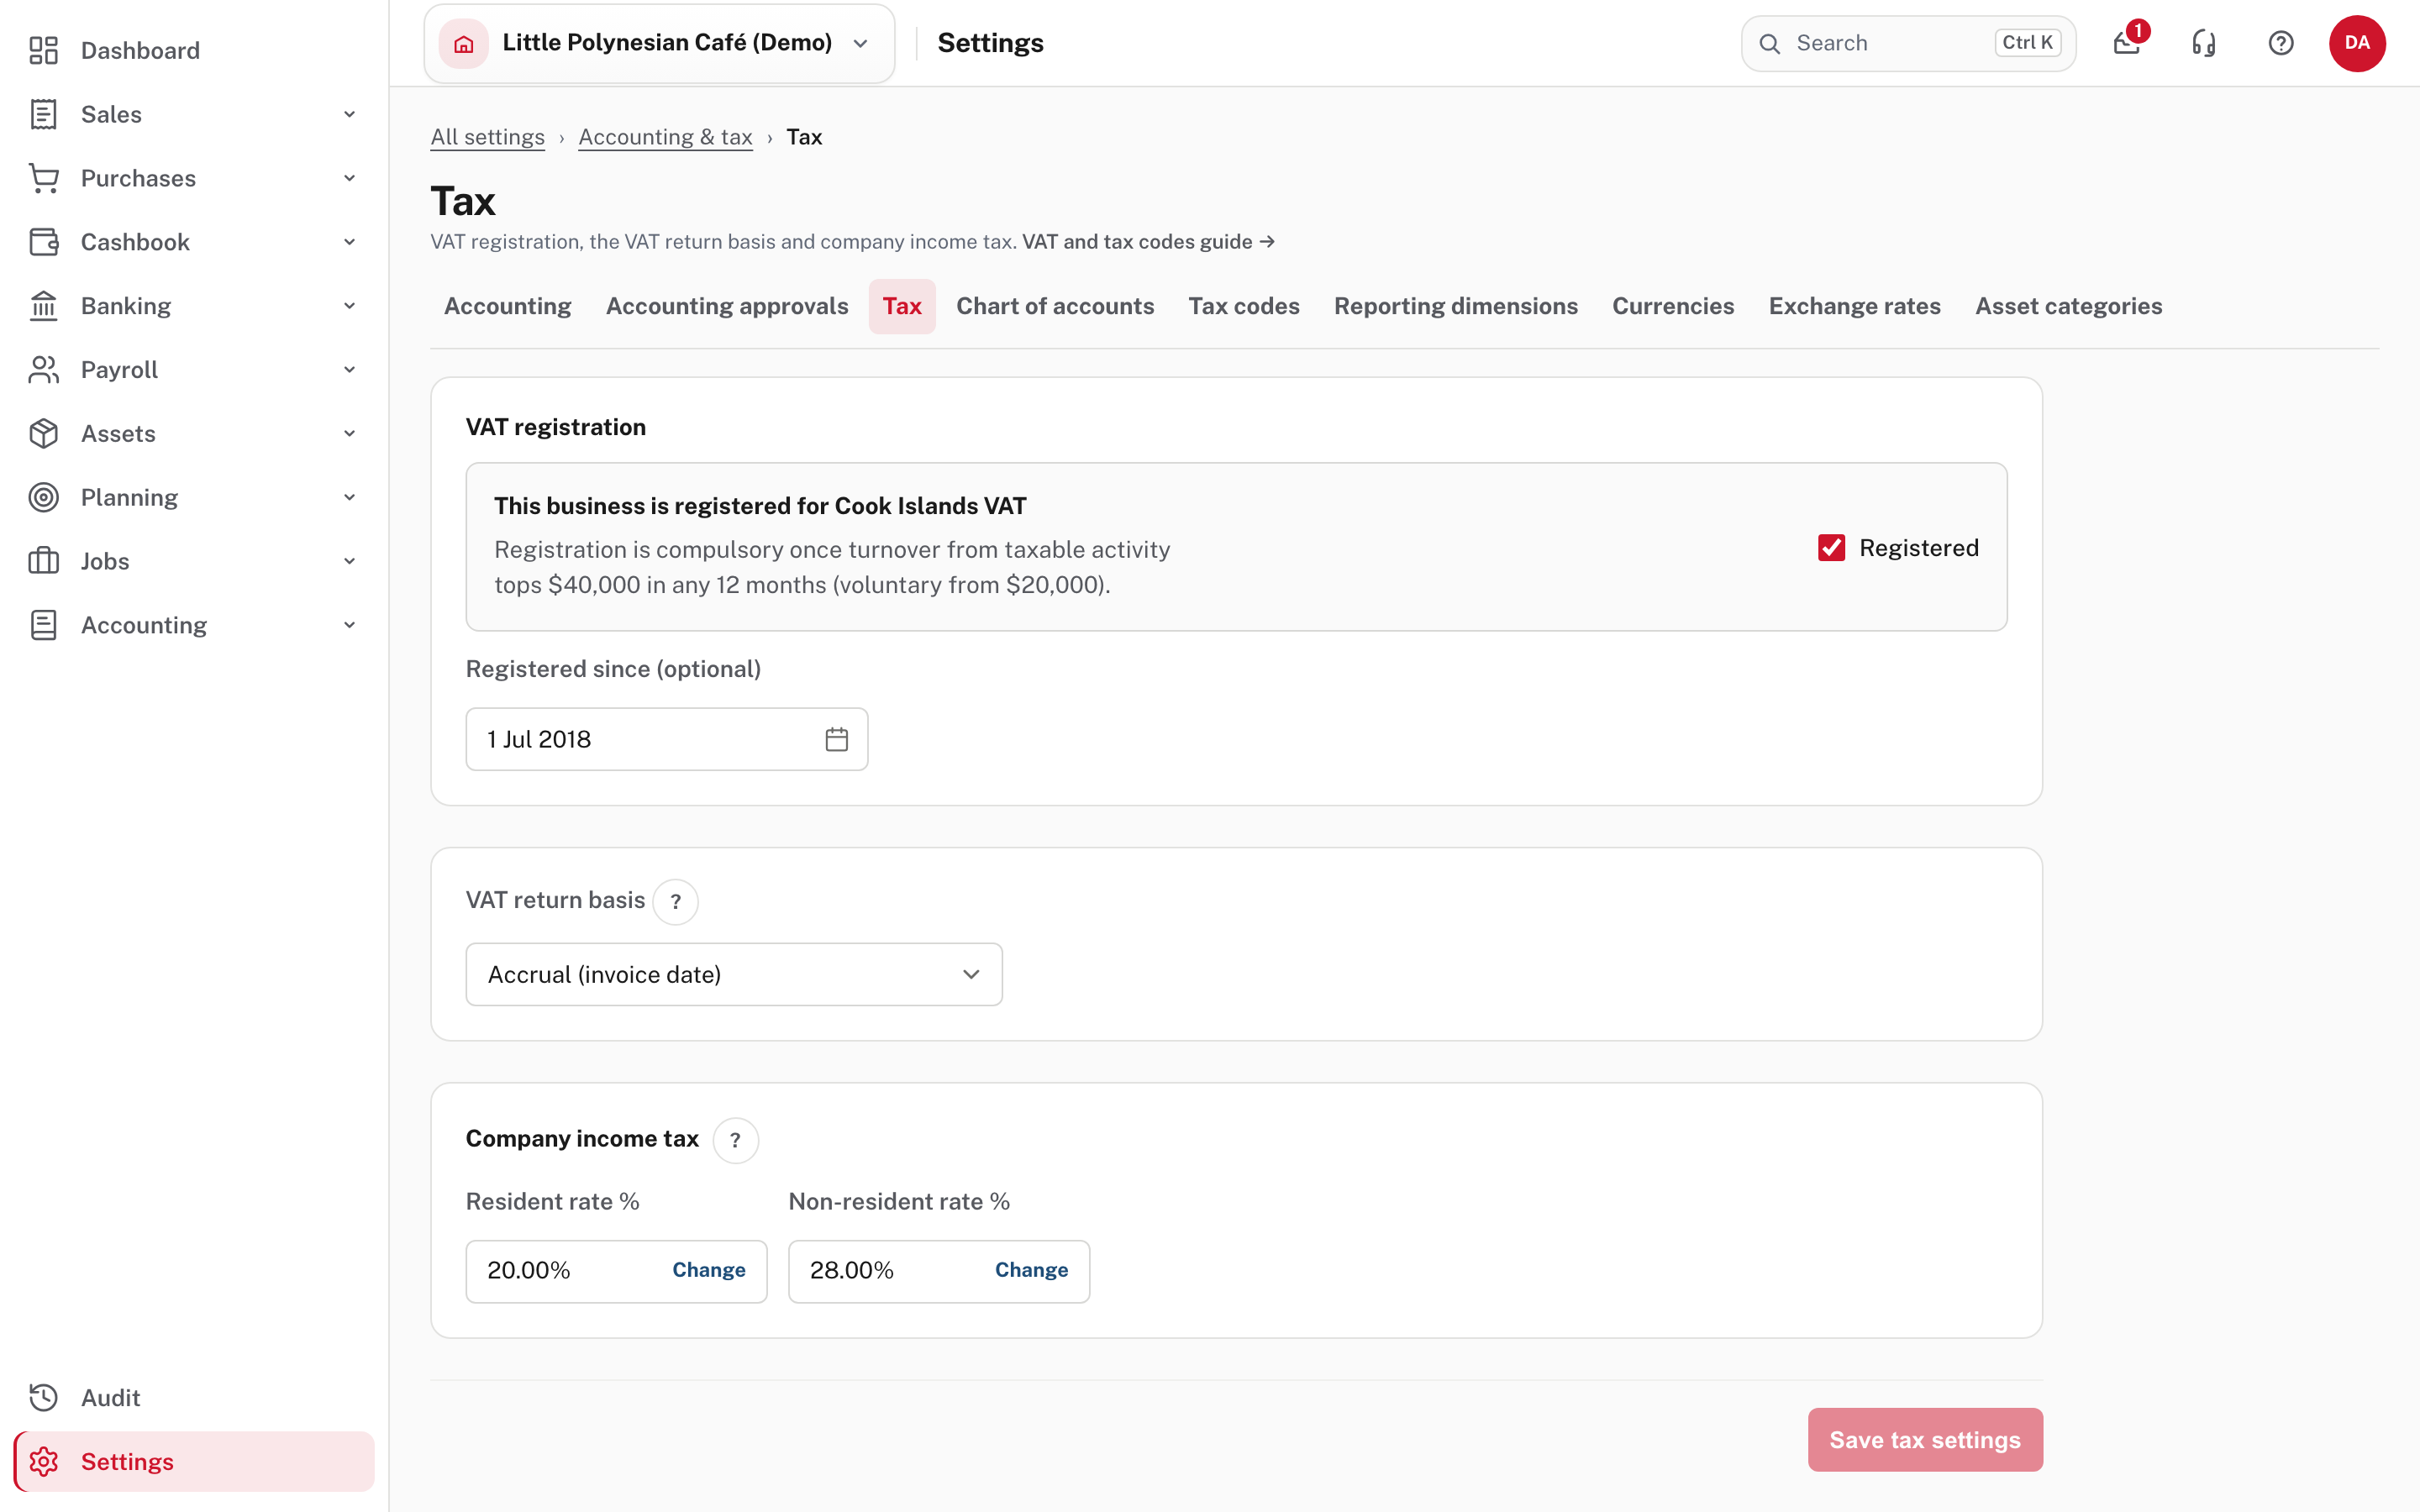
- Registered switches VAT on, with an optional Registered since date.
- VAT return basis is how the return counts VAT (here, Accrual (invoice date)).
- Company income tax shows the resident and non-resident rates; Change edits one.
Change the registration on the day the change takes effect. Documents already raised keep the treatment they were raised with. With VAT off, documents have no VAT column, every line is coded N, invoices are headed "Invoice" rather than "Tax Invoice", and the monthly RM205 return is hidden.
More detail: VAT registration and tax codes. The steps are in VAT: registration, tax codes and rate changes.
Modules
Settings → Organisation → Modules.
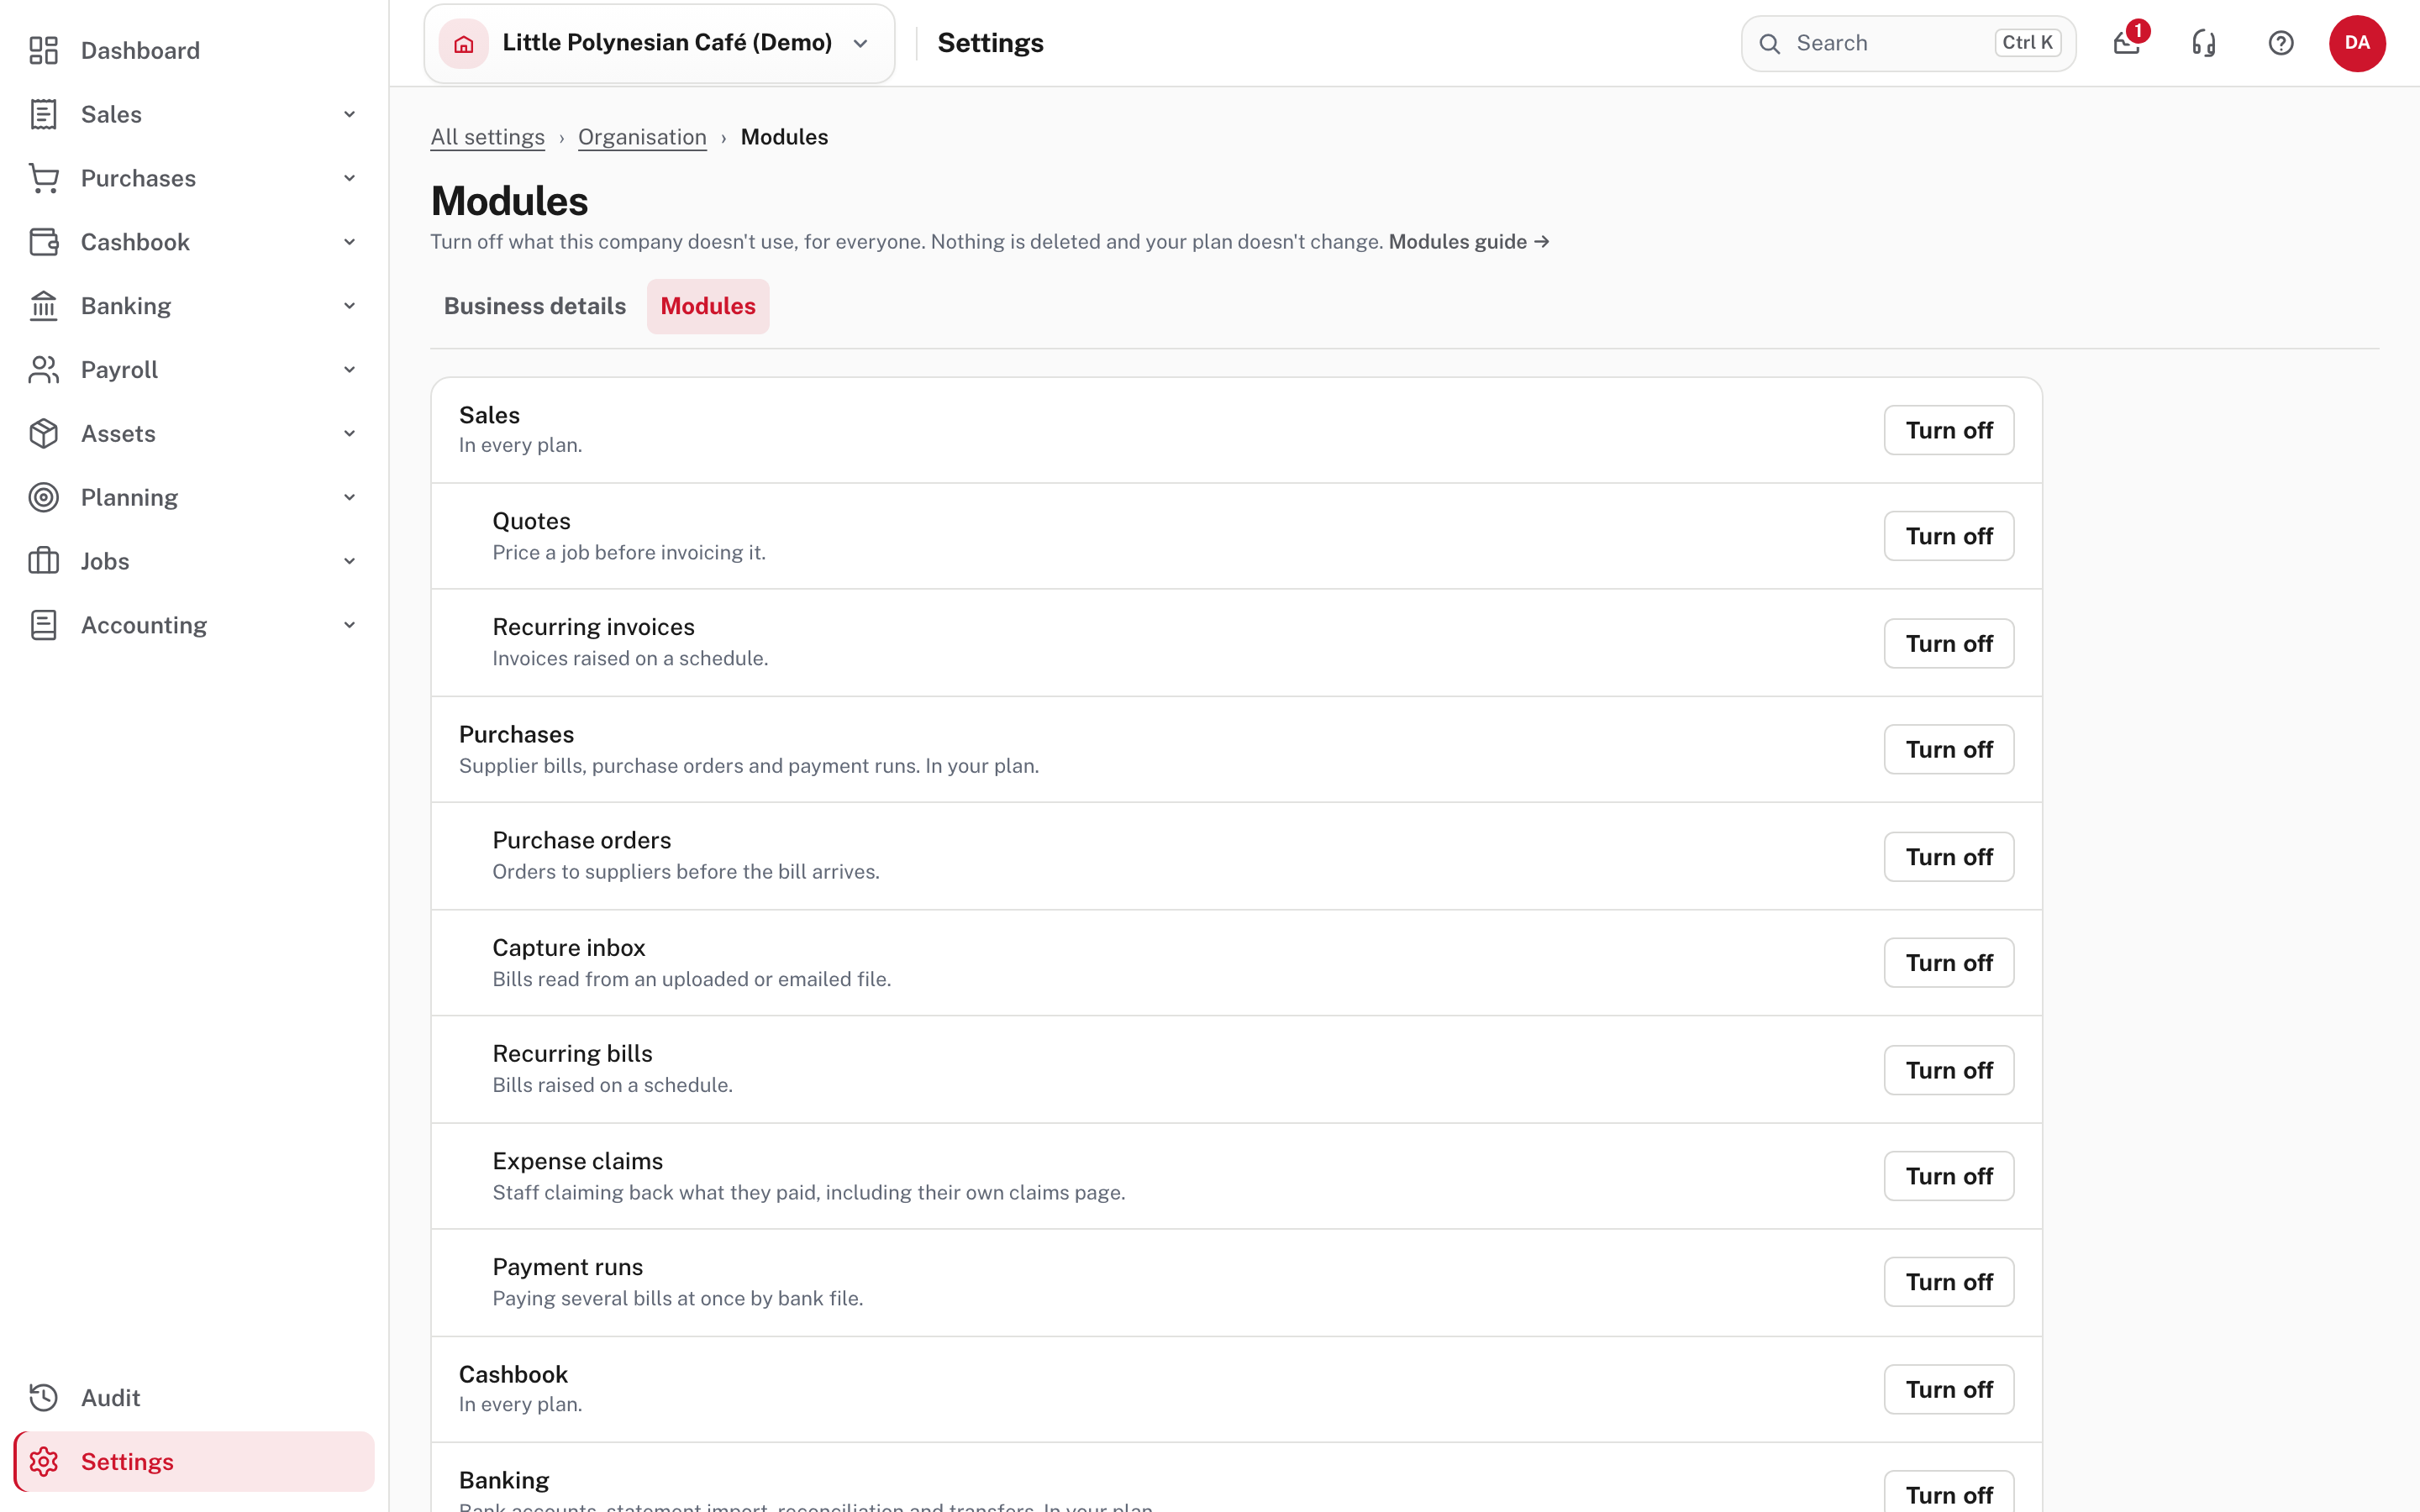
Turn off a part of Easy the company doesn't use, for everyone. Nothing is deleted and your plan doesn't change. You can turn off a whole module (Sales, Purchases, Cashbook, Banking, Payroll, Assets, Planning, Jobs) or one feature inside it (quotes, recurring invoices, purchase orders, capture inbox, recurring bills, expense claims, payment runs, recurring journals, prepayments and accruals). Only an Owner or Administrator can change it. Easy refuses to turn something off while work is still running in it, and lists what to finish first. To give one person a shorter menu, choose their role instead.
More detail: Turning modules and features off.
Step 5. Look over the chart of accounts
Accounting & tax → Chart of accounts.
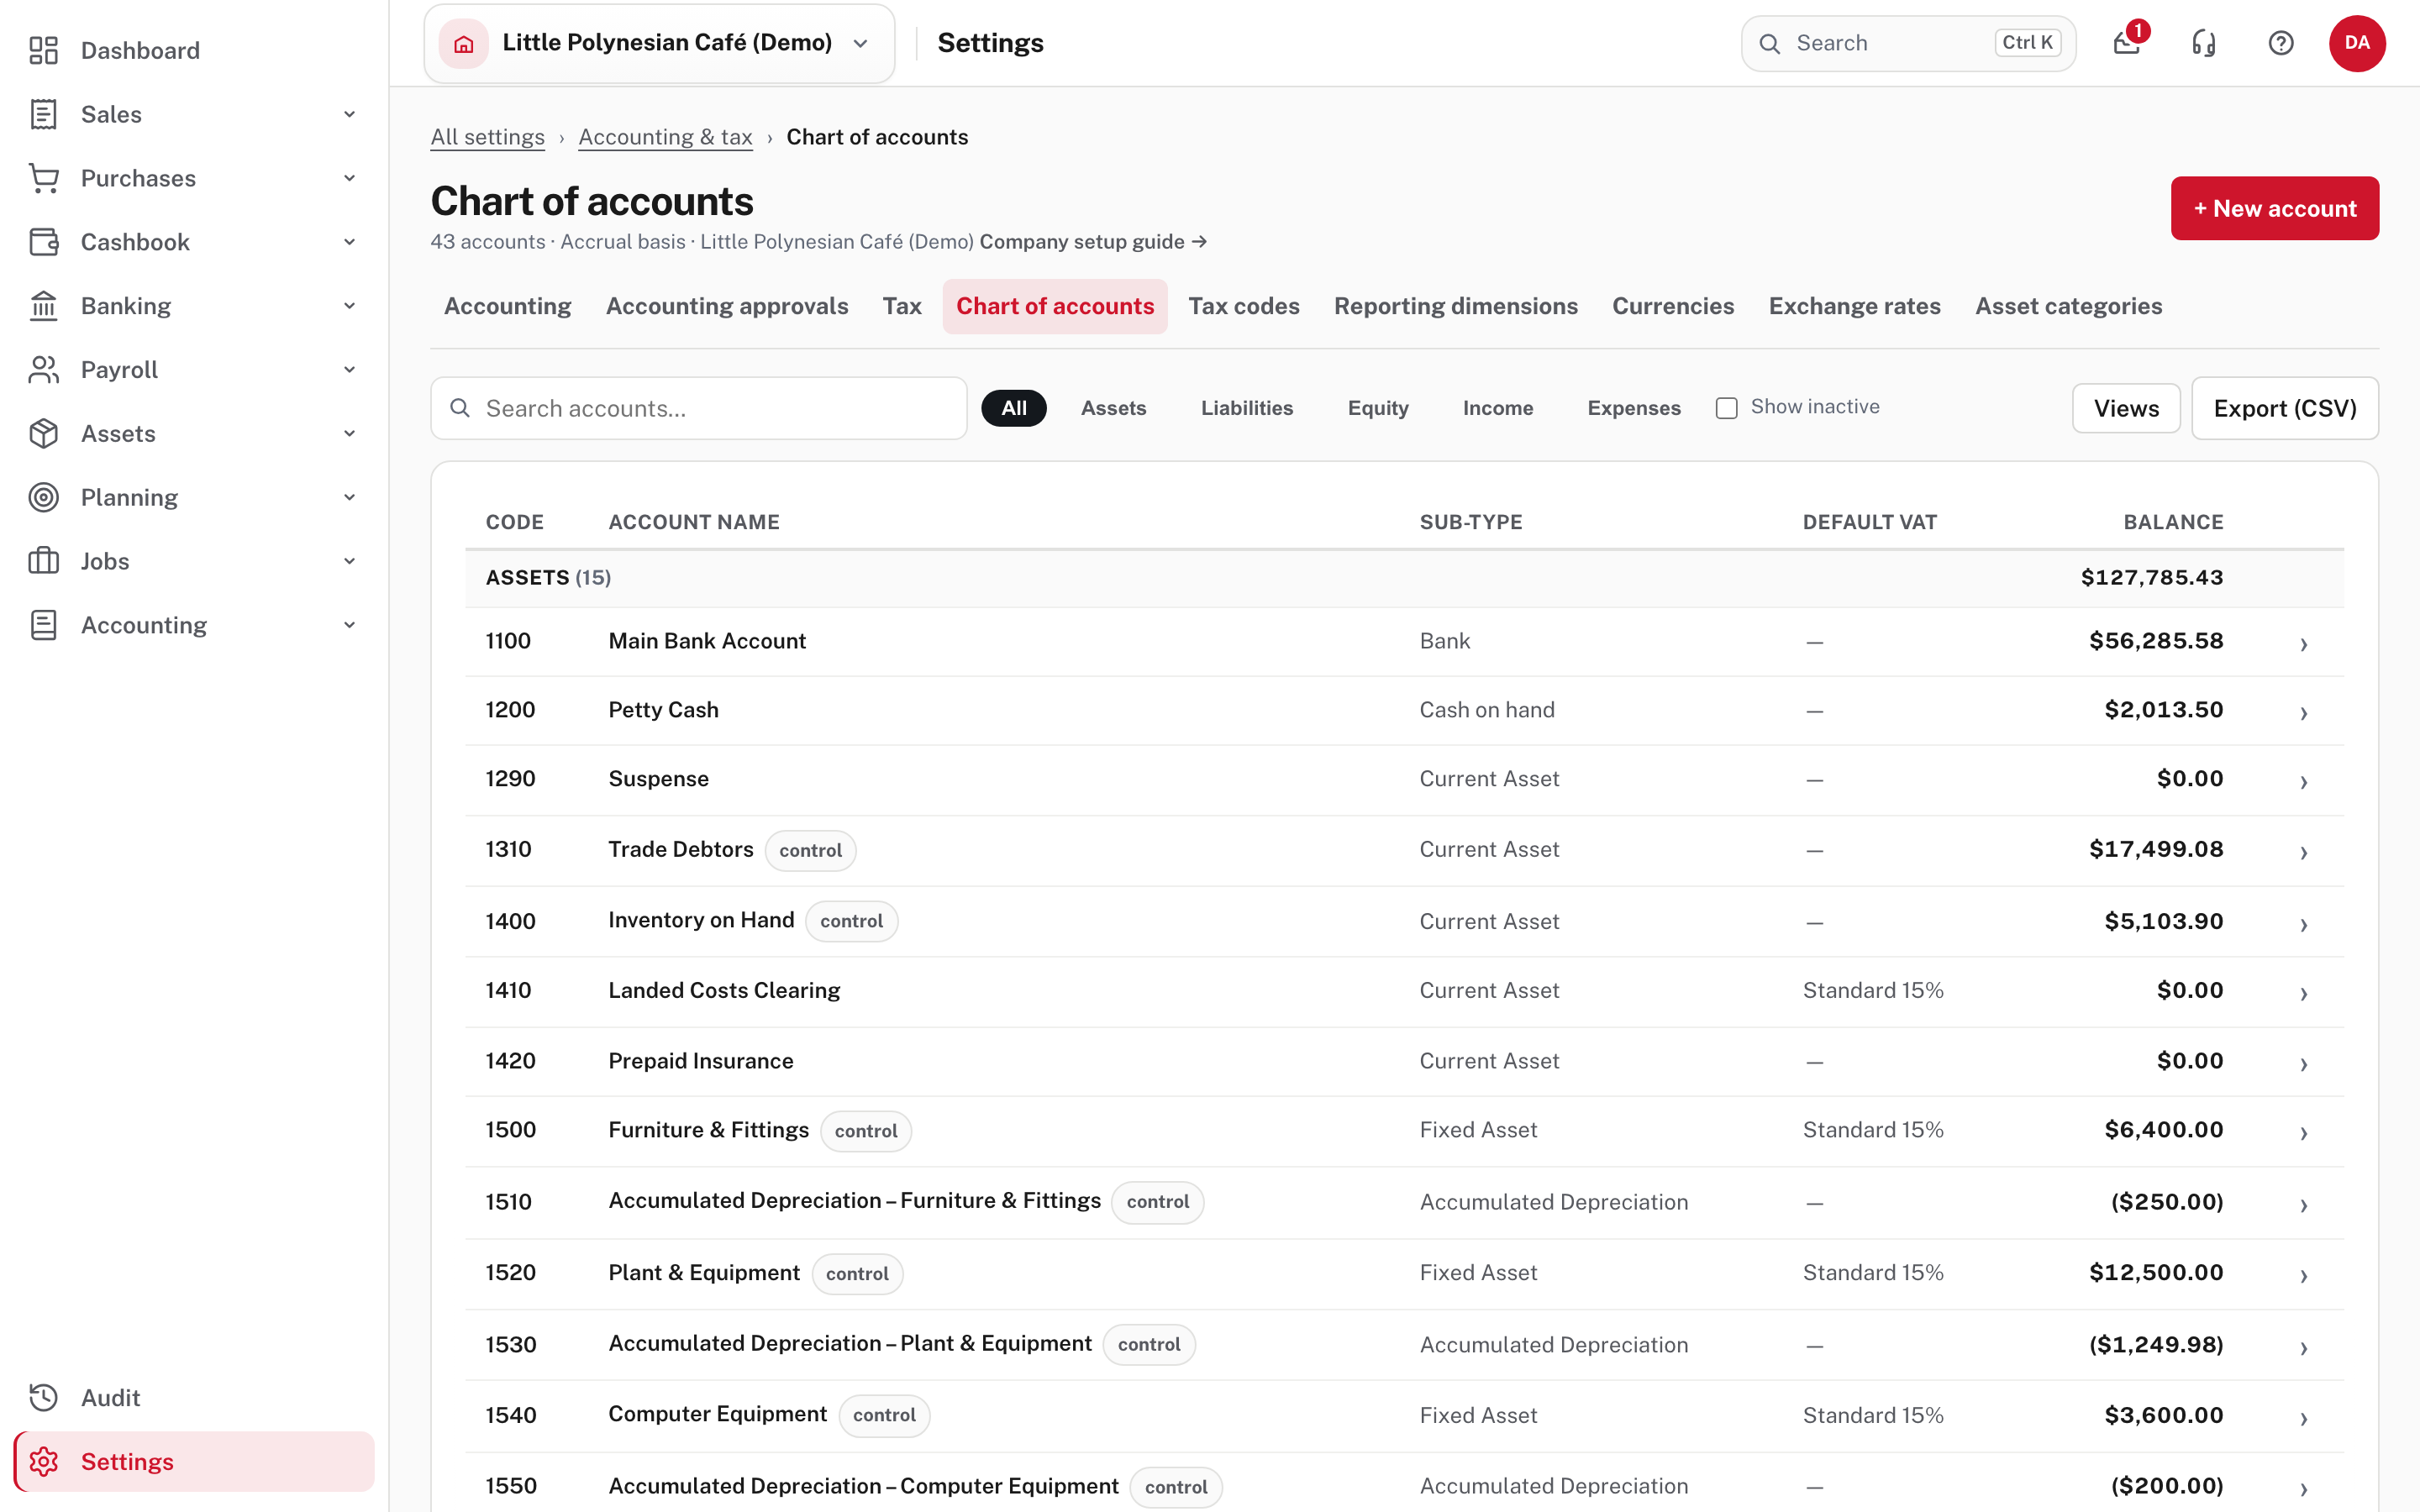
The list shows each account's code, name, sub-type, default VAT code and balance, grouped as assets, liabilities, equity, income and expenses. Accounts marked control are managed by Easy and can't be posted to by hand (see System control accounts). Use + New account to add one, or edit a name; nothing from the starter chart is thrown away.
Add another company, or restore one
- Another company under the same login: the company switcher, + Add a company (step 1). Each company has its own isolated books and its own 30-day trial.
- Restore from a backup: Settings → Data & import → Restore from a backup, or the restore section of Add company. A restore always creates a new company that you own; the company you are in is never changed. Only a company's Owner or an Administrator can restore. More detail: Setting up your company.
Check before you continue
Check before you continue
- The company exists, and you can see it in the company switcher.
- VAT is set correctly, with the right start date, and the VAT return basis is as you filed before.
- Business details are complete: legal name, RMD number, CINSF employer reference (if you have staff), address, logo.
- Bank accounts have names you will recognise on a statement.
- The modules you won't use are turned off.
- You have decided how to bring in opening balances, and the approvals you will turn on.
Next
Opening balances, then Invoice branding so the first invoice looks right, and Set up payroll if you have staff.