Raise, send and get paid for an invoice
Do this for every invoice. It takes a couple of minutes: fill in the invoice, finalise it, send it to the customer, and record the money when it arrives.
About the screenshots
Screenshots are from Easy's demo company, Little Polynesian Café. The customer, amounts and references are examples.
Before you start
- The customer exists (you can add one from the invoice itself with + New customer).
- Your branding is set, so the invoice looks right (Invoice branding).
- The money goes into an account you can name. For a bank transfer, the "Pay to" details are under Settings → Getting paid.
Step 1. Open Sales → Invoices
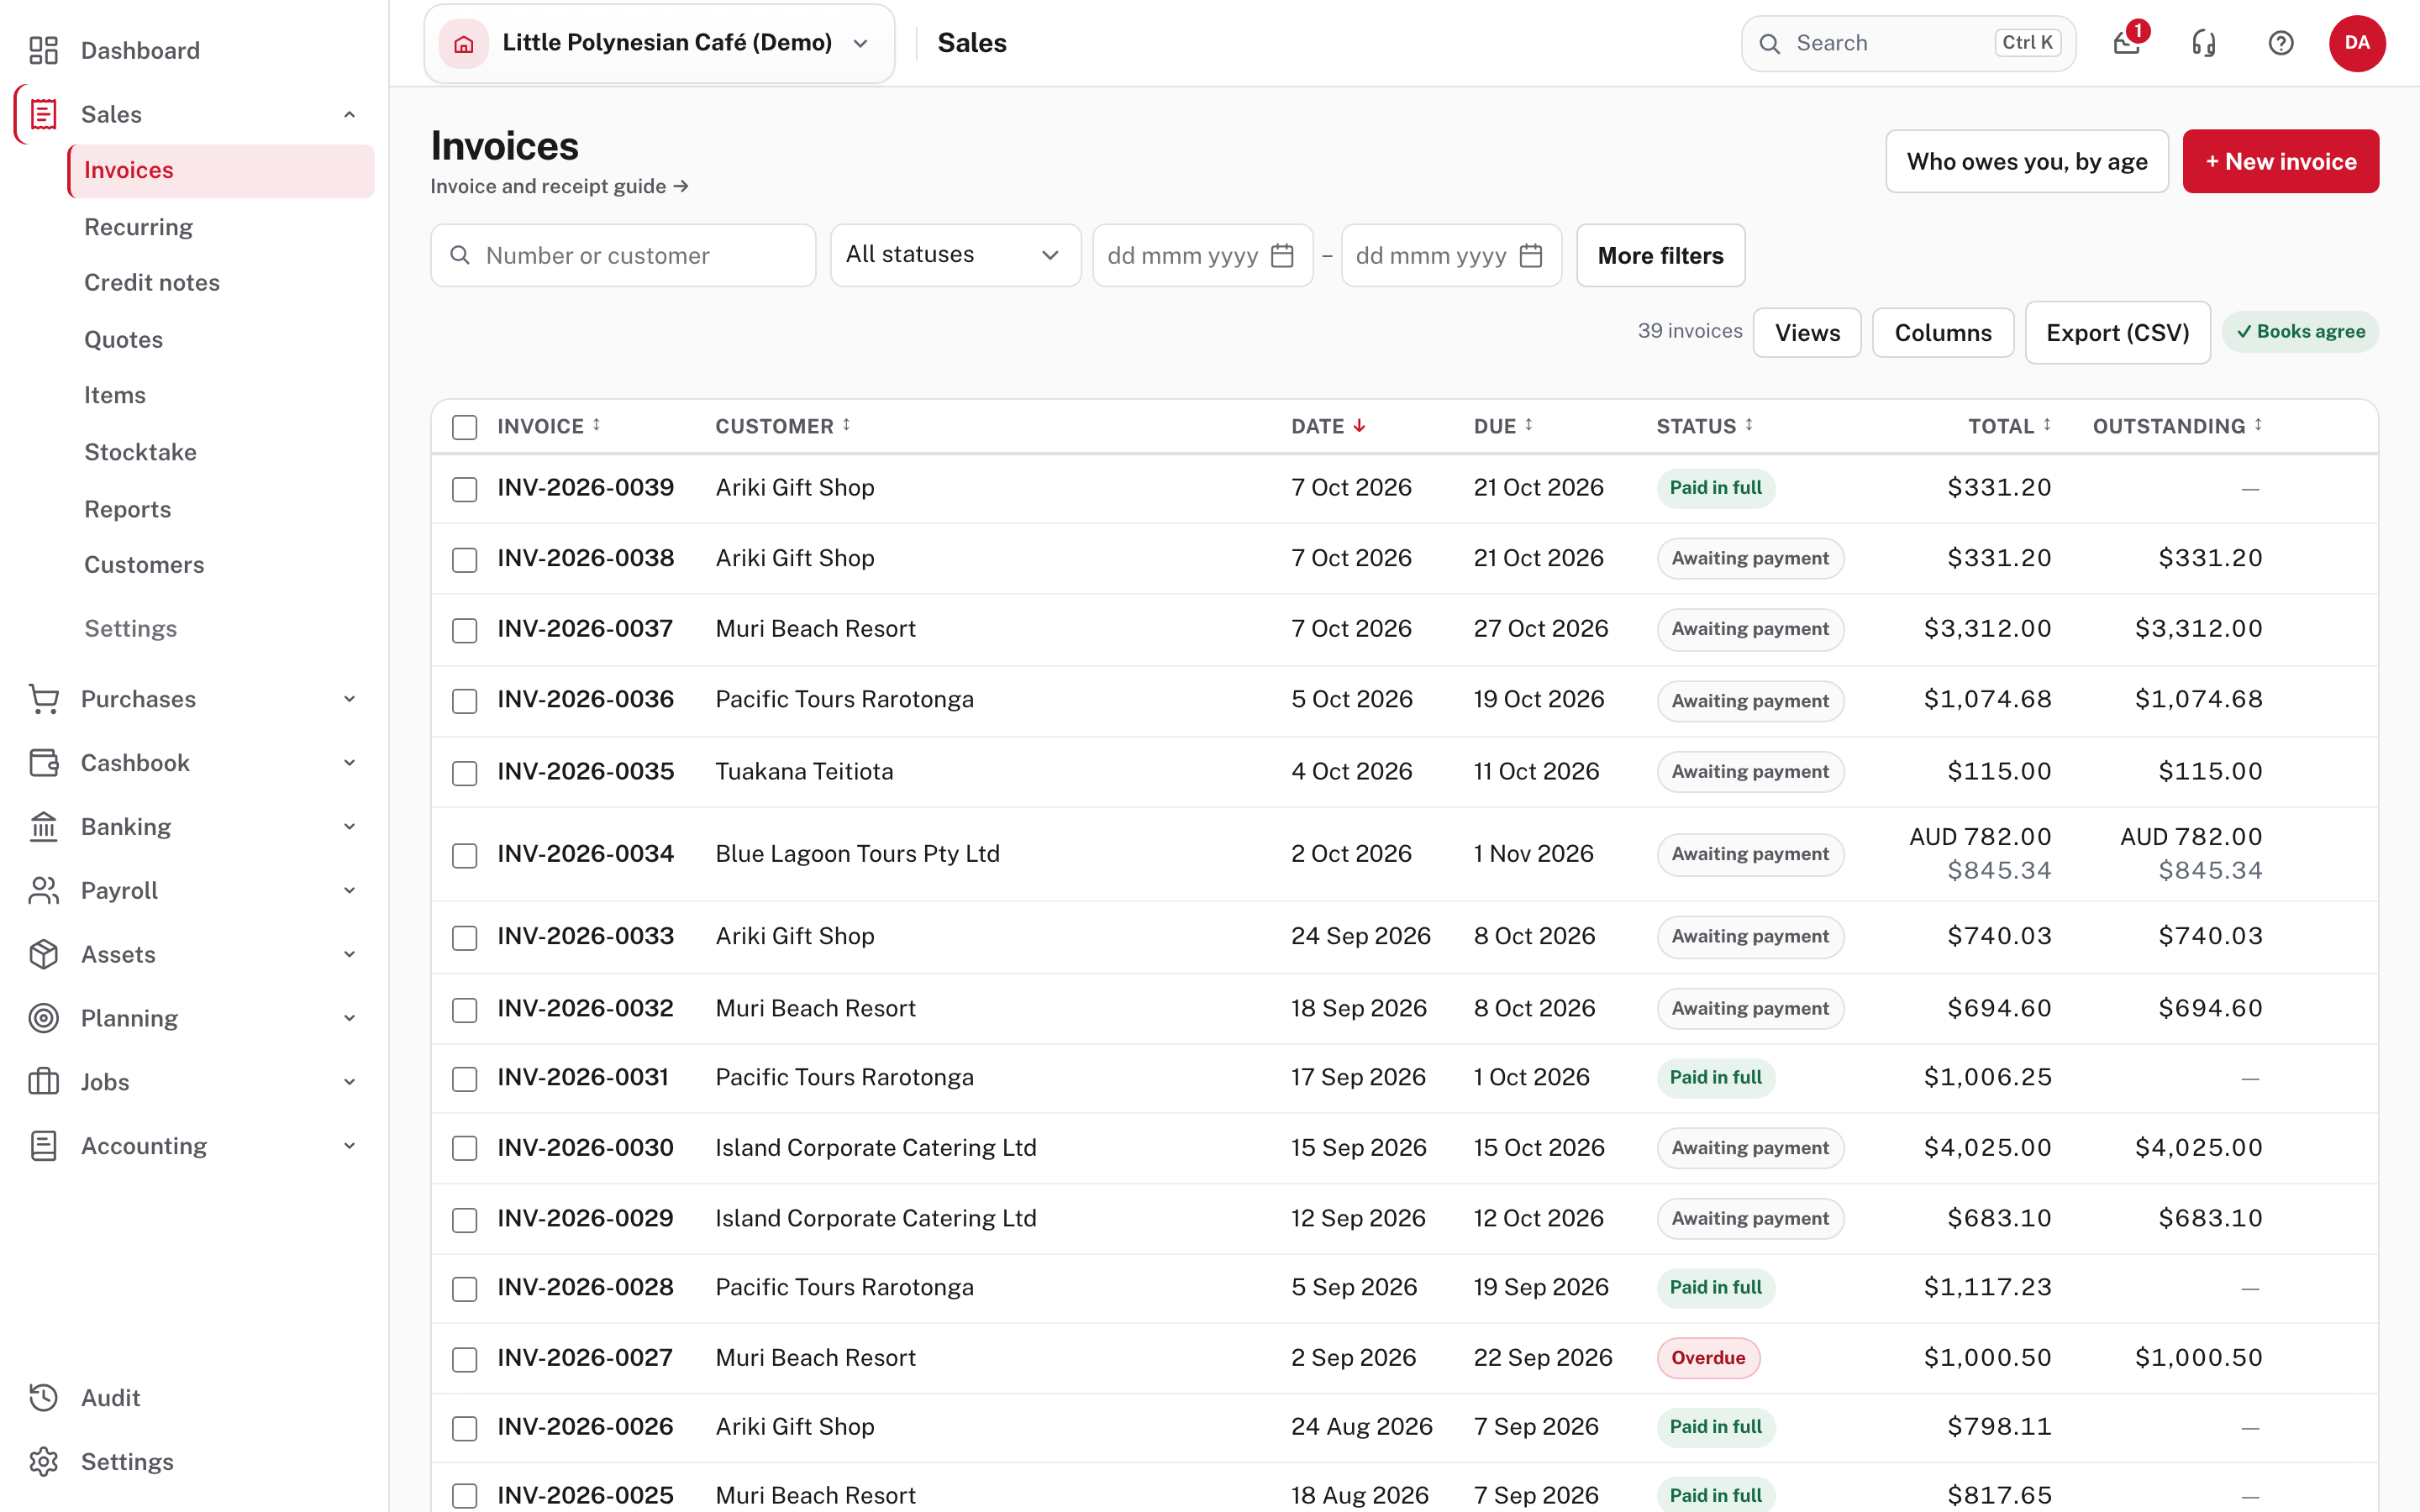
The list shows every invoice with its customer, date, due date, status, total and what is still outstanding. Filter it by status: Draft, Awaiting payment, Part-paid, Overdue, Paid in full or Undone. Who owes you, by age at the top opens the aged receivables report.
Choose + New invoice.
Step 2. Fill in the invoice
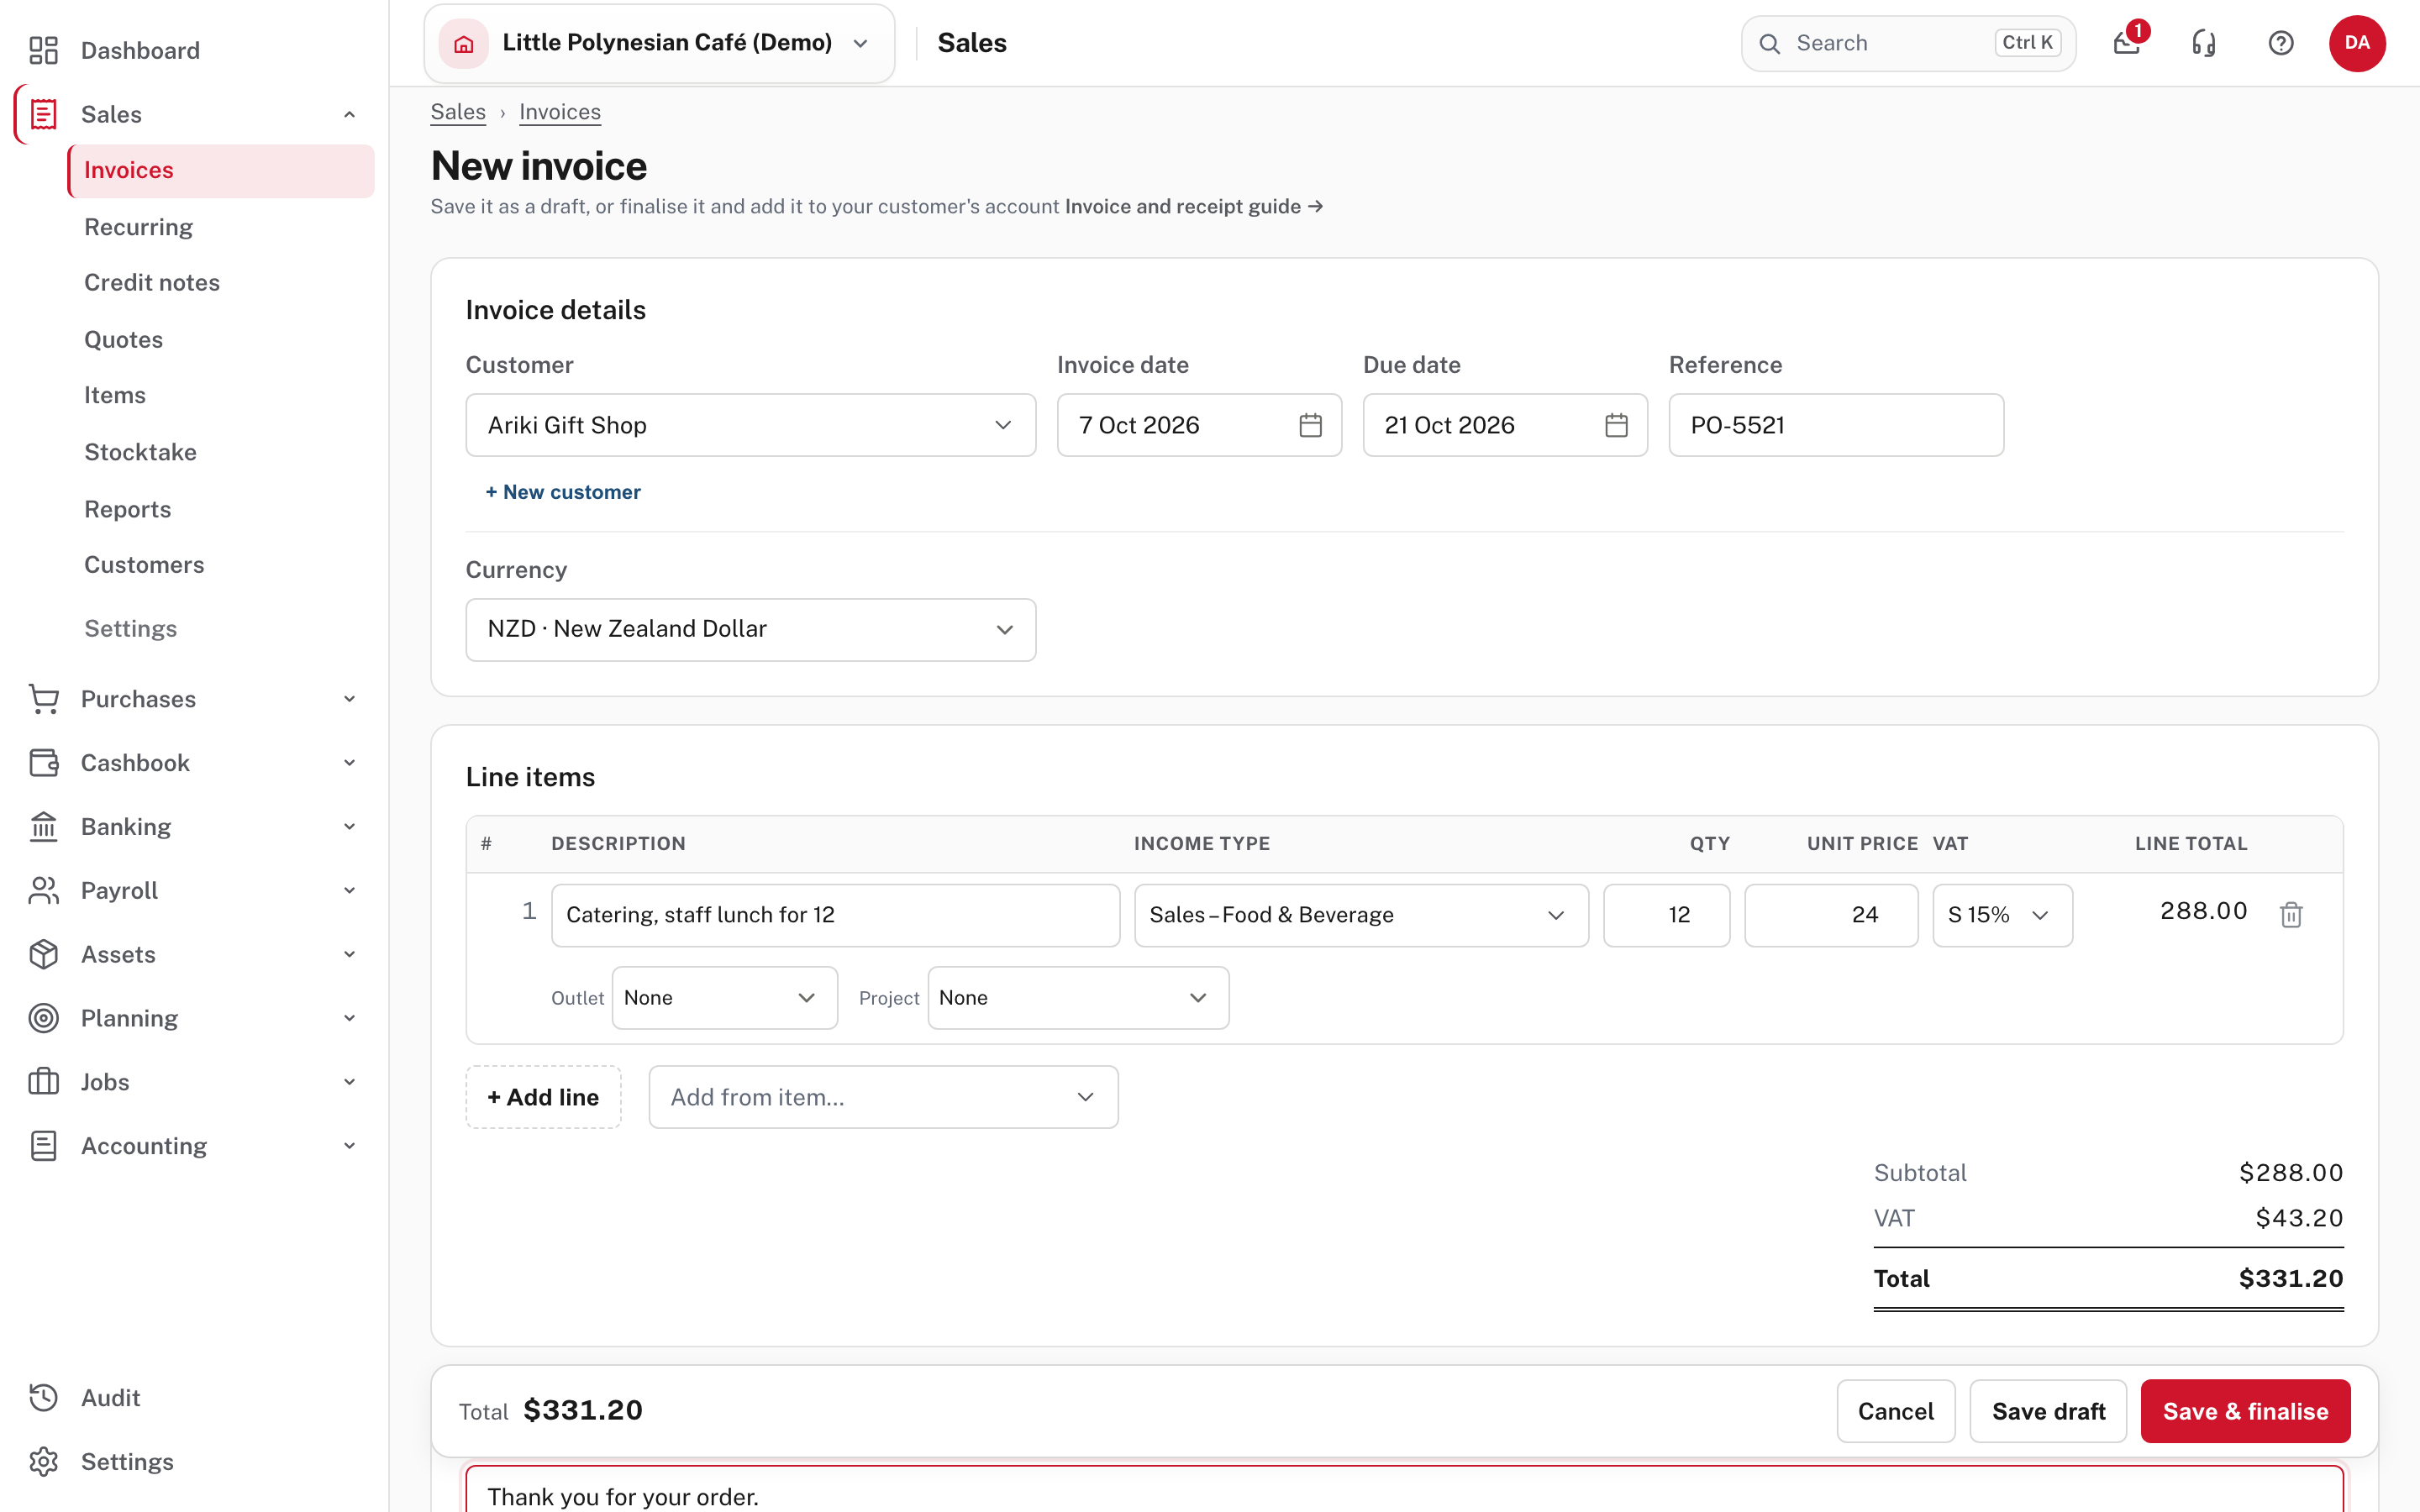
- Customer: type to search. The list shows what each customer already owes you.
- Invoice date is today's date, and the Due date is filled in for you; change either if you need to.
- Reference is the customer's own reference, such as their purchase order number. It prints as Your reference.
- Currency: the company's currency, or another you have switched on.
- Line items: for each line, a description, the income type (the account the sale is recorded against), the quantity, the unit price and the VAT code (the standard rate is filled in). Outlet and Project tag the line for reporting. + Add line adds another, and Add from item fills a line from a saved item.
- Notes are printed on the invoice below the line items.
The subtotal, VAT and total update as you type.
Step 3. Save it as a draft, or finalise it
At the bottom you choose:
- Save draft if someone needs to check it first. A draft is not yet on your customer's account or in your books.
- Save & finalise when it is ready. Finalising adds the invoice to your customer's account and to your books.
If an invoice can't be finalised, the draft stays available; read the message, fix the cause and try again.
Step 4. Send it to the customer
Finalising opens the invoice.
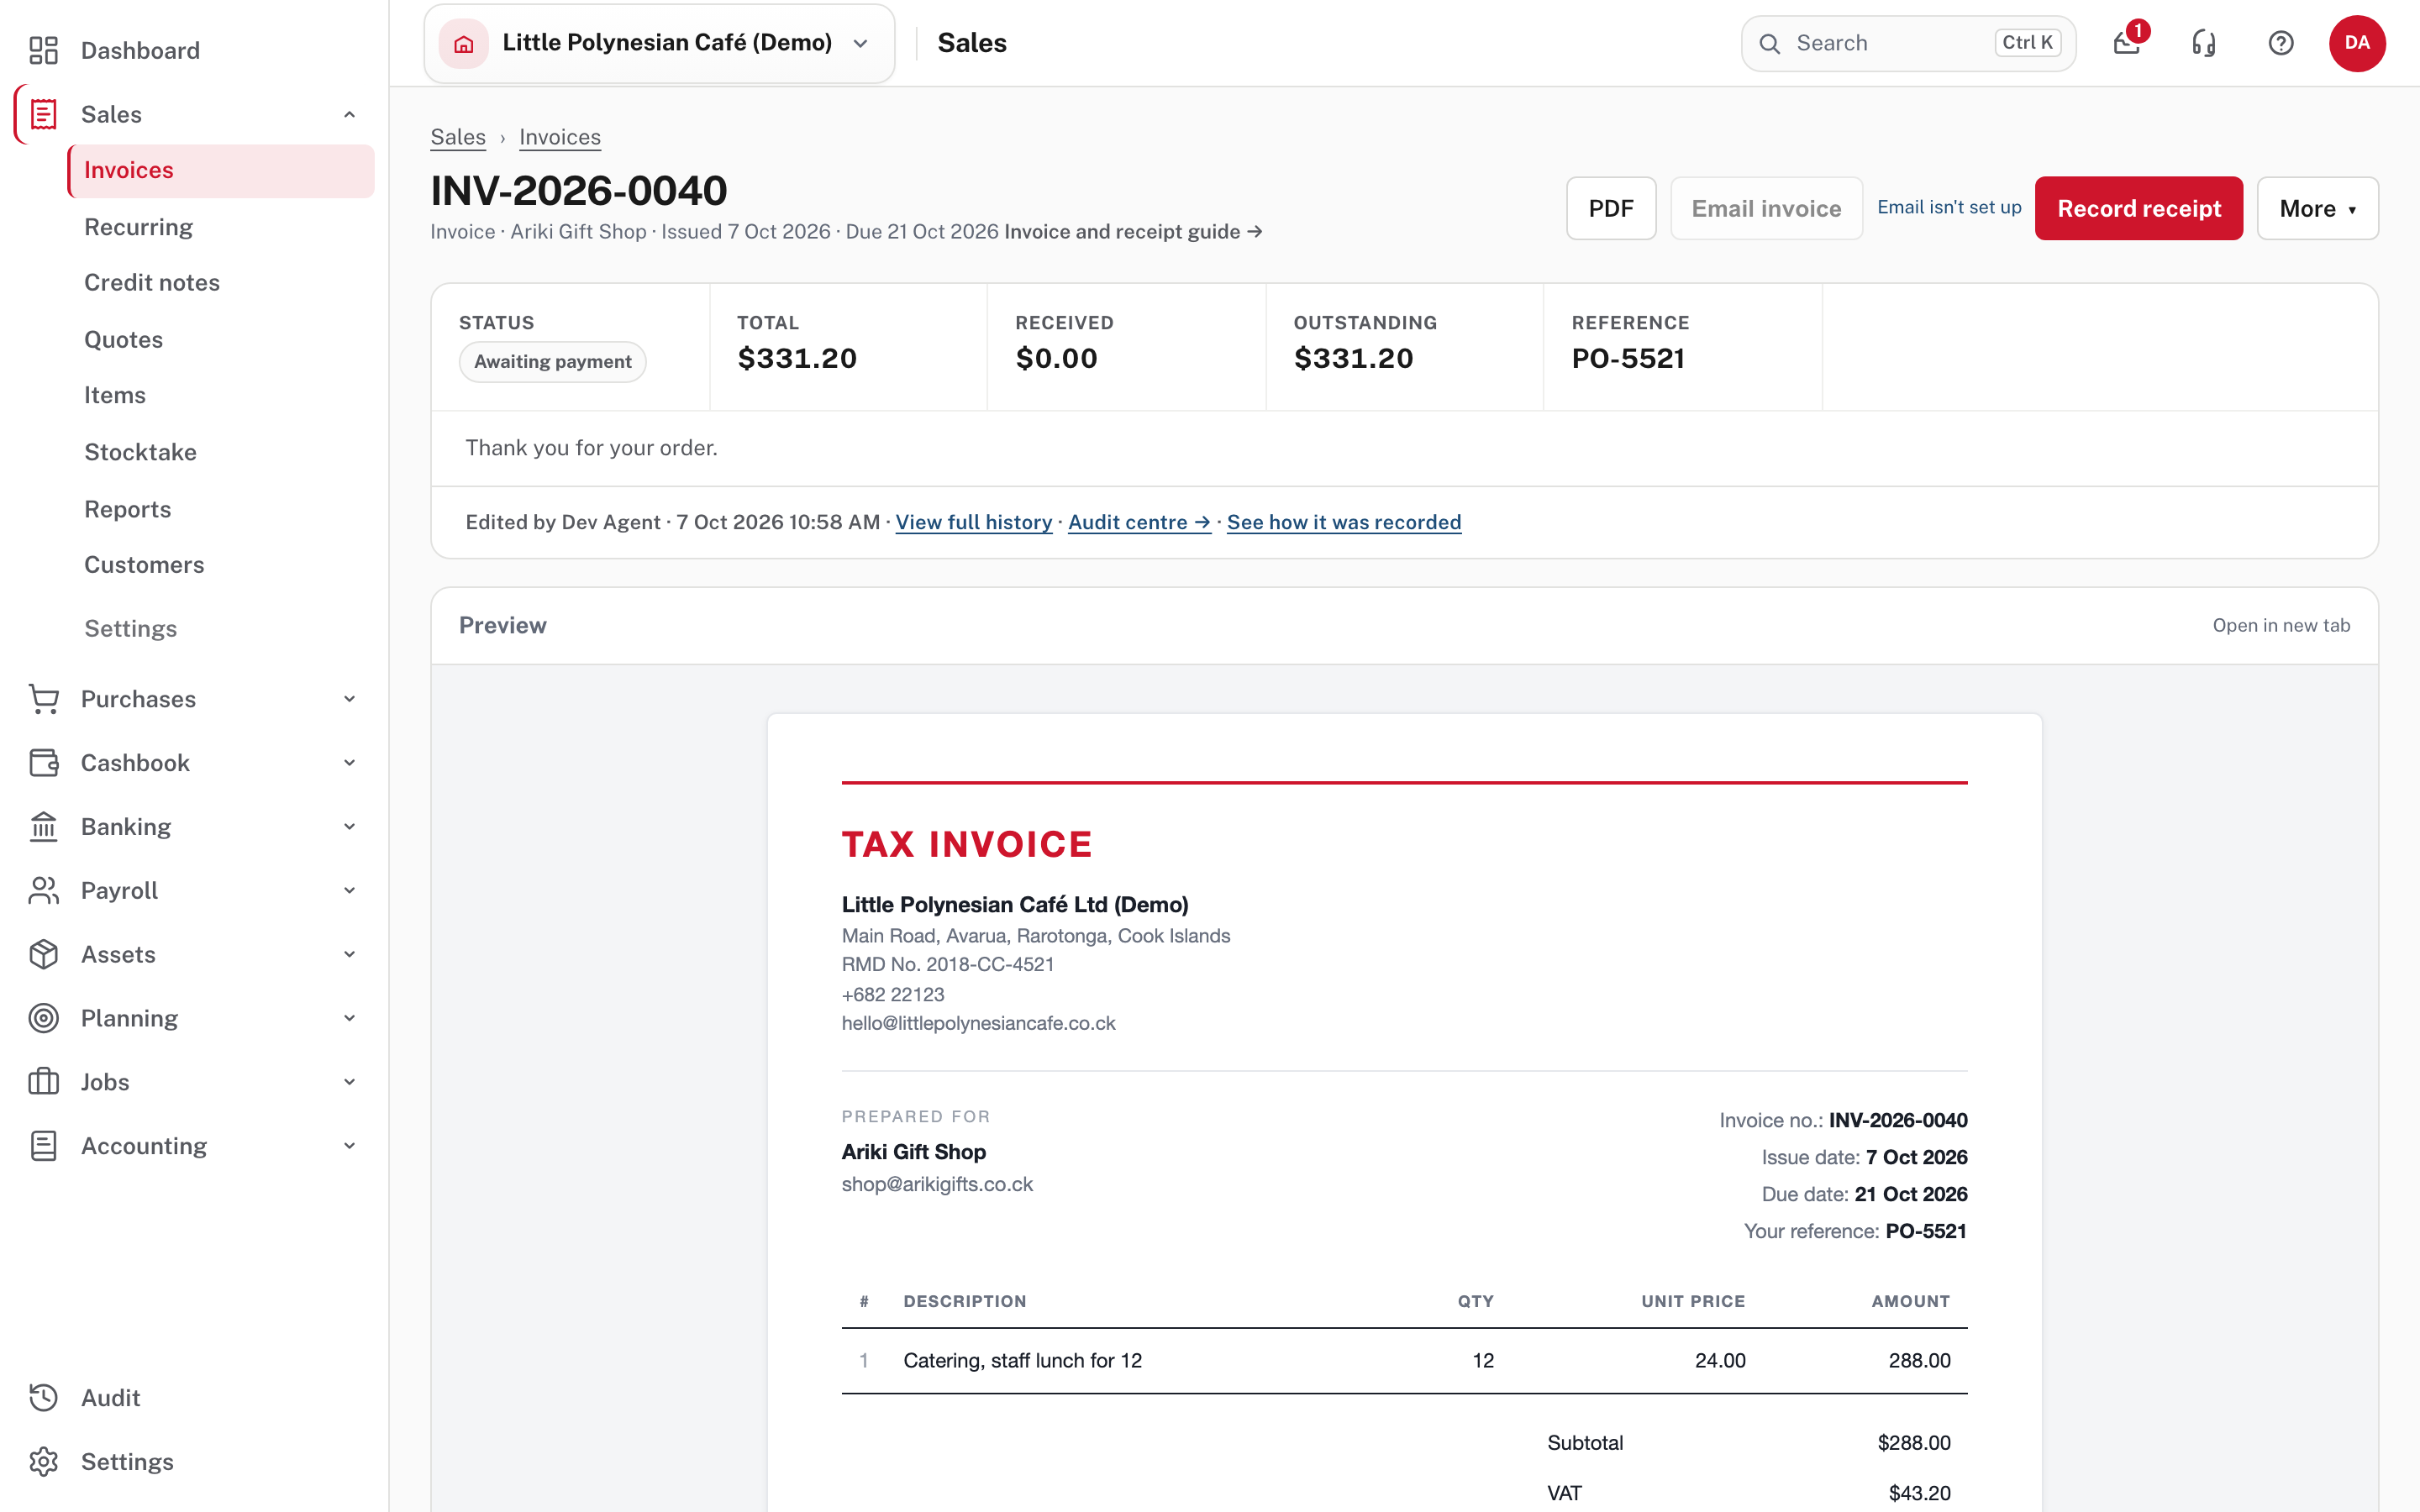
Along the top: PDF, Email invoice, Record receipt and More. The summary shows the status (here Awaiting payment), the total, what has been received and what is outstanding, and the reference.
- Email invoice sends the invoice to the customer. A customer's email can hold up to five addresses, separated by commas, and the invoice goes to all of them in one message. If the button is greyed out and says Email isn't set up, email sending has not been switched on for your company yet. Download the PDF and send it yourself until it is.
- PDF downloads the invoice as it prints.
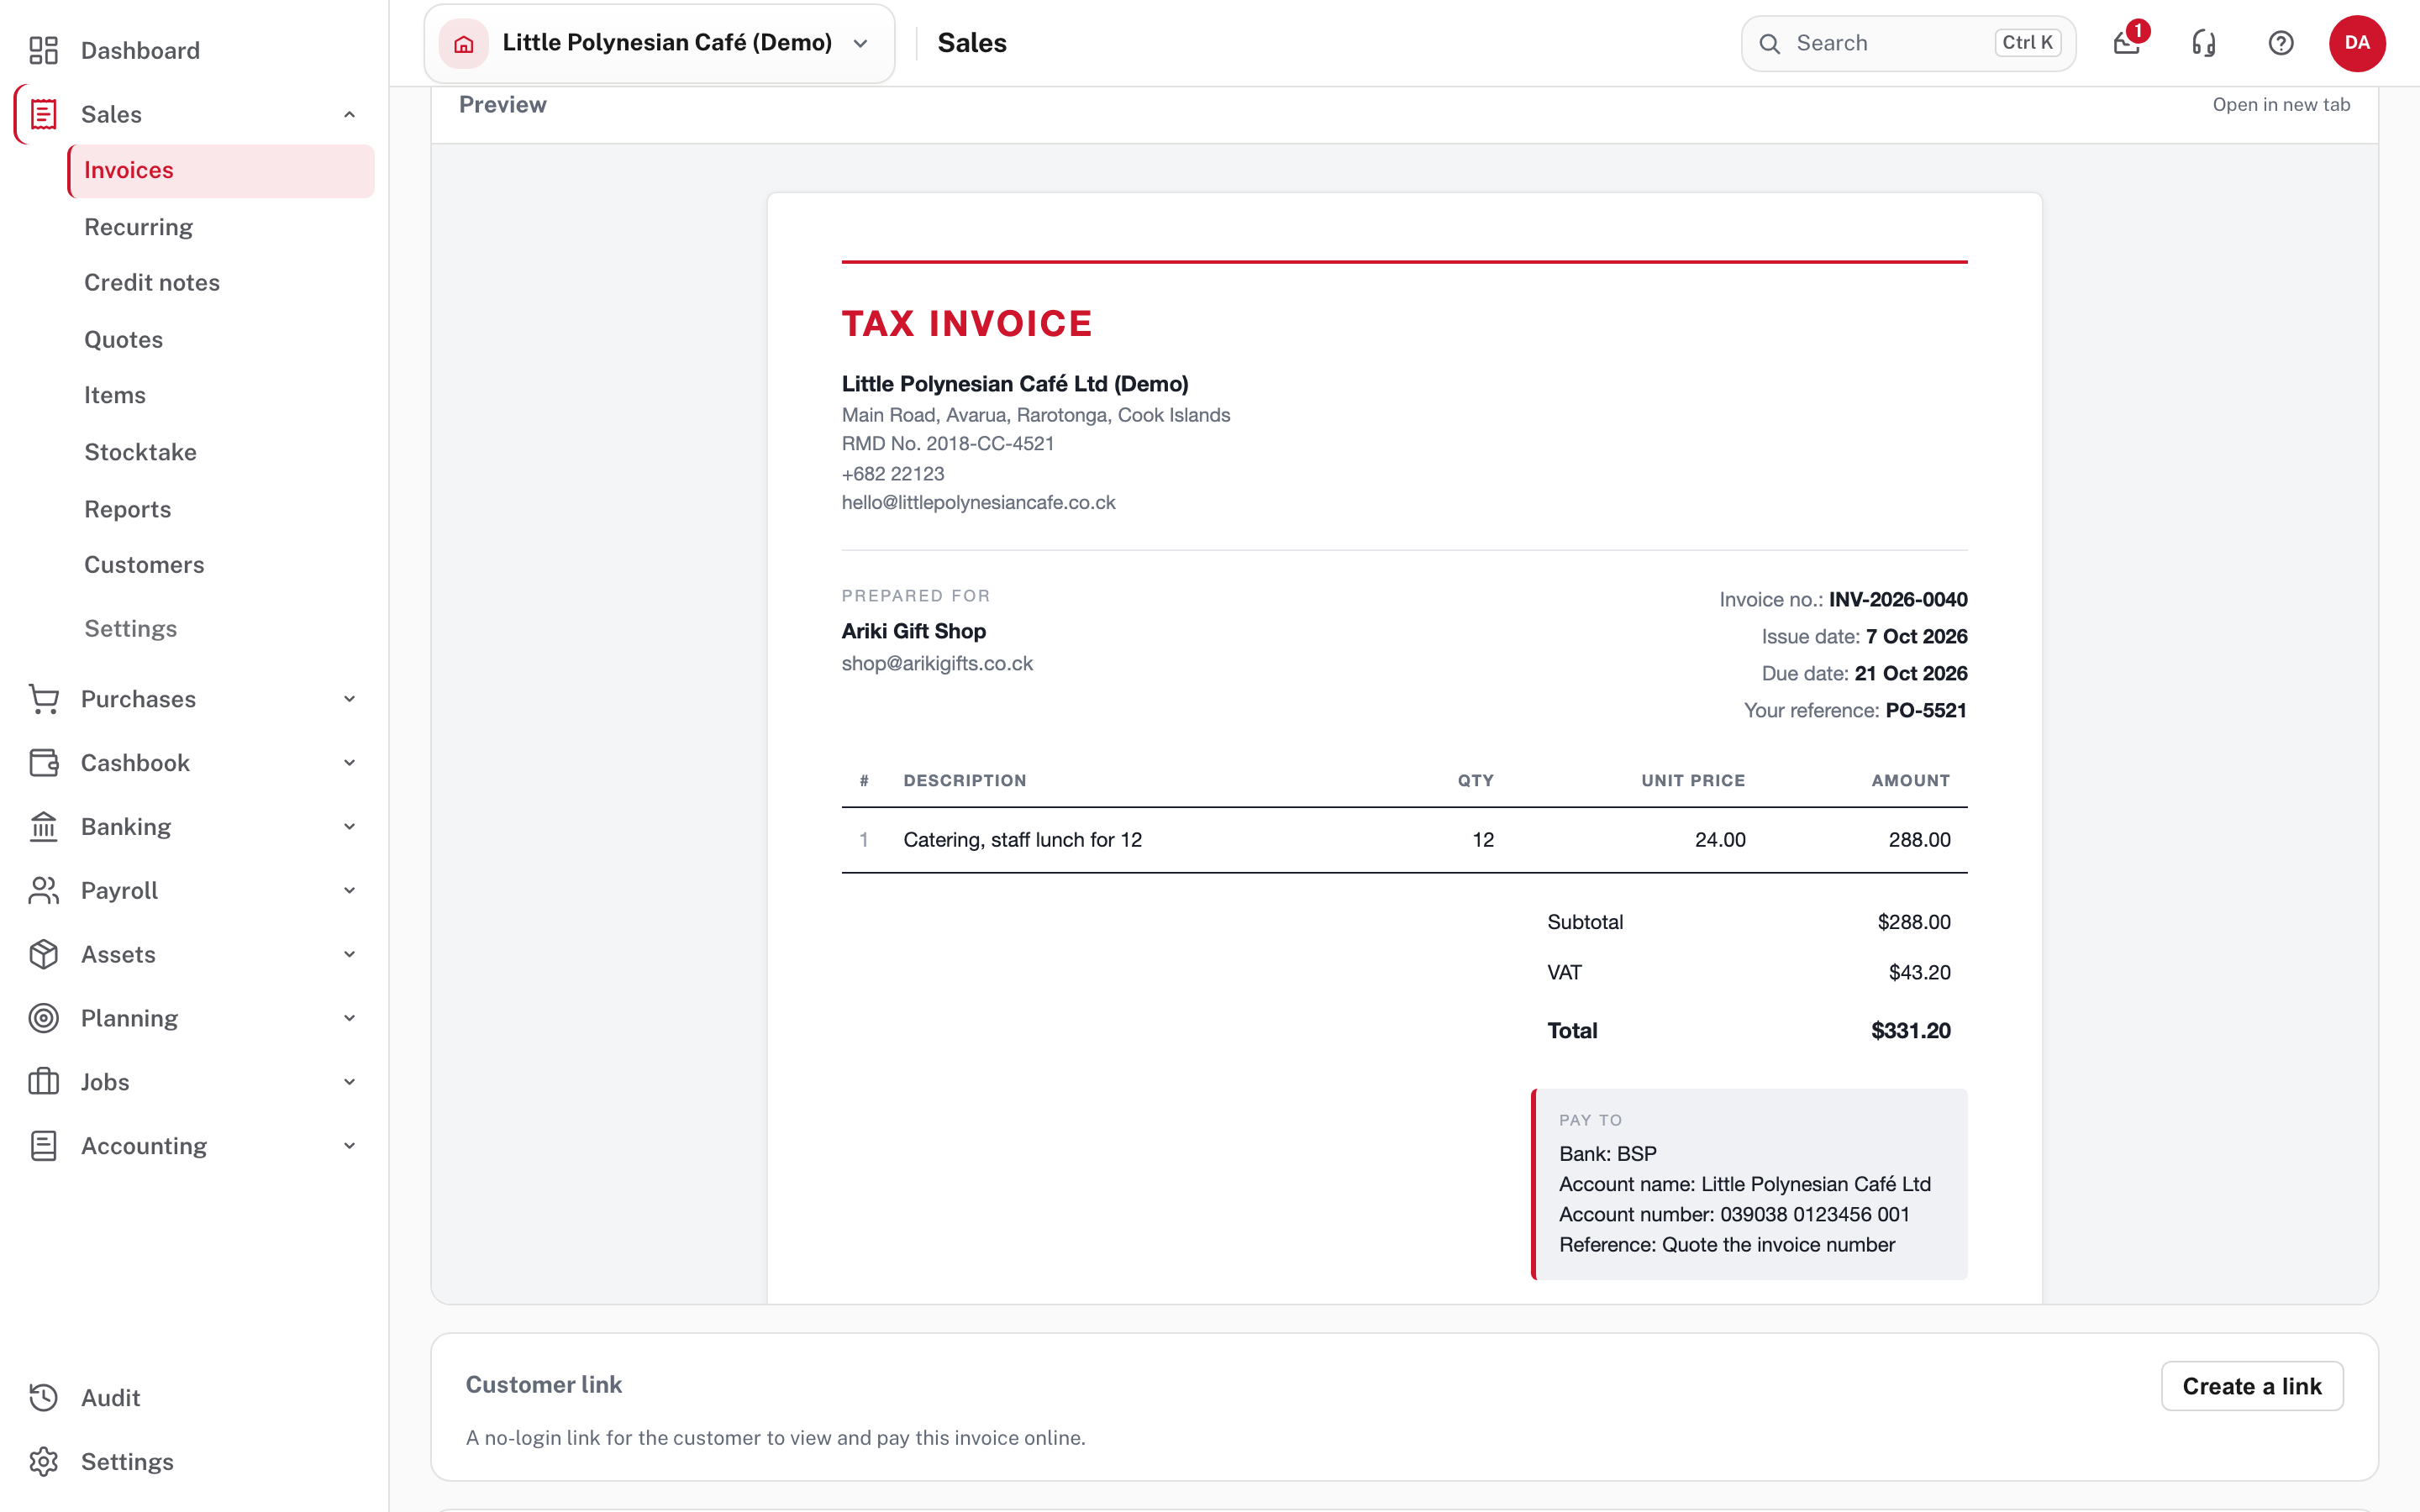
Scroll down to the Preview: this is the invoice exactly as it will print, including the Pay to bank details. Check it the first time you raise an invoice with a new theme.
Below it, Customer link can create a link: a no-login link for the customer to view and pay the invoice online. Attachments keeps customer orders, delivery notes or scanned paperwork with the invoice, and History shows what has happened to it.
Step 5. Record the money when it arrives
Choose Record receipt on the invoice (or Cashbook → Receipts).
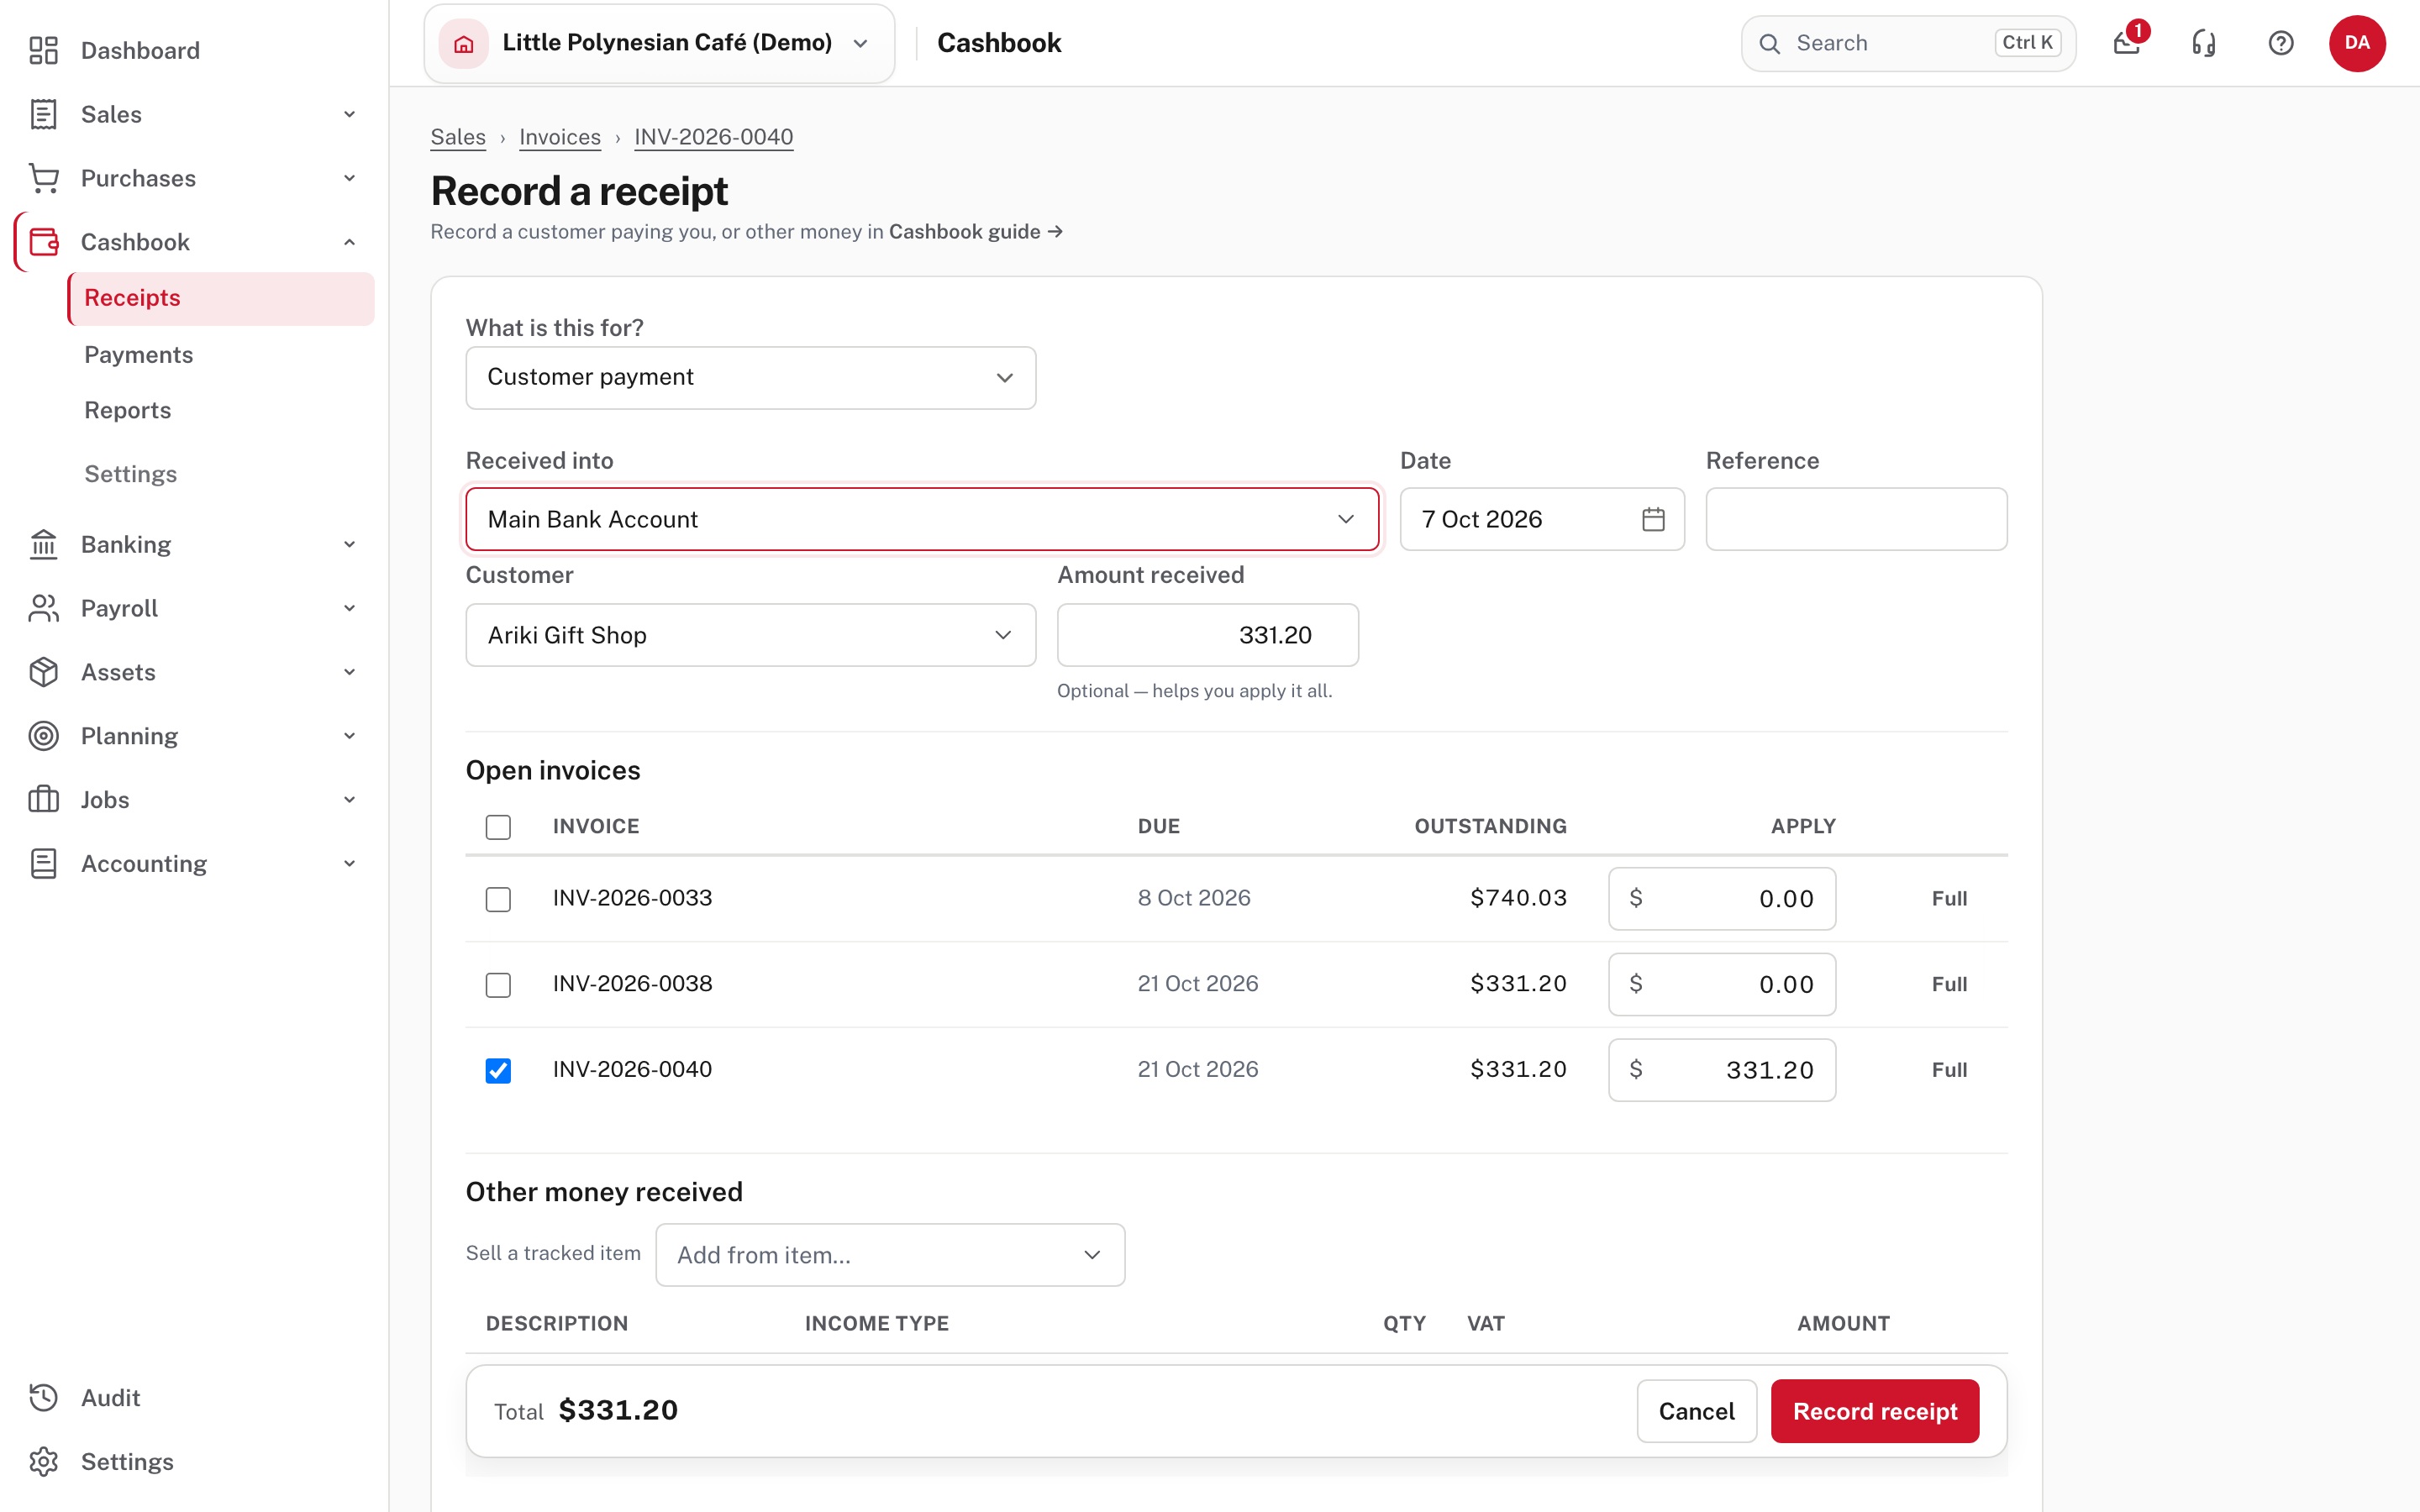
- What is this for? is Customer payment, because you came from an invoice.
- Received into: the bank or cash account the money went into.
- Date, and a Reference if you want one (a bank reference, for example).
- Customer and Amount received. The amount is filled in with what is owing on the invoice.
- Open invoices: the invoices this payment settles, with how much of the payment is applied to each. Here the whole amount is applied to the invoice you came from. Allocate the receipt to the right invoices, so that the amount due falls.
- Choose Record receipt.
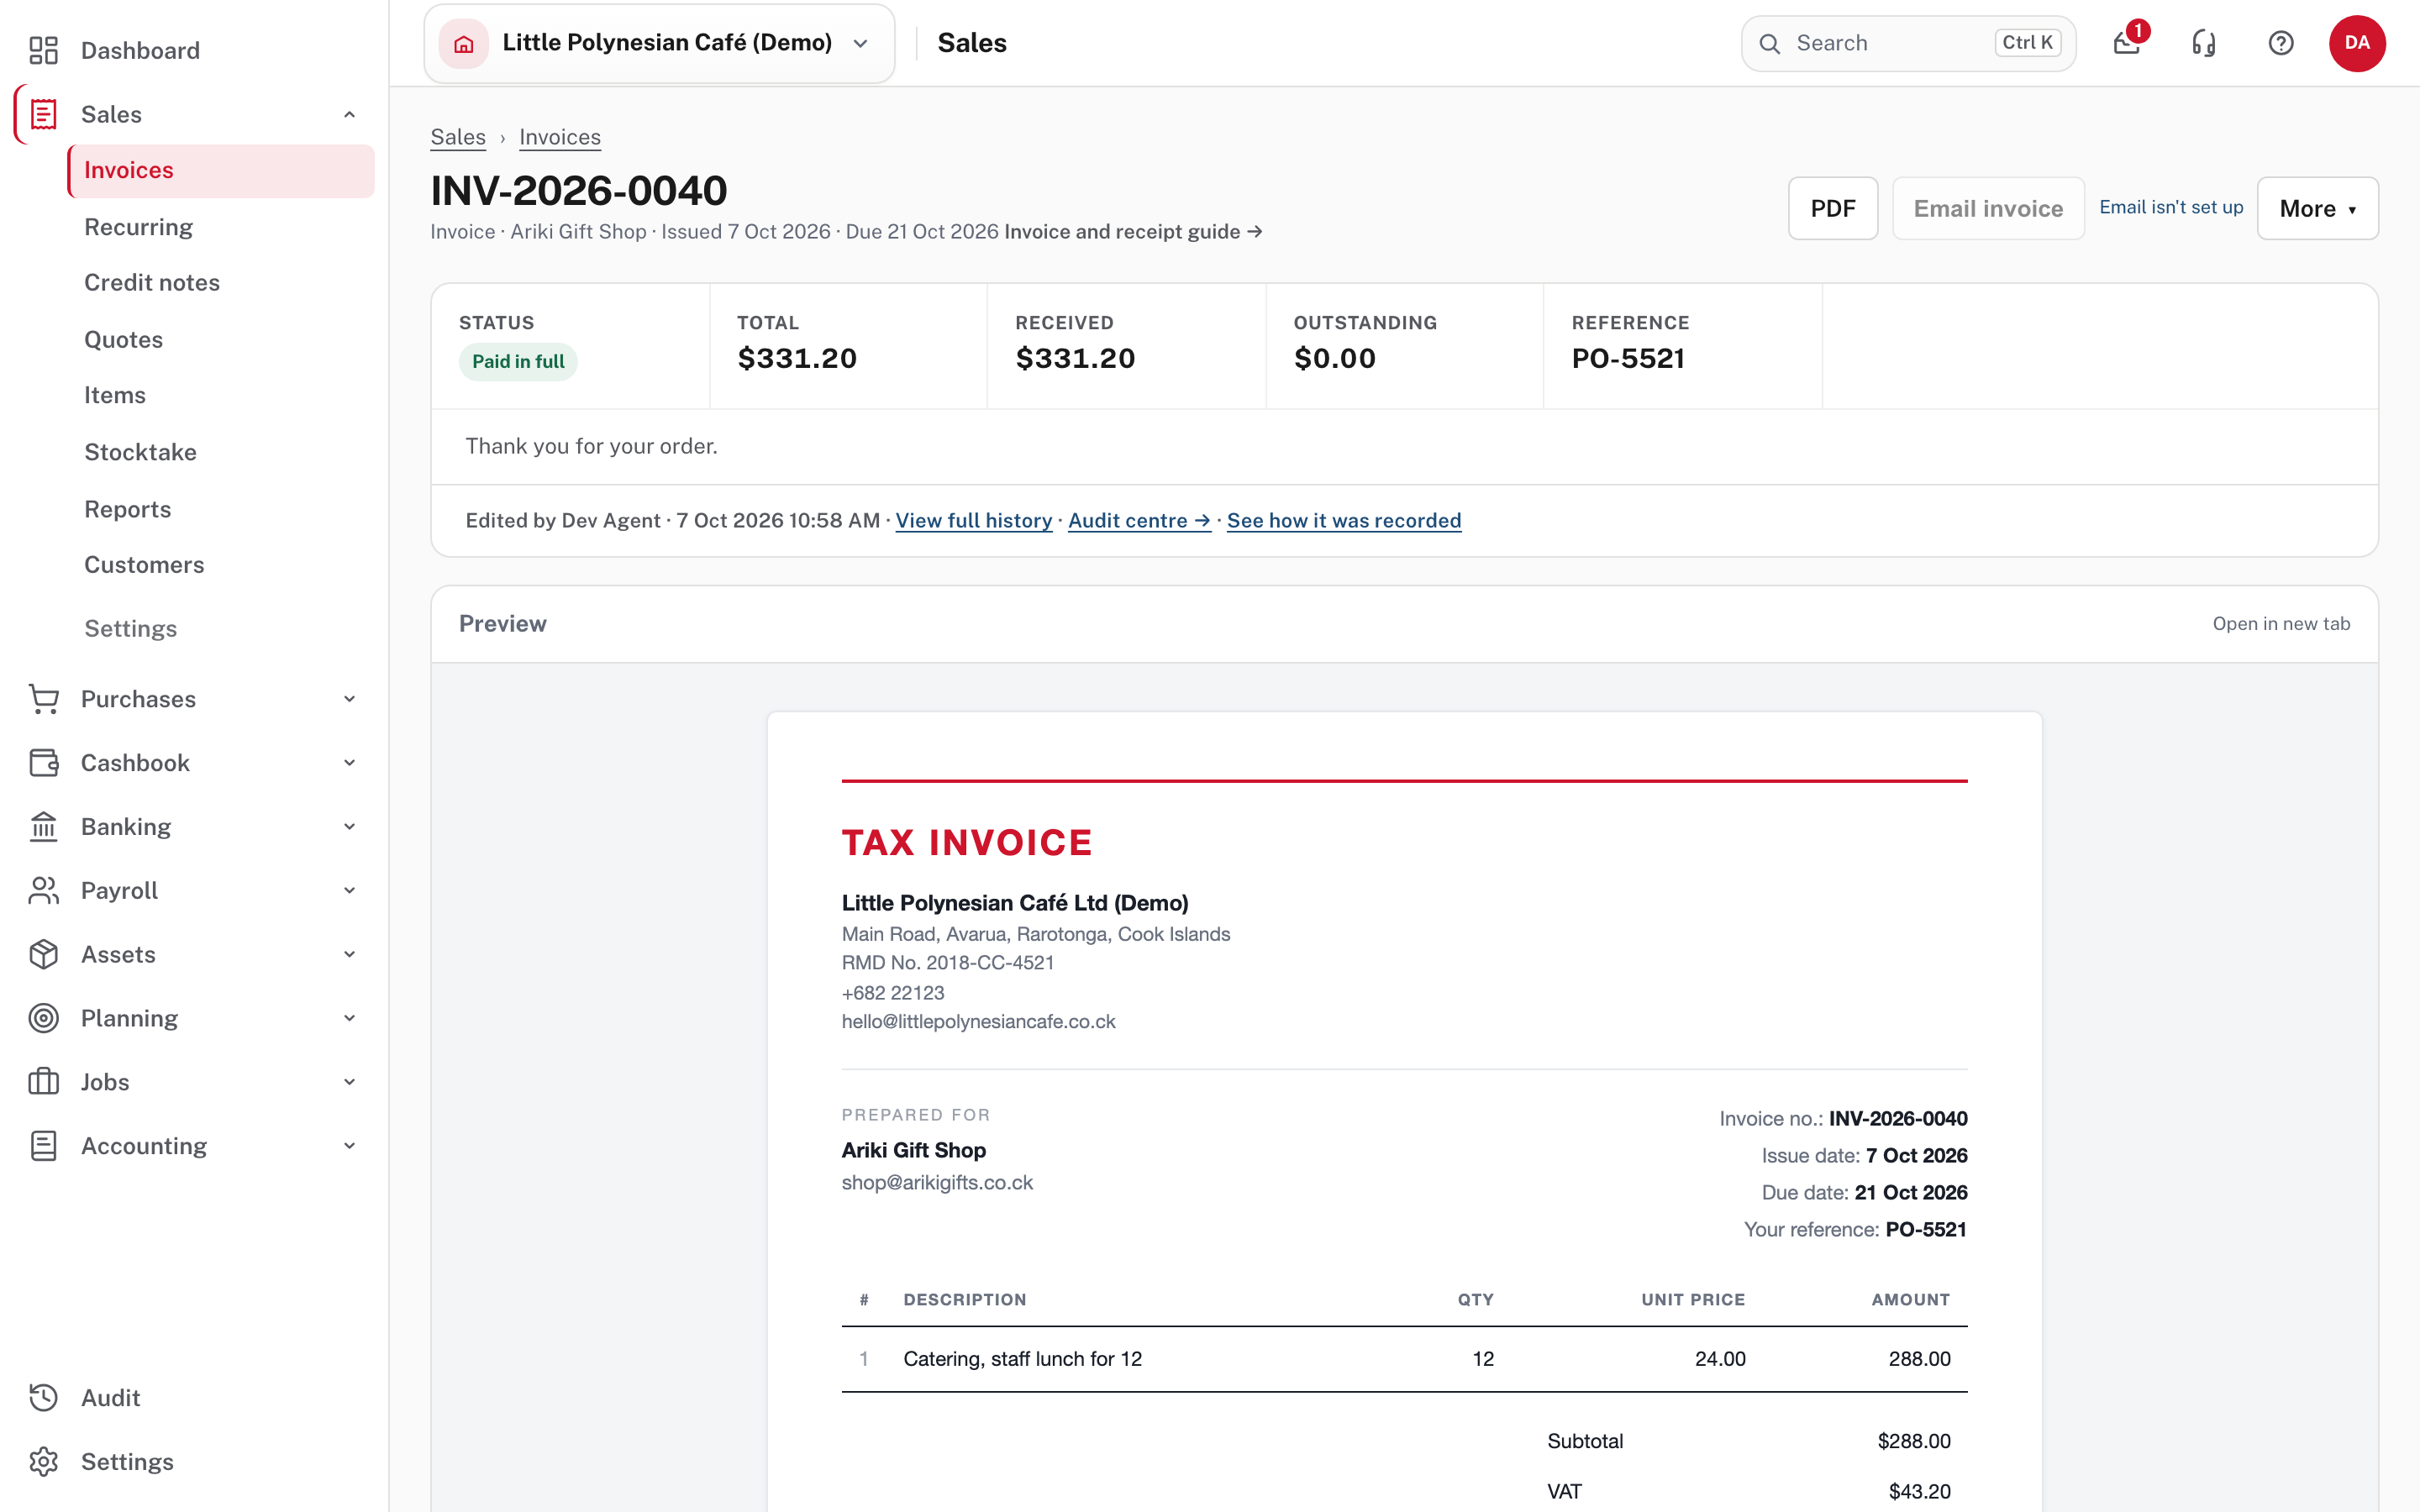
The invoice now reads Paid in full, with nothing outstanding, and the receipt is listed on it.
Check the date
A receipt dated before the invoice it settles is allowed, but the form warns you: until the invoice's date, what customers owe won't agree with your books. If a customer paid too much, or paid twice, see the chapter on credit notes and corrections.
Step 6. Correct a mistake
Open the invoice and choose More.
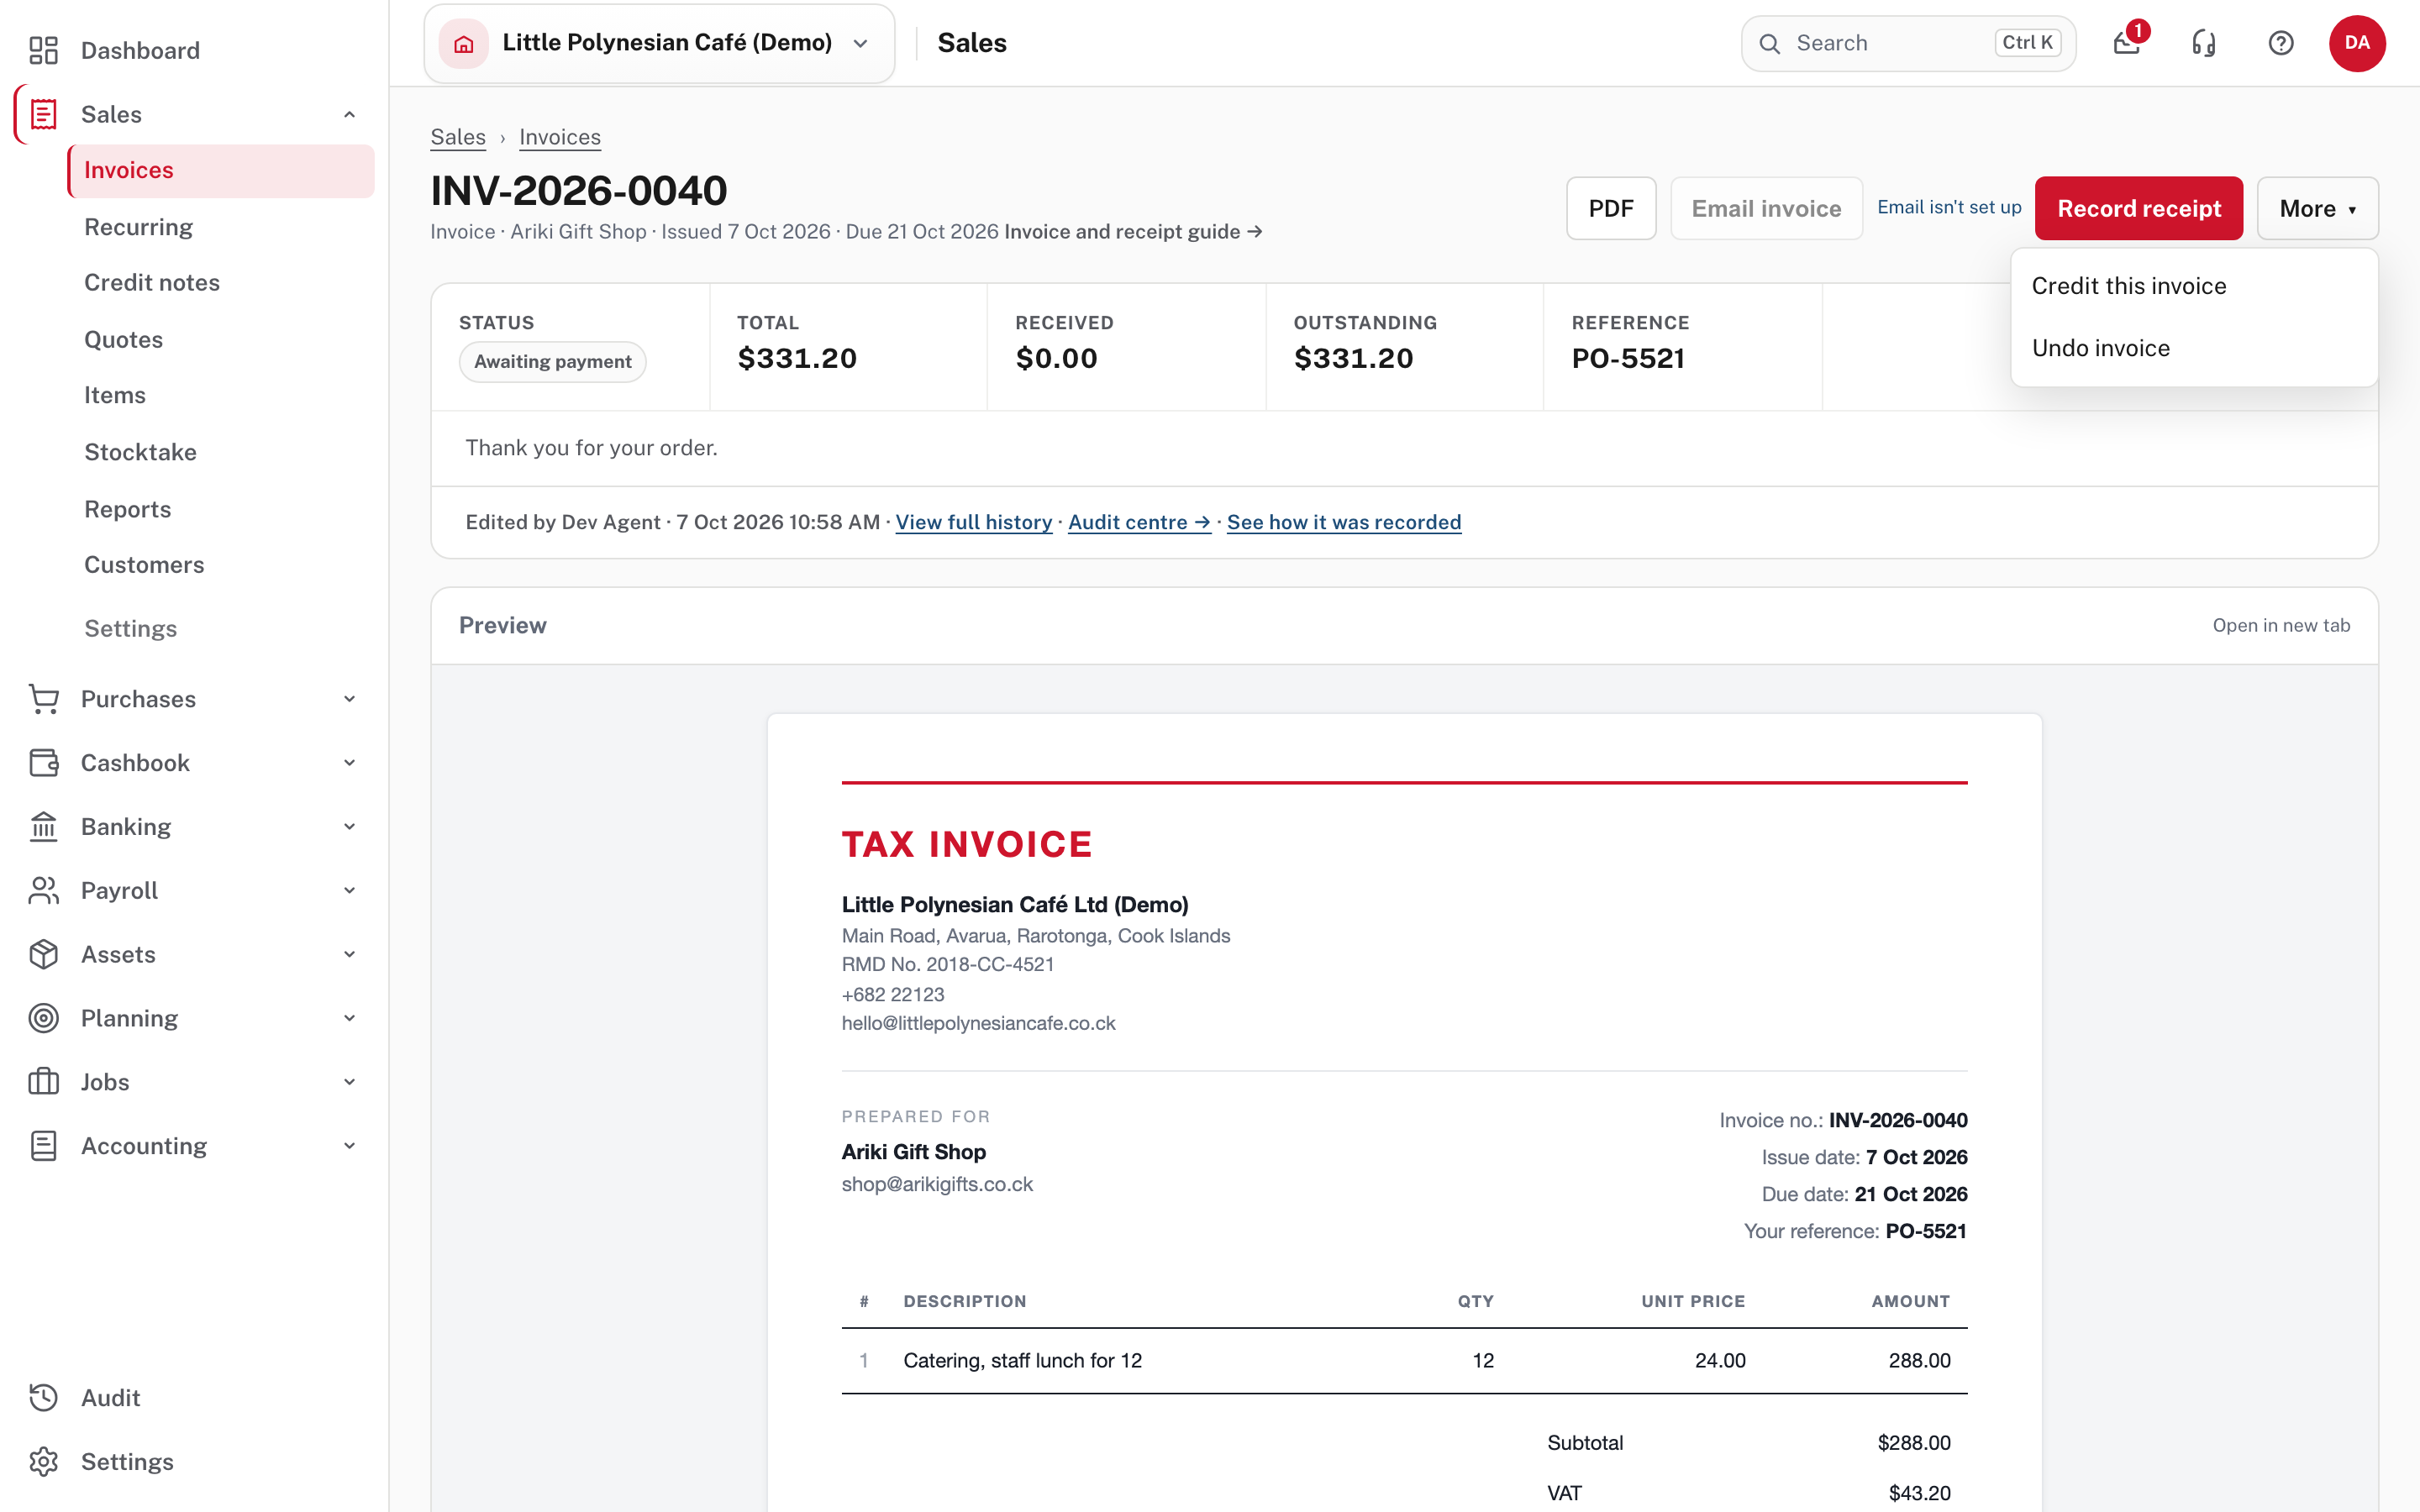
- Credit this invoice raises a credit note against it, when the customer has been charged too much or sends goods back.
- Undo invoice takes the invoice back out of your books.
Correct it here rather than changing what customers owe with a journal. A receipt can be undone from the receipt itself.
More detail: Undoing, correcting and allocating.
Recurring invoices
For work you bill on a schedule, use Sales → Recurring: save a draft invoice with the lines to repeat, then choose it as the template. A draft used as a template is not an invoice you send, so it does not appear under Invoices; open it from its recurring invoice to change the lines. Each run makes its own invoice.
More detail: Invoices and customer receipts.
Check before you continue
Check before you continue
- The customer, dates and currency are right, and each line has the right income type and VAT code.
- The preview shows your logo, business details and Pay to bank account.
- The invoice has been sent (or its PDF downloaded and sent), to every address that should get it.
- When the money arrives, the receipt is applied to the right invoice and the bank account it really went into.
- Overdue invoices are chased: see Chasing overdue invoices.
Next
Bills are the other side: Enter, approve and record a bill.