Reporting dimensions
A reporting dimension is a label you can put on a line of a transaction, so you can report on the business in slices without adding more accounts. The café has Outlet (the Avarua café and the Muri beach kiosk) and Project (one for each job). A sale tagged Muri beach kiosk still goes to Sales like any other, and the profit and loss can then show a column for each outlet. You set a dimension up once, then tag lines as you enter them, and read Profit and loss by dimension. Setting up is accountant's work; anyone who can read the books can read the report. It belongs with Reading the financial reports and Manual journals.
About the screenshots
Screenshots are from Easy's demo company, Little Polynesian Café. The demo has two dimensions: Outlet, and Project (whose values are the demo's jobs). The pictures add one value, Manual: Aitutaki market stall, and one journal that tags a $120 repair to it. Amounts are made up. The forms for adding or changing a dimension are shown and cancelled, so the demo still has one free slot.
Before you start
- Who can set dimensions up. The page is under Settings → Accounting & tax, so it is open to the people who do accounting setup; Data entry and read-only roles see "You don't have access to this" (People, roles and access).
- Who can read the report. Any role that can read the books can open Profit and loss by dimension.
- Decide what you want to ask first. A dimension answers one question ("how did each outlet do?"). Each company can have up to three, and a dimension is only as good as the lines that carry it, so choose ones you will actually tag.
Step 1. Look at the dimensions you have
Settings → Accounting & tax → Reporting dimensions
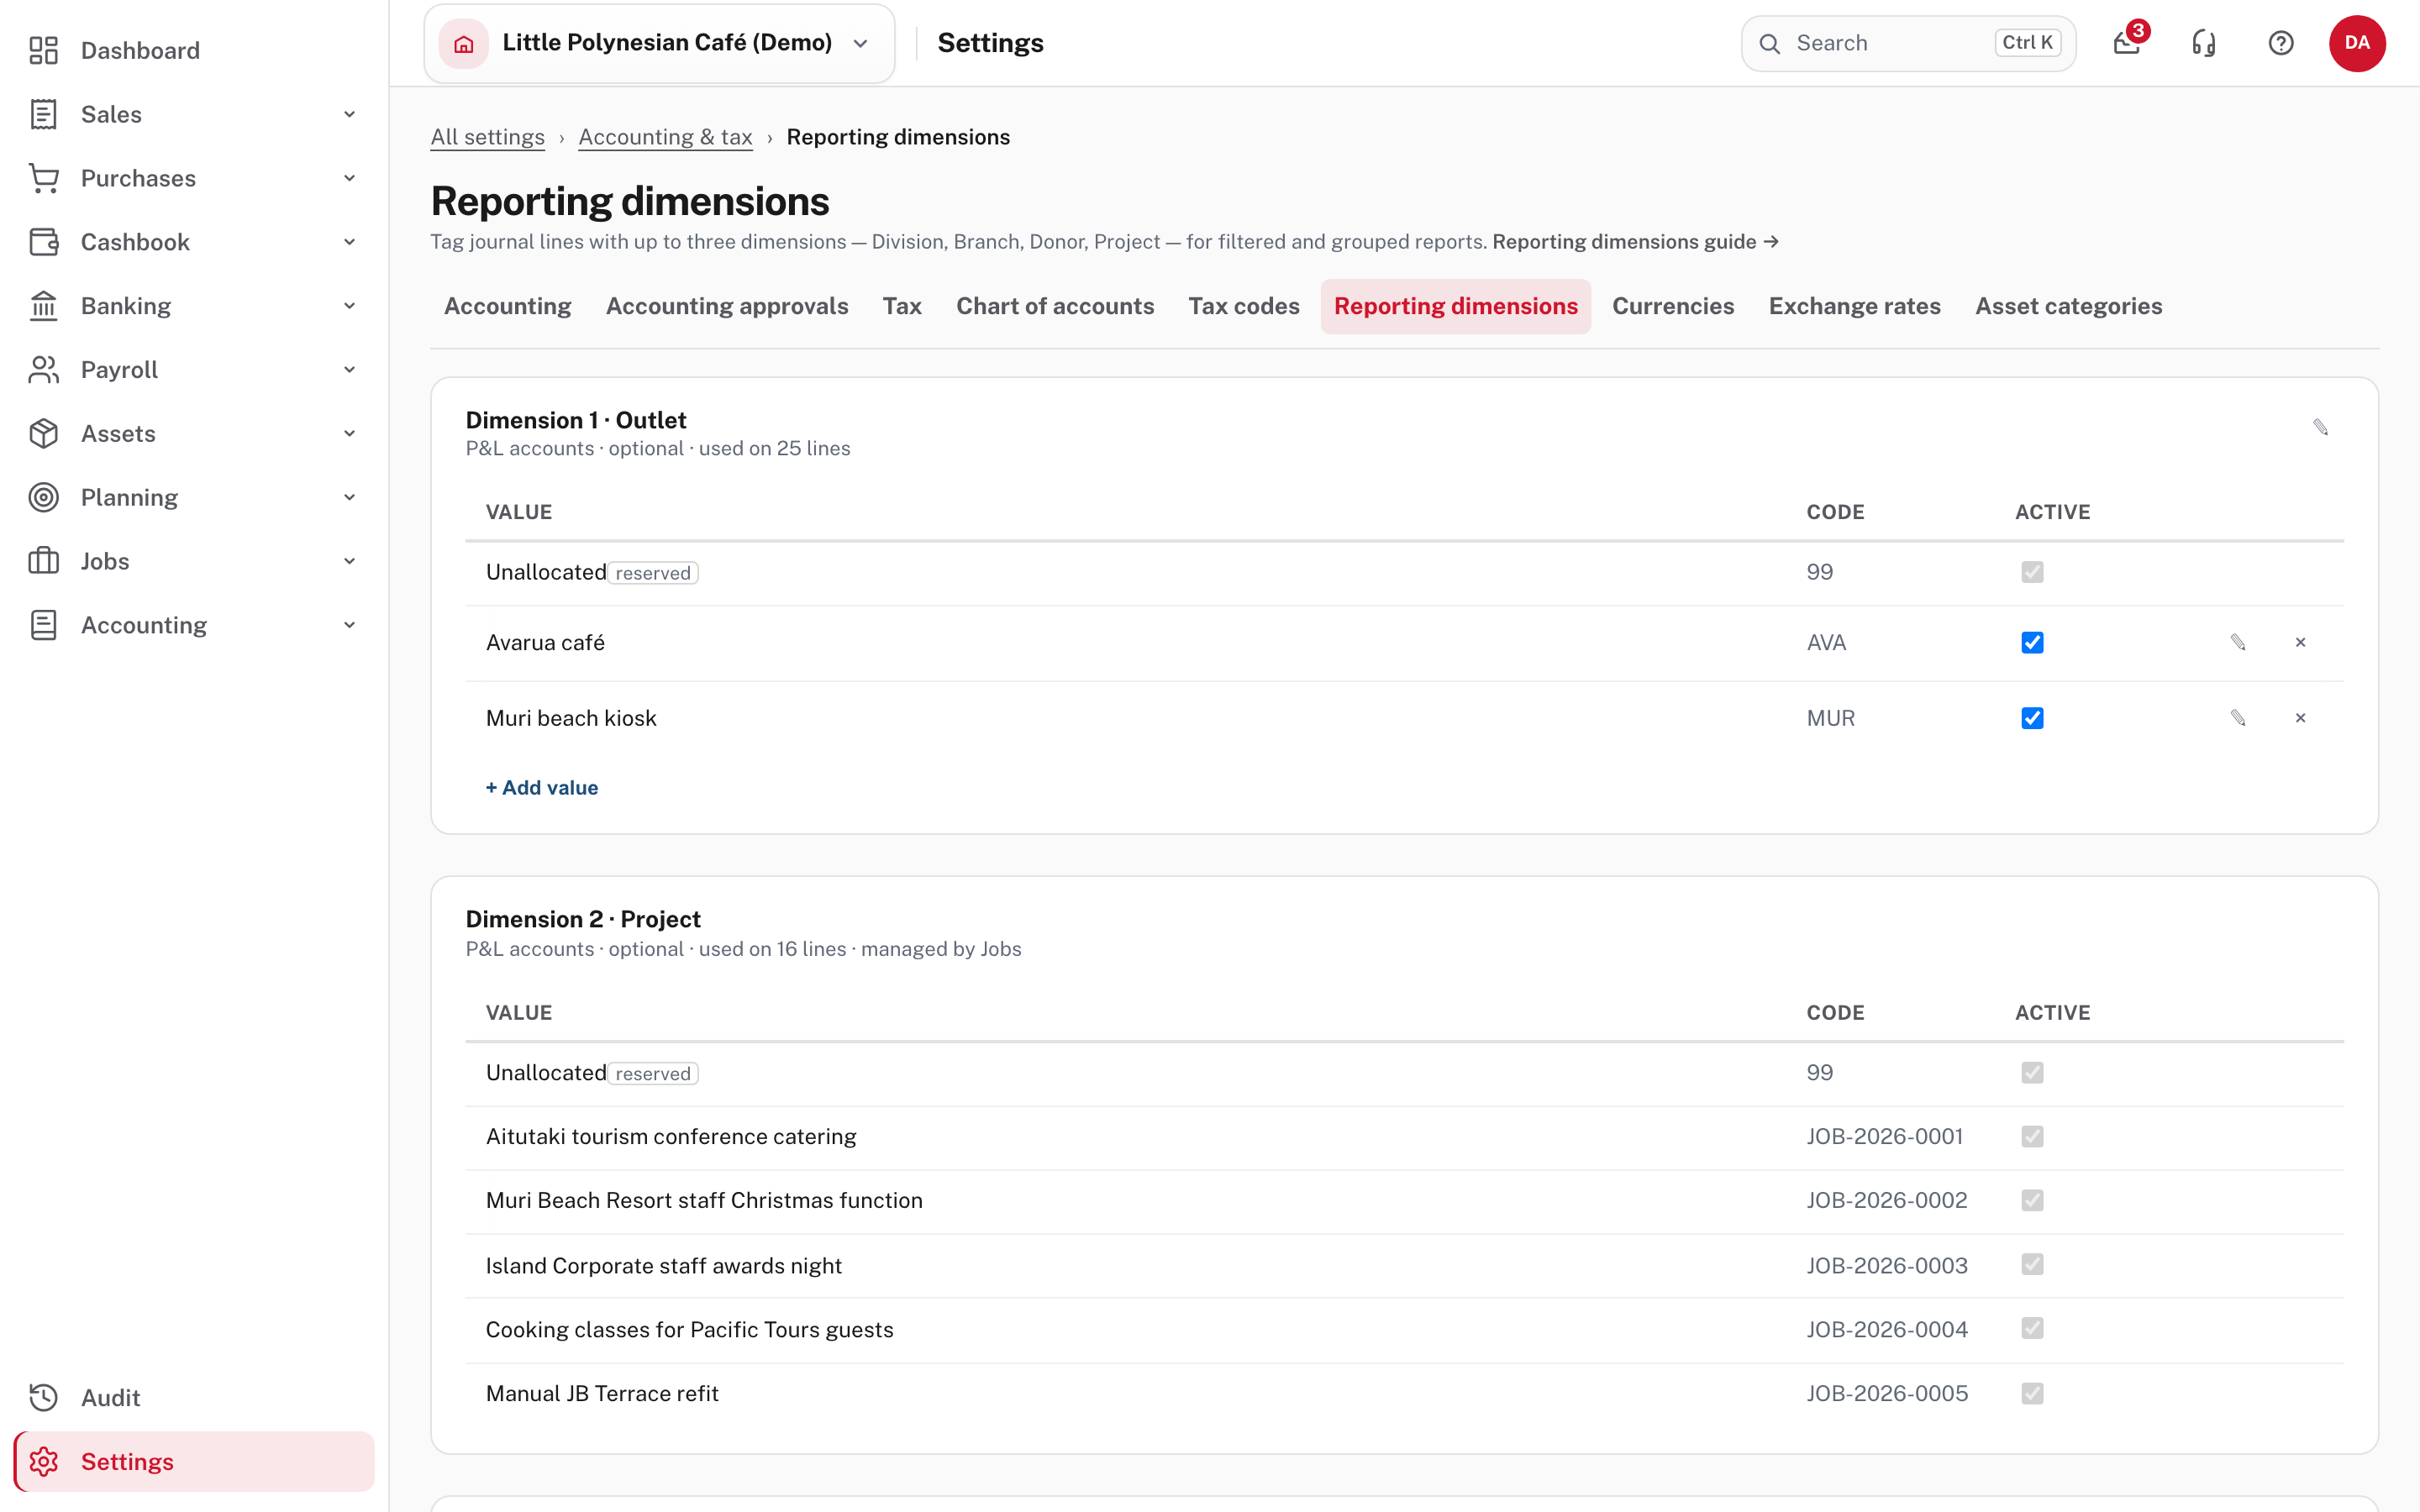
Each dimension is a card. The line under its name says what it applies to (here P&L accounts), whether it is optional or required, and how many lines use it (used on 25 lines). Under it are its values, each with a Code and an Active box. Below the last card, Add a dimension shows how many of the three slots are free.
Two things to notice:
- Every dimension has a reserved value, Unallocated (code 99), for lines that belong to no value in particular. It is always there and can't be edited, switched off or deleted.
- Project says managed by Jobs. Its values are made by the Jobs module, one for each job, so they have no edit or delete buttons here and their boxes are fixed (Help).
Step 2. Add a dimension, or change one
To add one, choose Add a dimension; to change one, choose its ✎.
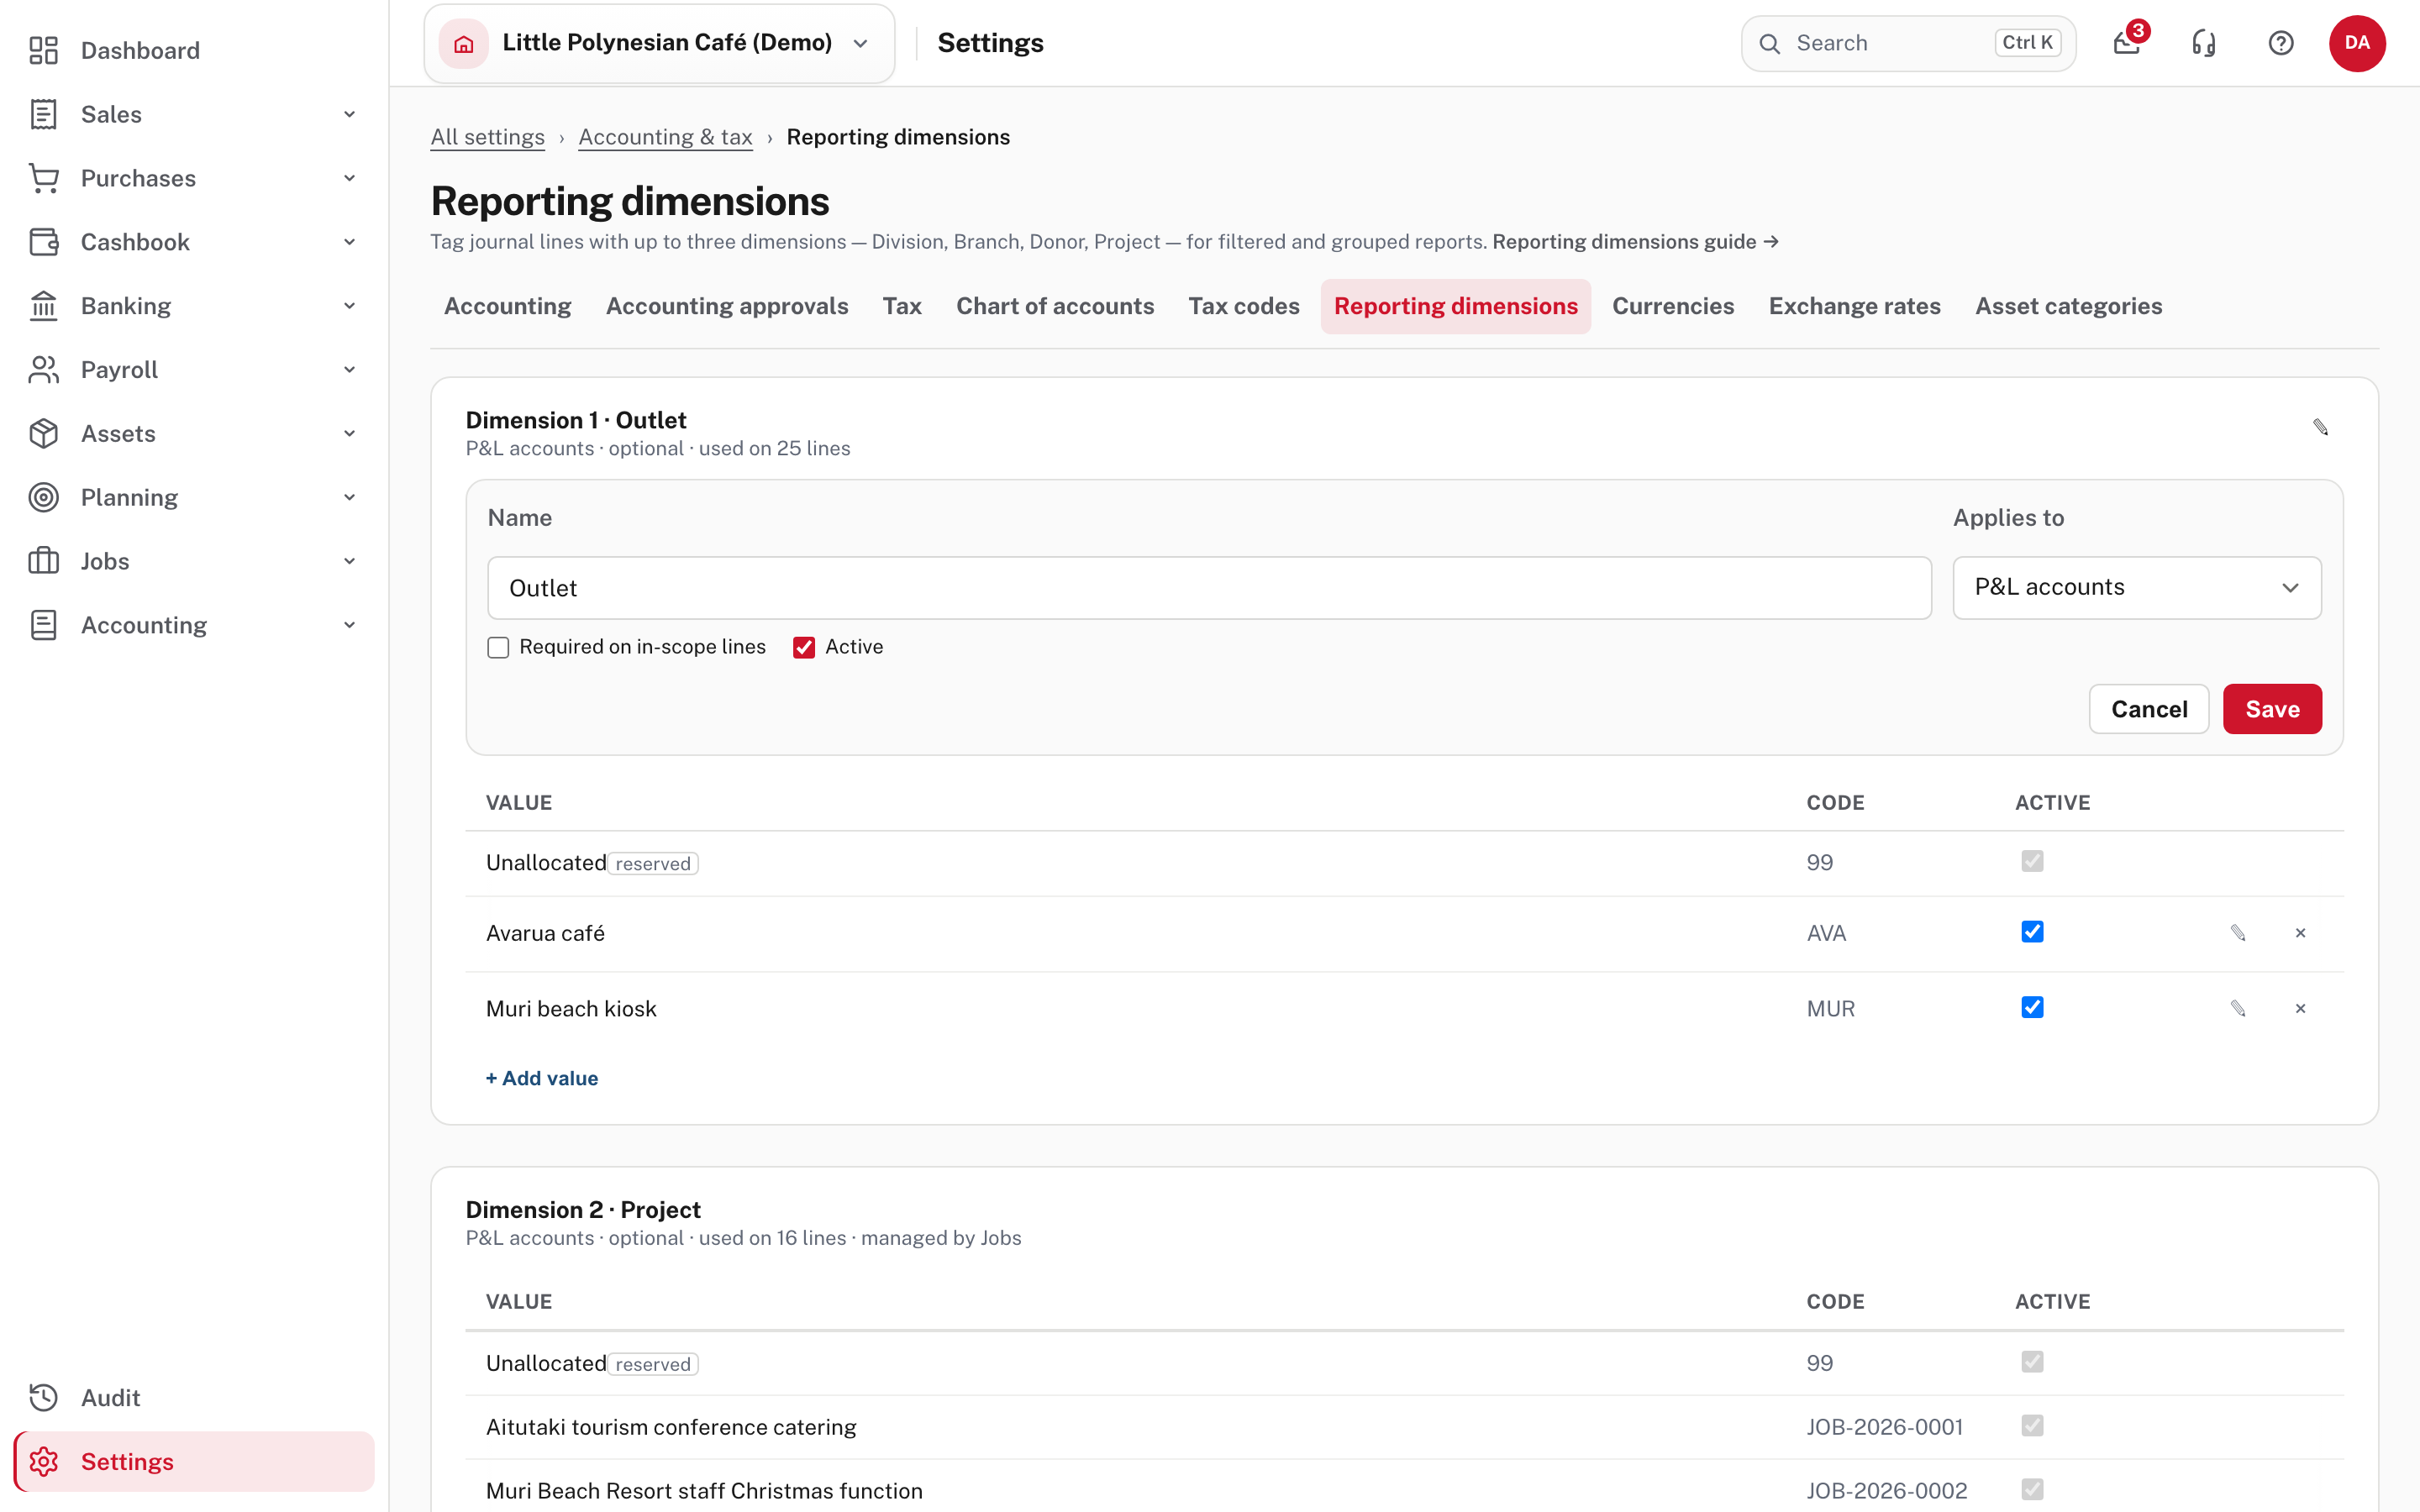
| Field | What it does |
|---|---|
| Name | What it is called everywhere: Outlet, Donor, Department |
| Applies to | P&L accounts (income and expenses, the usual choice), P&L + balance sheet, or All accounts |
| Required on in-scope lines | When ticked, every line to an account the dimension applies to must name a real value; Unallocated is not enough and a line without a value is refused. Leave it unticked to make the dimension optional |
| Active | Untick to stop offering it on new lines. Past lines keep it |
The picture is the form for Outlet, closed with Cancel. The form offers three Applies to choices; Easy's Help describes the first two (Help).
Not shown in the demo: making a dimension required
With Required on in-scope lines ticked, a line without a value is refused (Required or optional). Switch it on only when you are sure every line should carry a value.
A dimension or value can be renamed or switched off at any time. Once it has been used on a finalised or recorded line it can't be deleted, so switch it off instead. A dimension that no line uses shows a × delete button; once lines use it, the button is gone (in the picture, Outlet has only the pencil).
Step 3. Add values
Choose + Add value under the dimension.
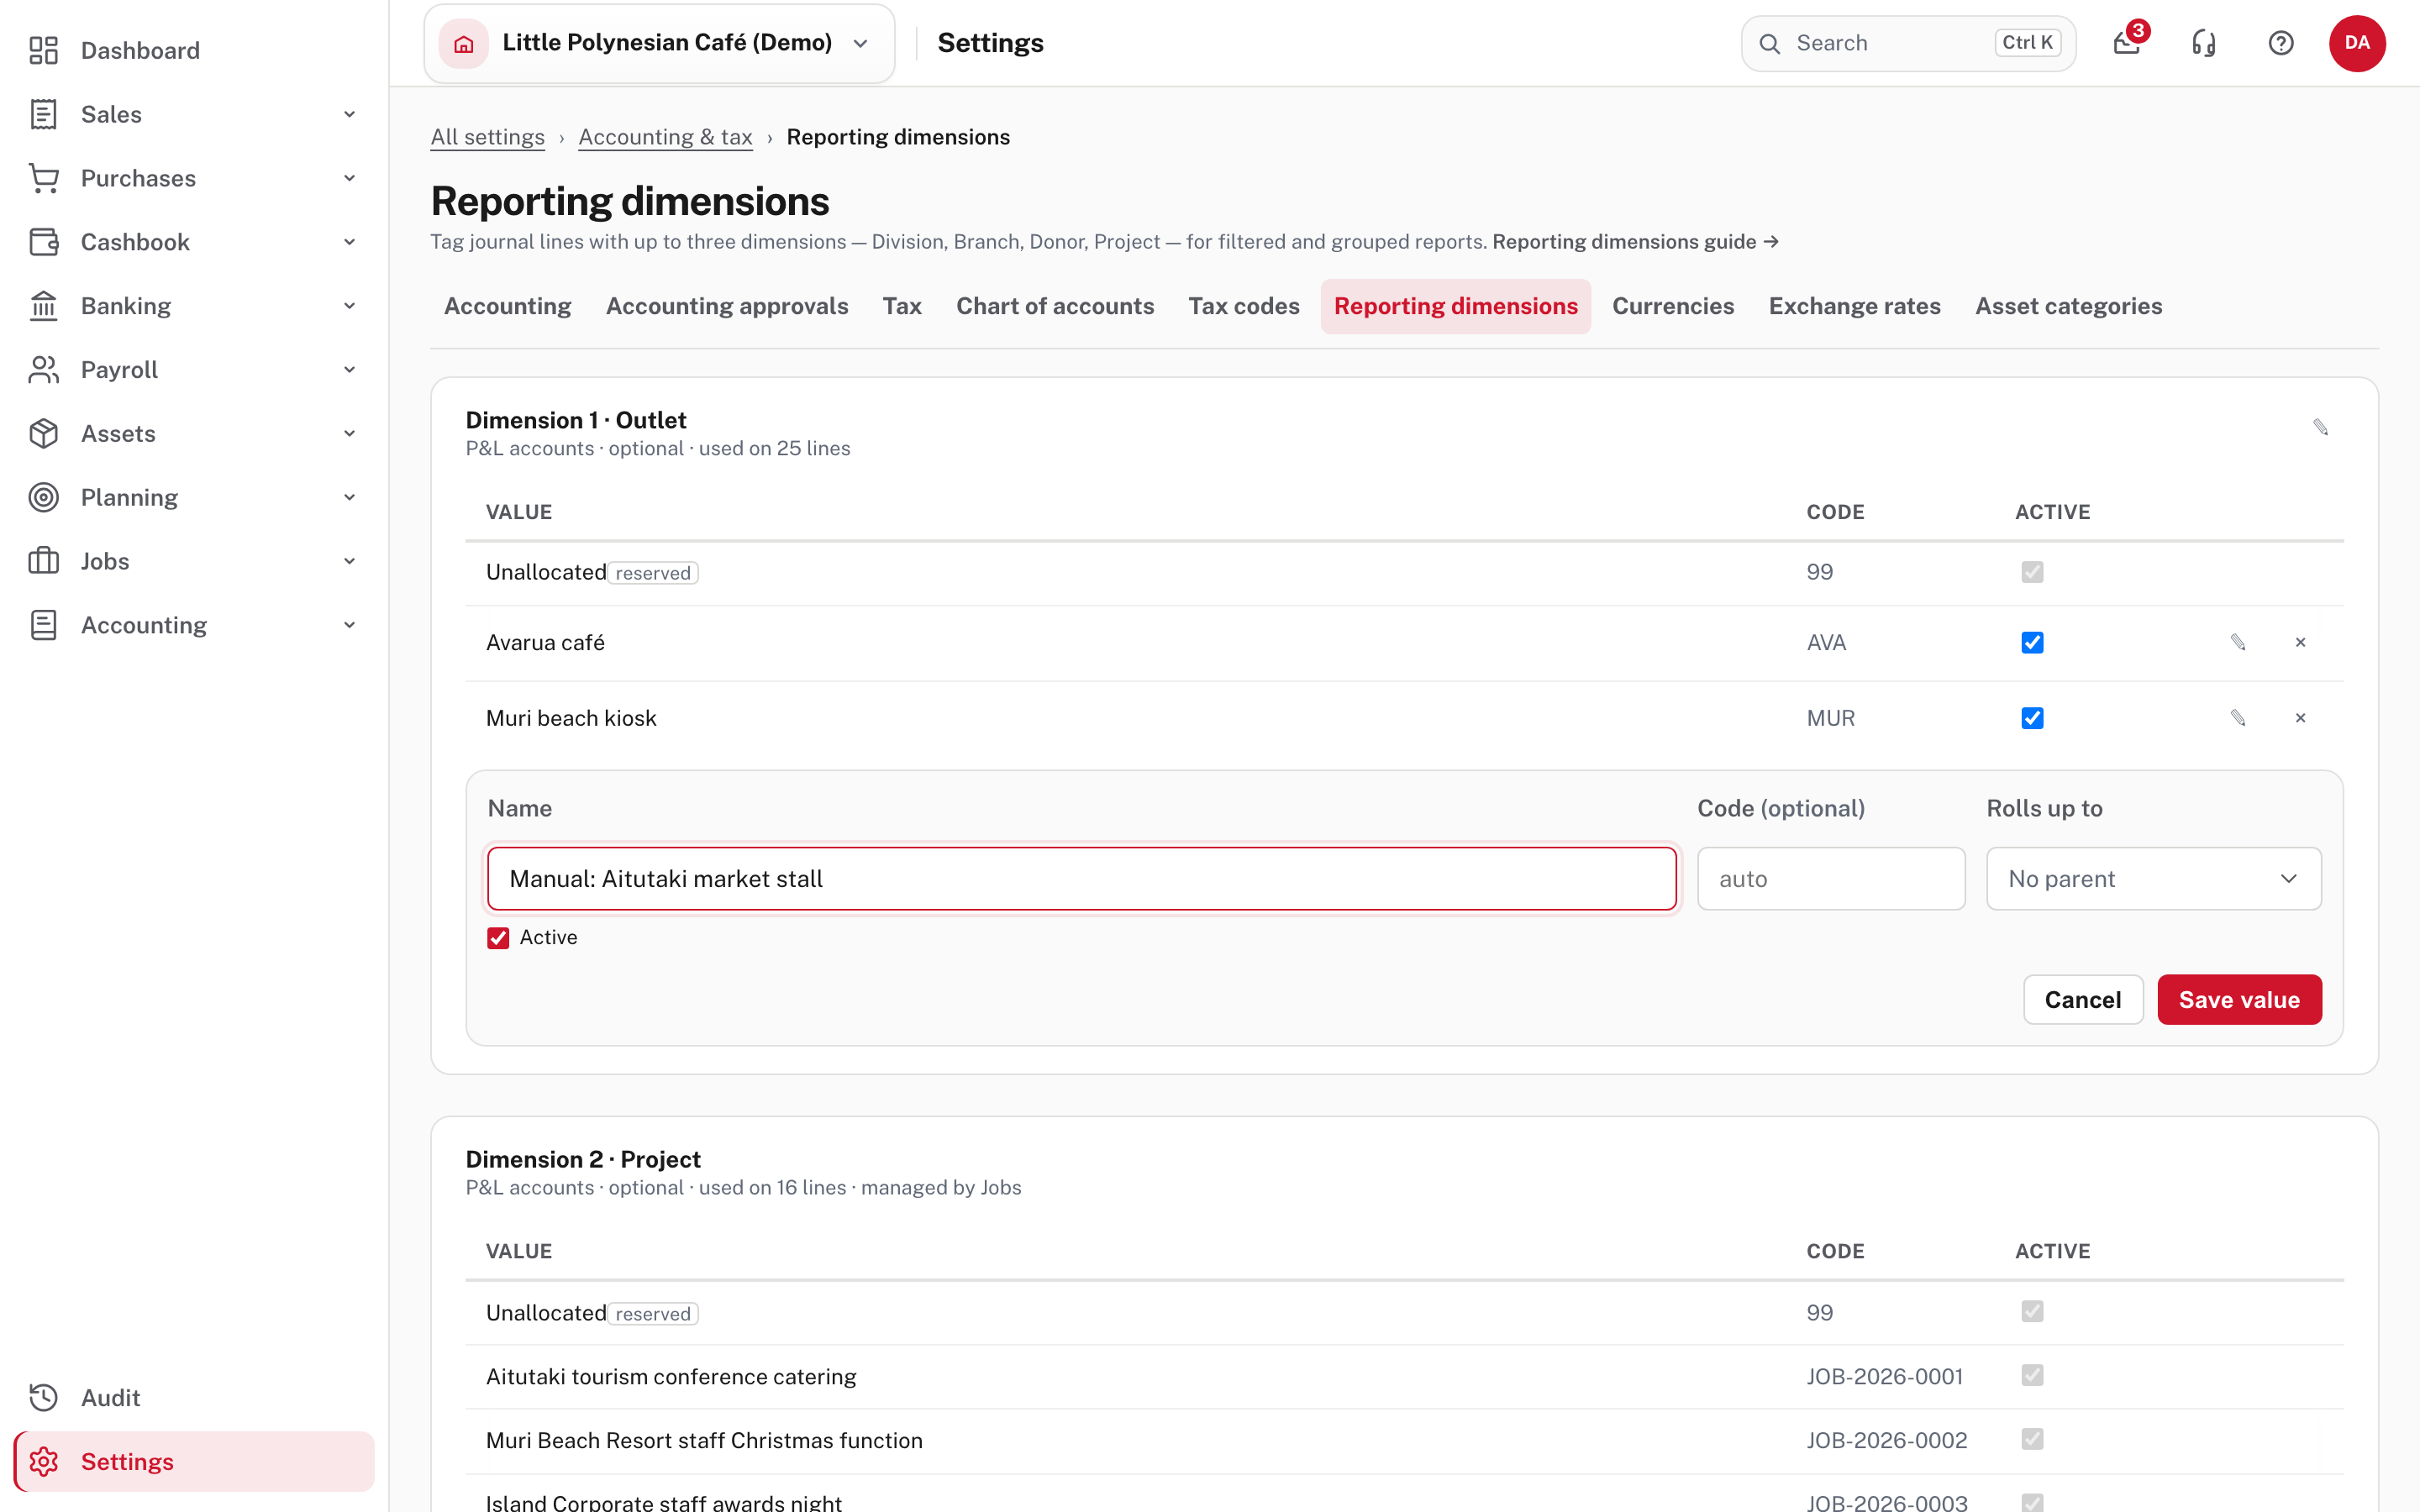
| Field | What to enter |
|---|---|
| Name | What people will pick: Manual: Aitutaki market stall |
| Code (optional) | A short code. Leave it as auto and Easy chooses one |
| Rolls up to | A parent value, if the values form groups. Only appears when the dimension already has a value that could be one |
| Active | Untick to retire the value |
Choose Save value.
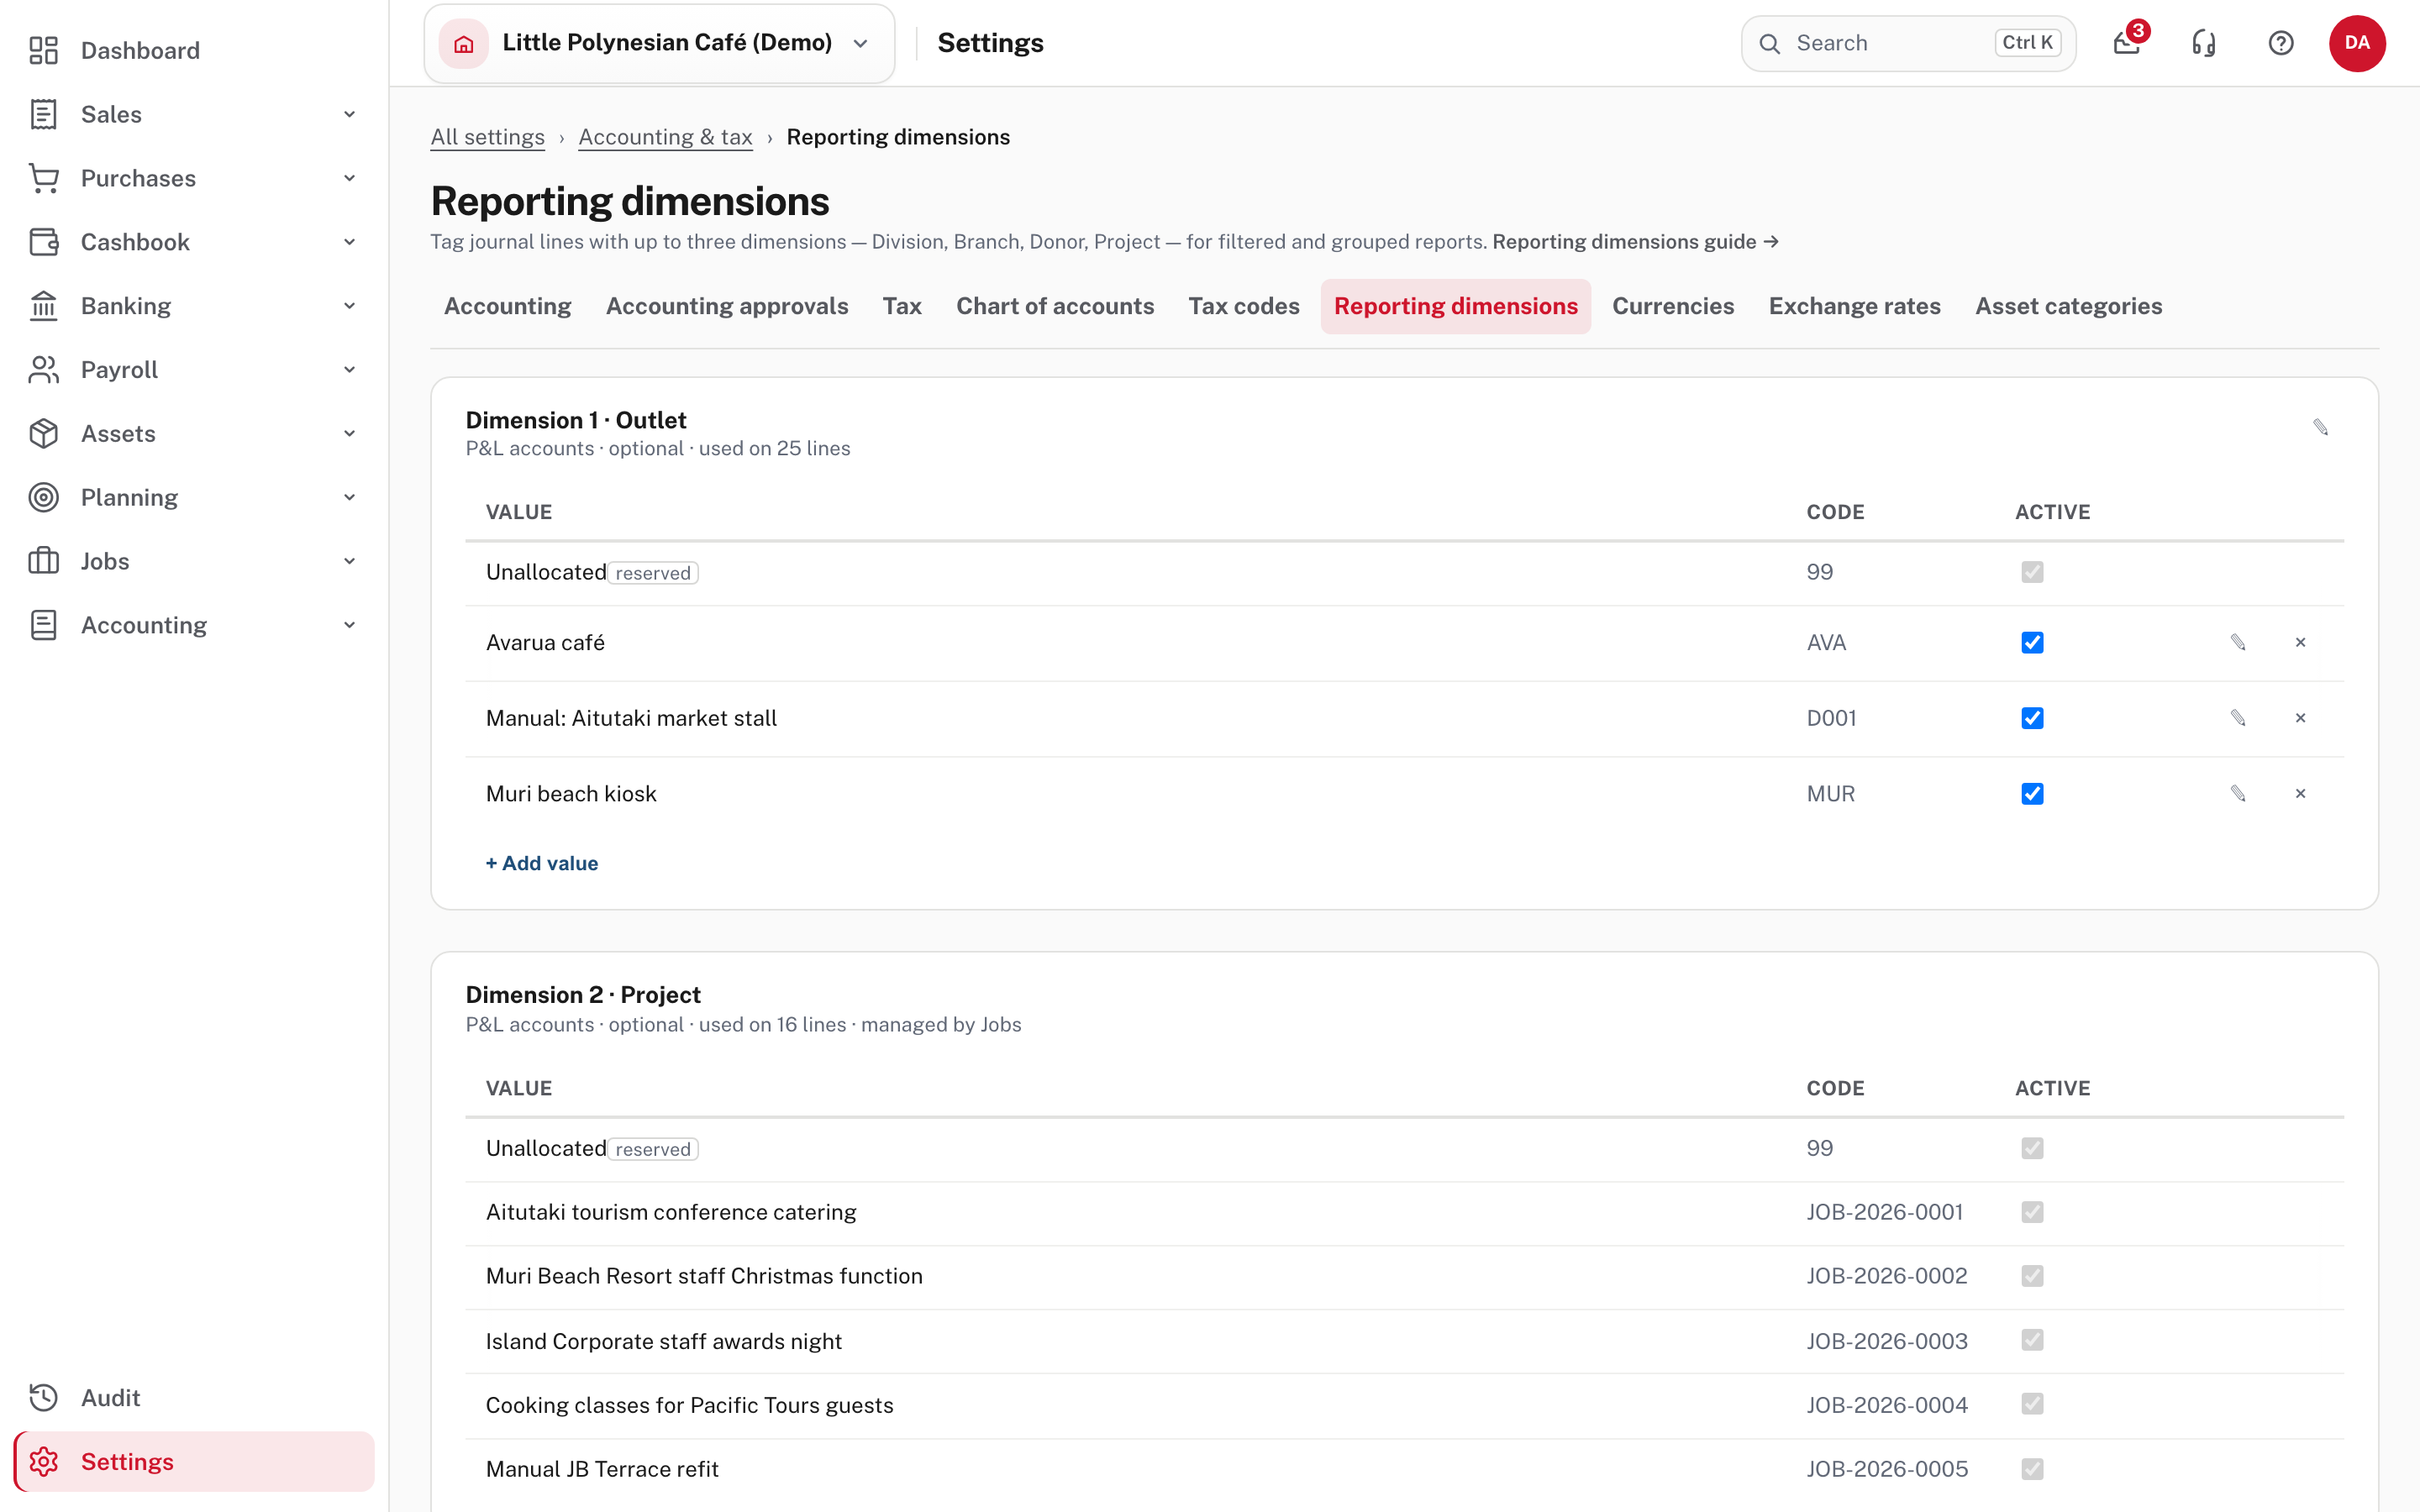
It is in the list at once, with the code Easy chose (D001), and is offered on every new line from now on.
Step 4. Tag the lines
Every line of a transaction that can carry a dimension has one box for each active dimension, under the line. They appear on the bill, invoice and journal editors, and on a cashbook payment once Other money paid out is chosen.
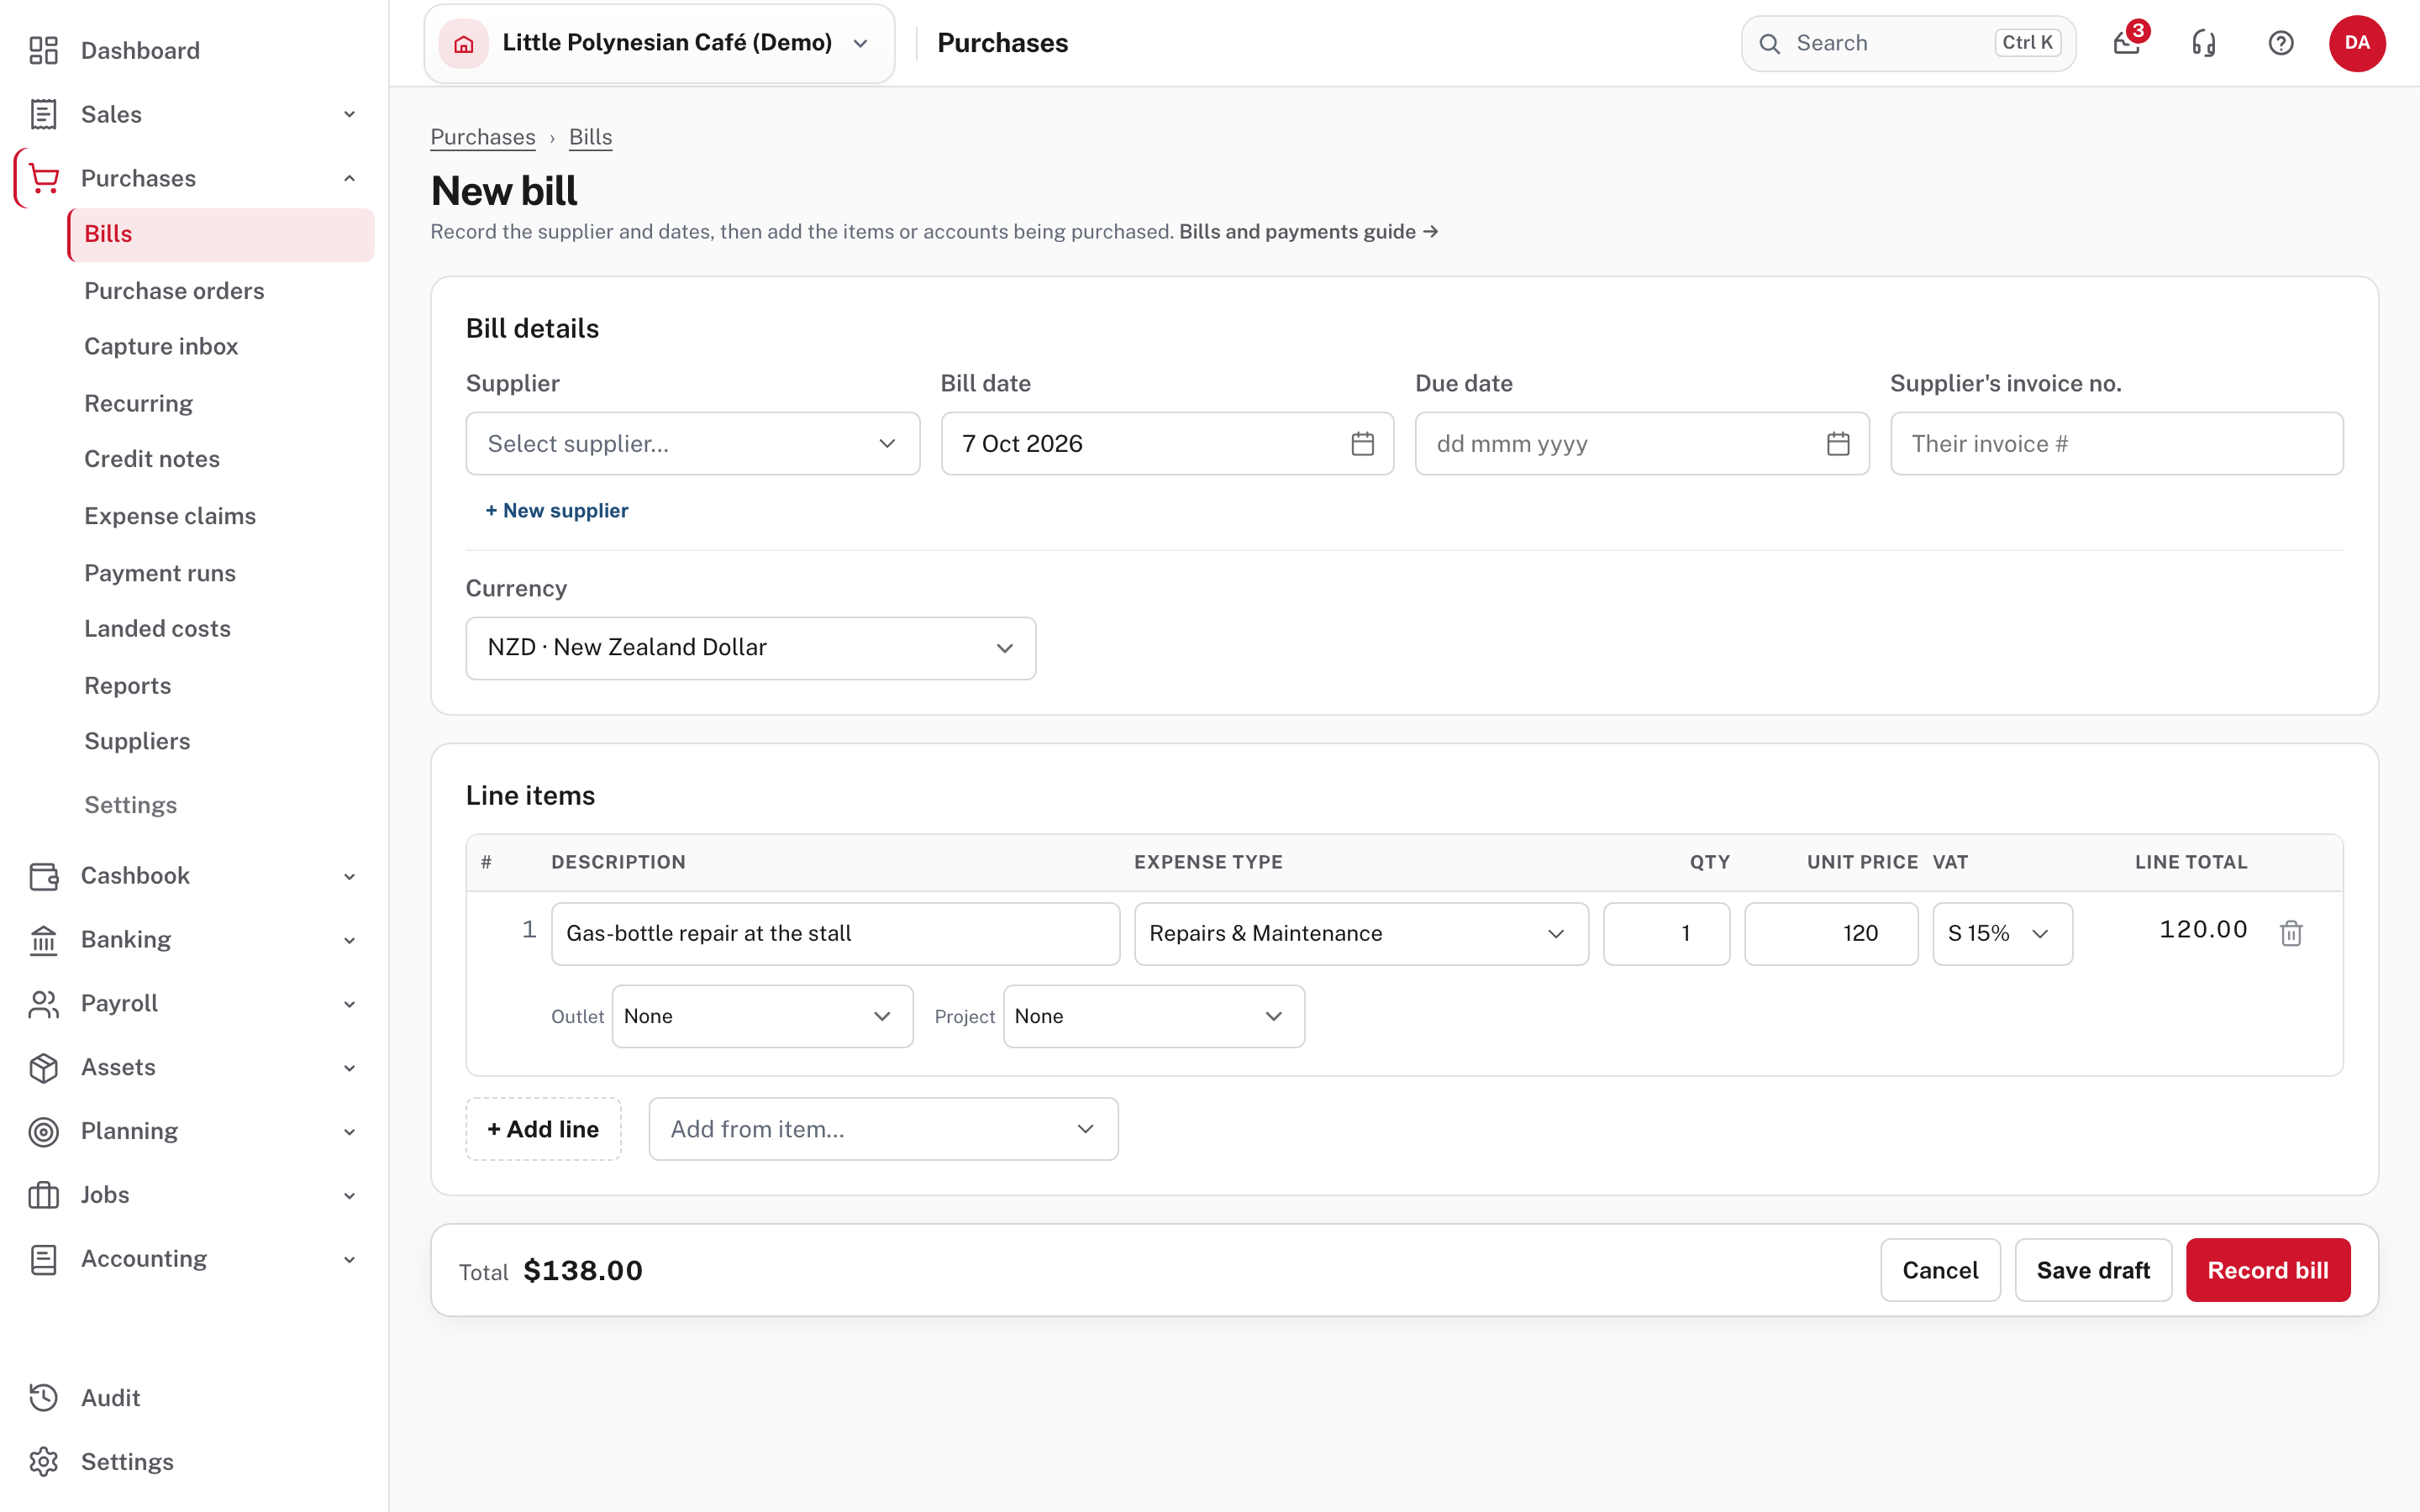
Pick a value, or leave None (the line then shows under Unallocated in the report). To fix a line that was coded without a tag, or to move a cost from one account to another and tag it as you go, use a manual journal. Here a $120 gas-bottle repair for the market stall was coded to Power & Utilities, so the journal debits Repairs & Maintenance with Outlet set to the stall, and credits Power & Utilities:
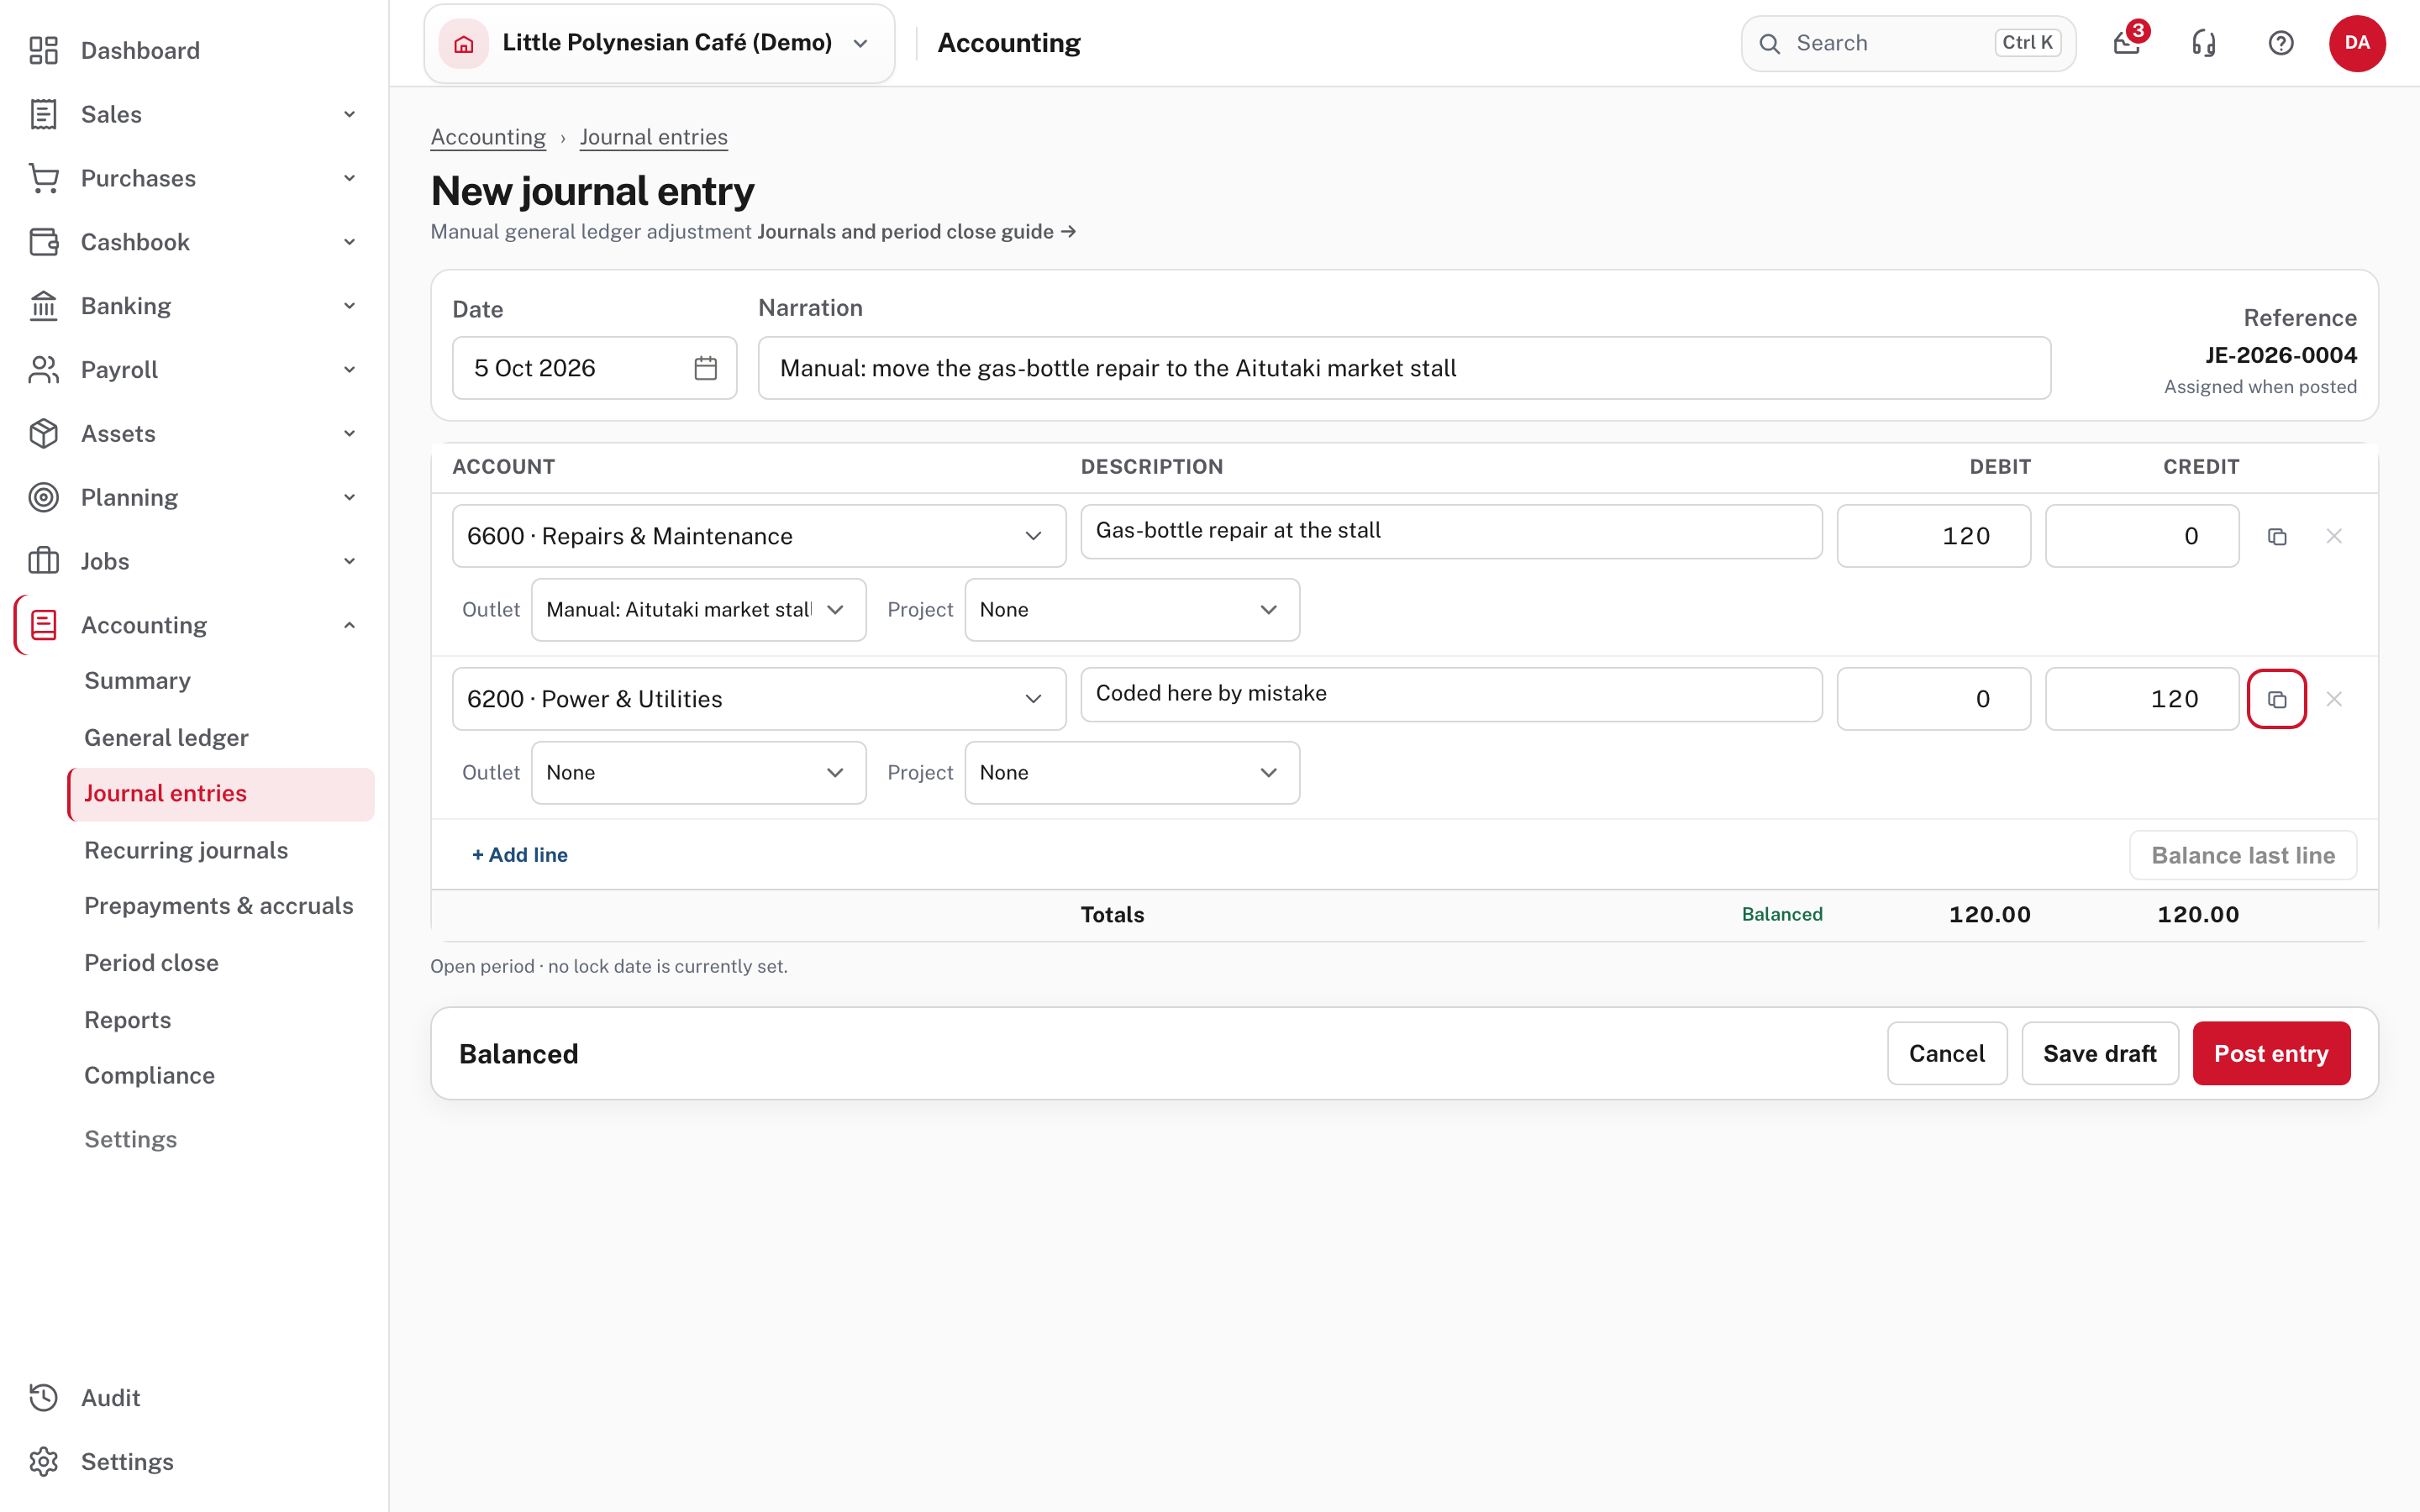
The journal posts like any other (Manual journals). Note that the credit line has None: a line you do not tag stays Unallocated. Tag in the editor you are in, whenever you can; a journal after the fact is the repair, not the habit.
Step 5. Read profit and loss by dimension
Accounting → Reports → Profit and loss by dimension (under Management)
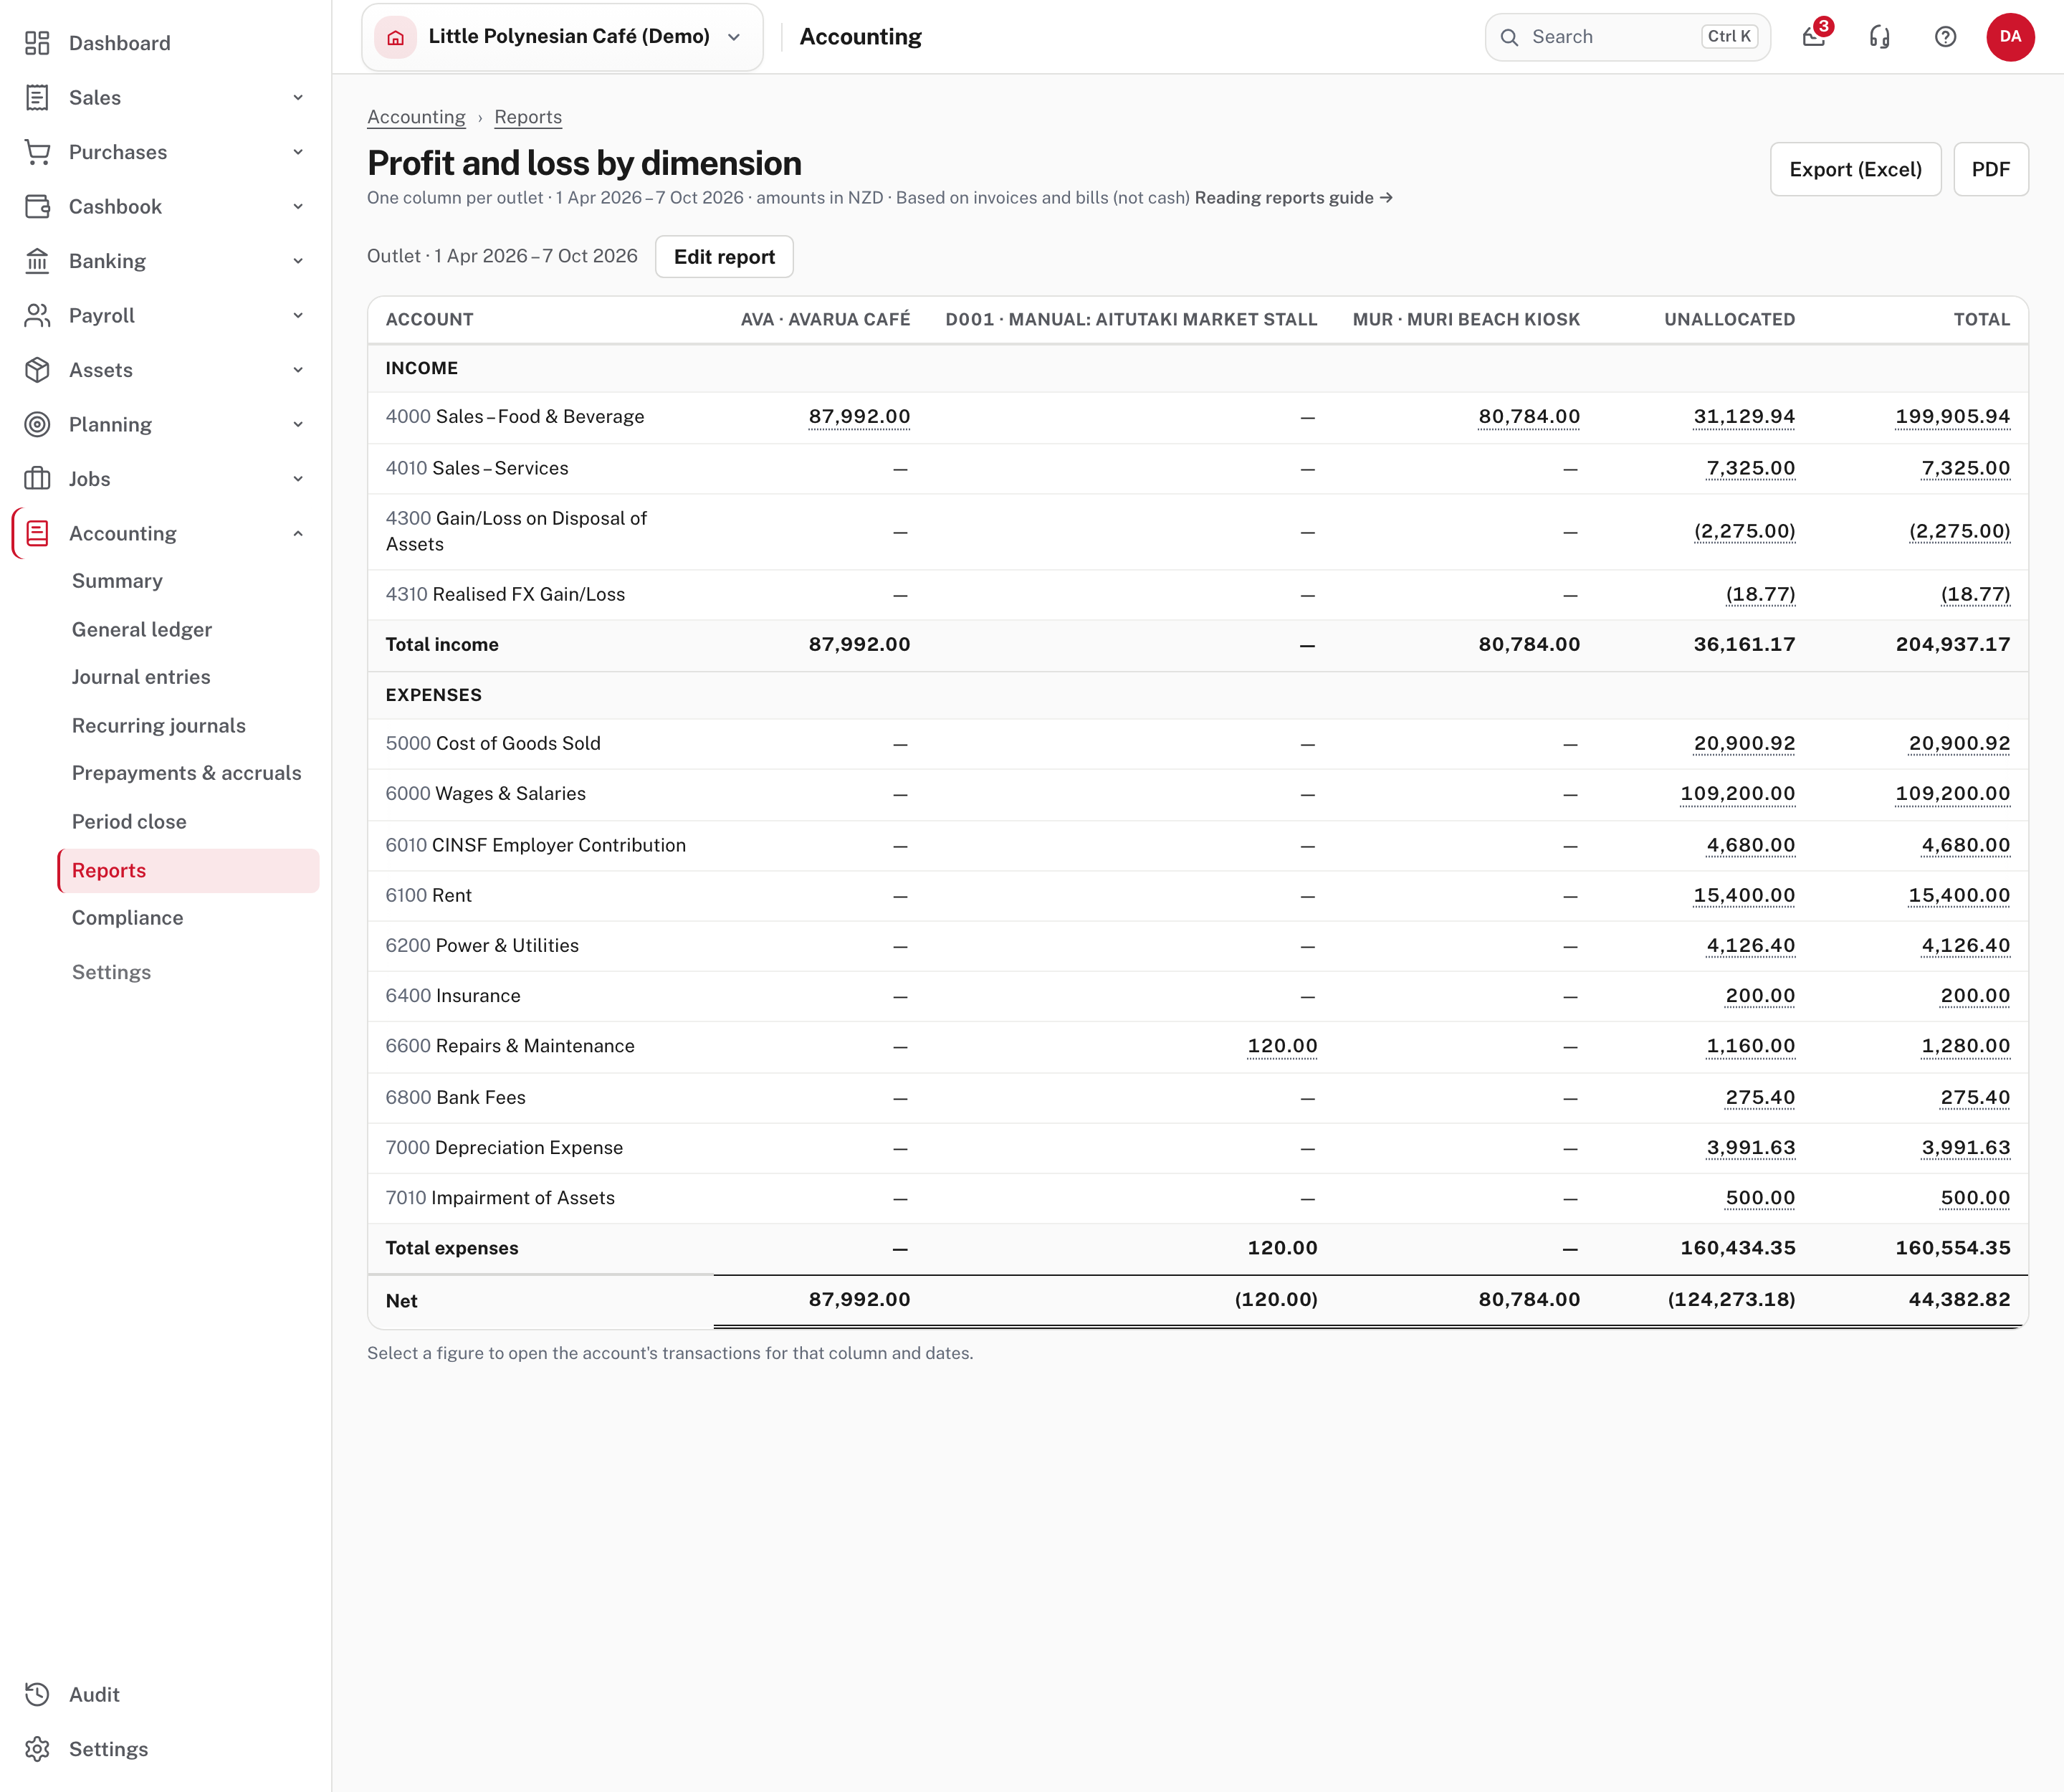
The report is the profit and loss with one column for each value of the dimension you choose, then Unallocated (lines with no value) and Total (the whole business, which is the same as the ordinary profit and loss for the same dates). It opens on the financial year to date. Edit report sets the Dimension and the From and To dates. Export (Excel) and PDF keep a copy. Choose any figure to open that account's transactions for that column and those dates: a value's column opens only that value's lines, and the Total column opens the whole business.
How to read the demo's report:
- The outlets show income only. Avarua café and Muri beach kiosk carry sales of $87,992 and $80,784, but all the costs are in Unallocated (wages, rent, cost of goods), because nobody tagged them. So the outlet Net figures are just income and are not profit. Read each column only for the accounts that were tagged.
- The new value shows up where it was tagged. Manual: Aitutaki market stall has $120 of Repairs & Maintenance and a Net of ($120.00). The Unallocated column's total expenses fell by the same $120, because the credit took it out of Power & Utilities there.
- The columns add across to the total. For any account the value columns plus Unallocated equal the Total.
- A dimension that Jobs manages (Project) works the same way, with a column for each job. Choose Project in Edit report. Its columns are wide, so the report scrolls sideways.
The ordinary profit and loss, narrowed to one value
The standard Profit and loss can also be narrowed to one value:
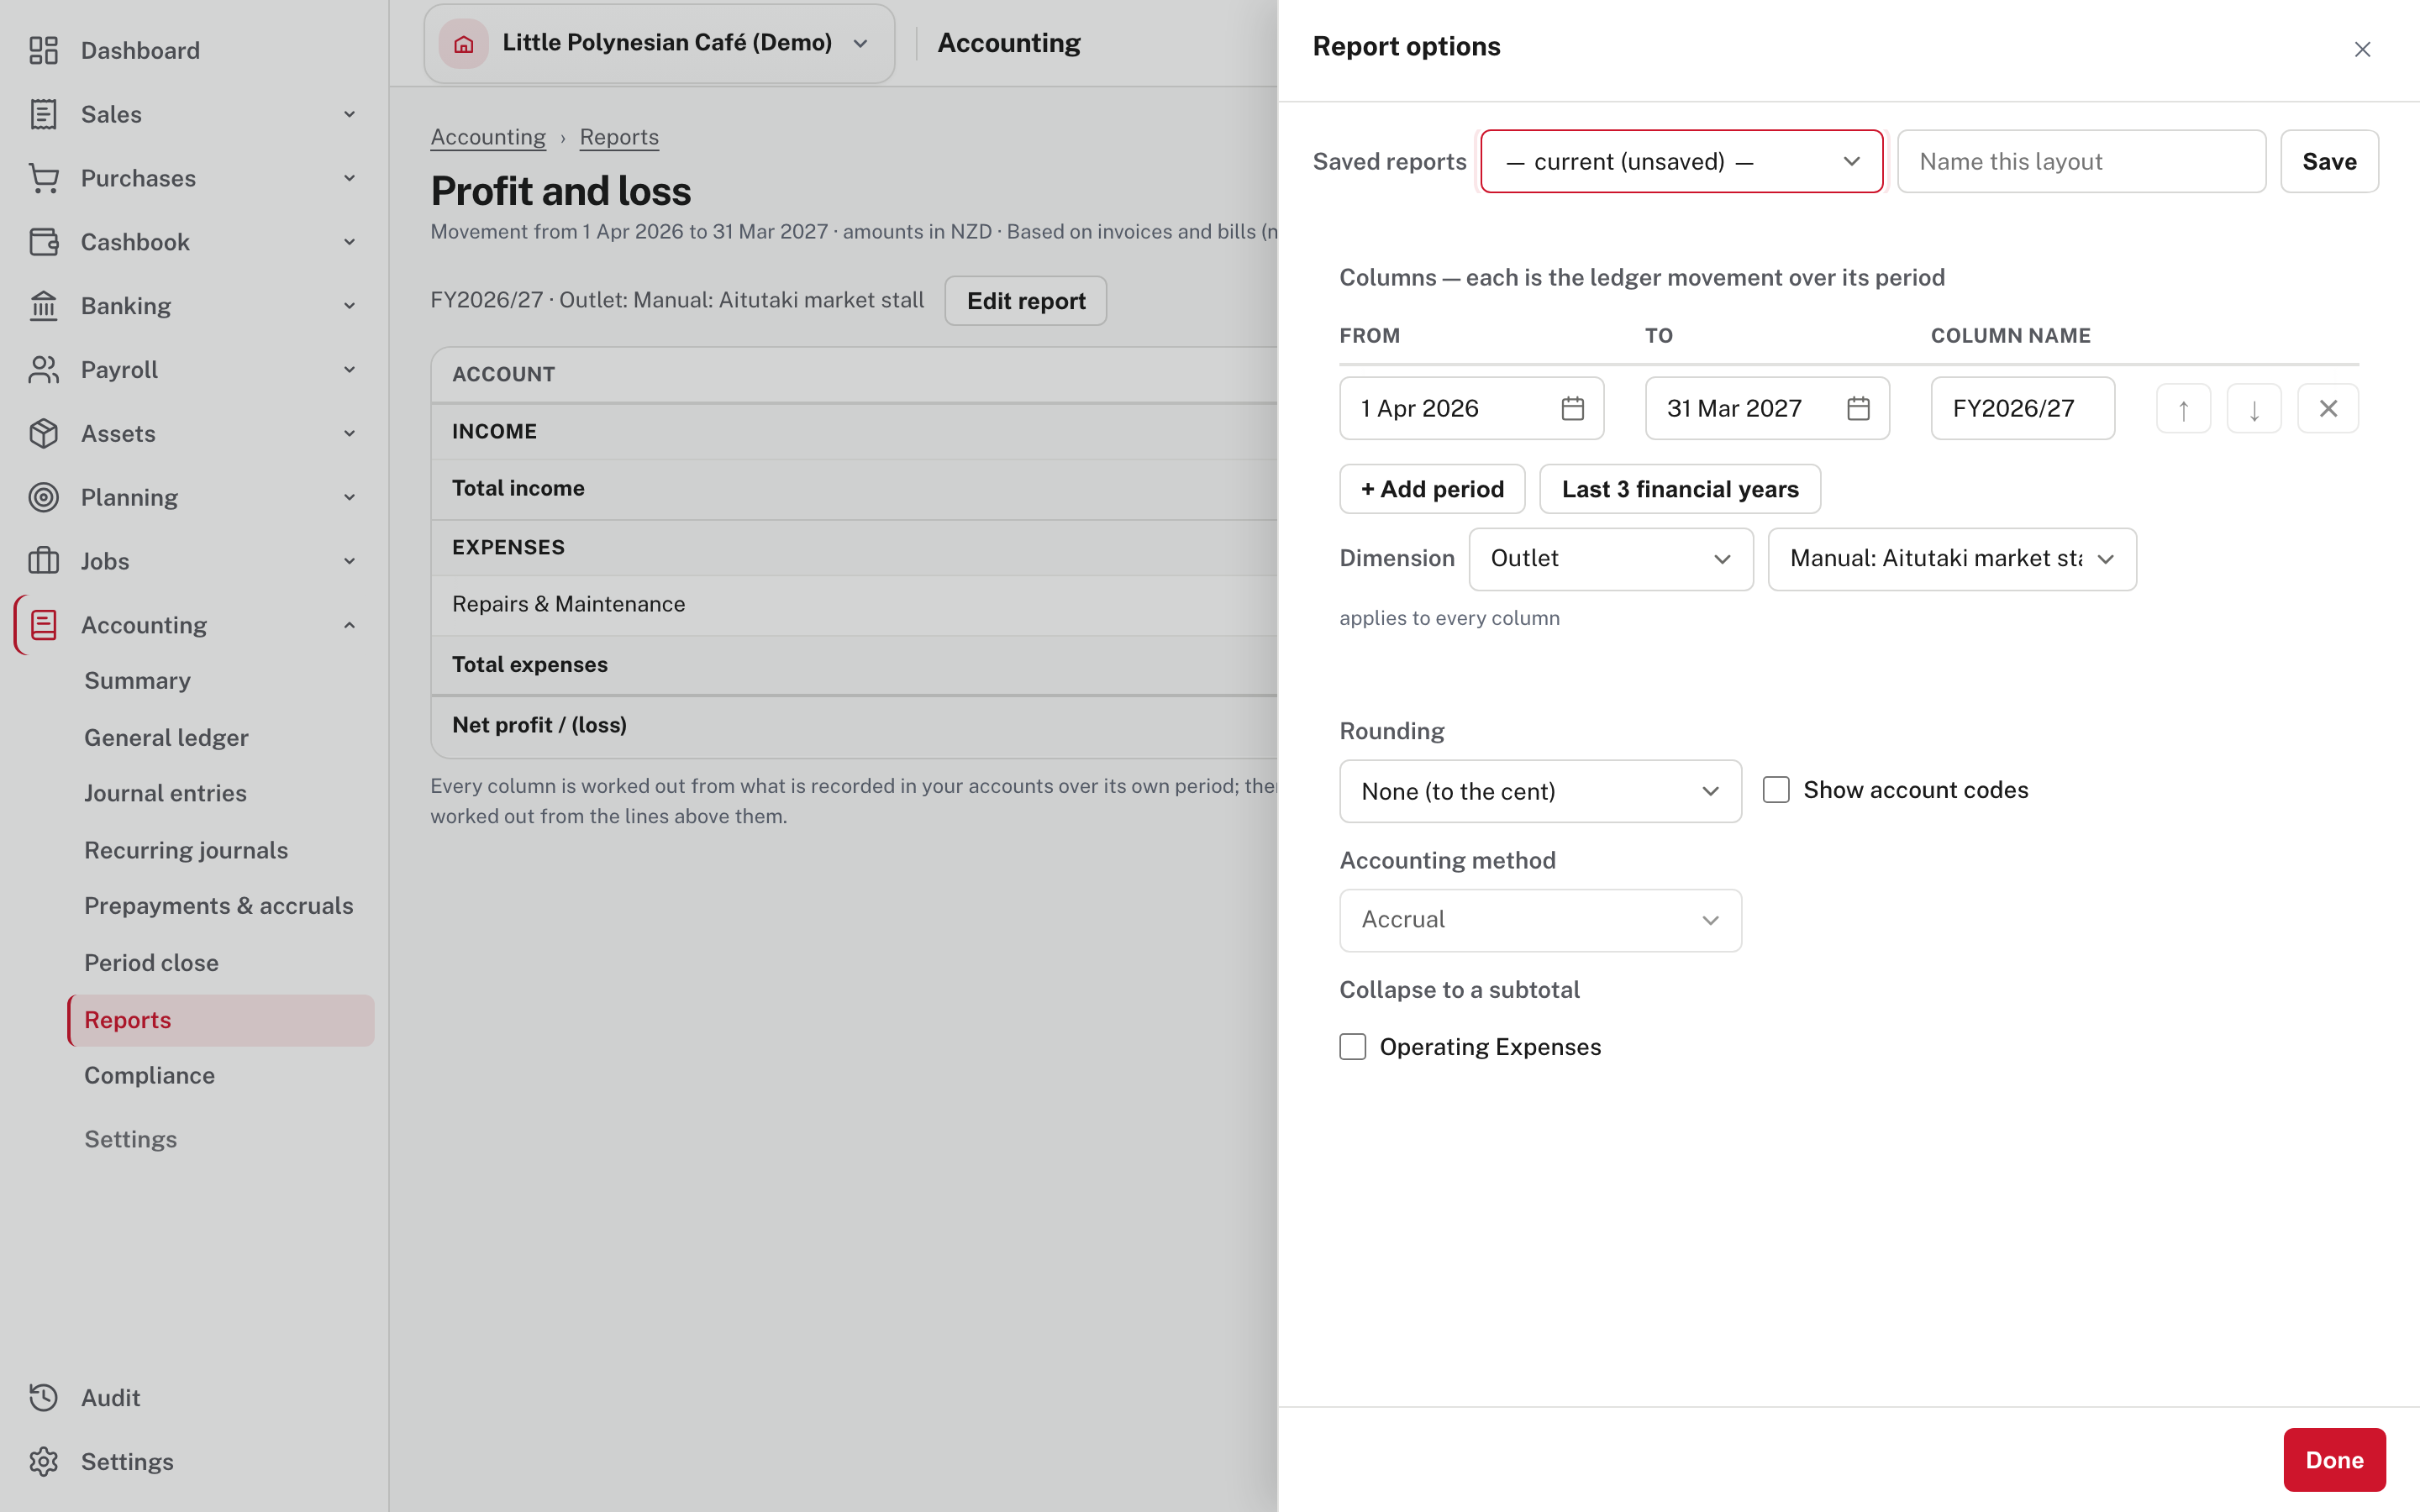
In Edit report, the Dimension boxes choose the dimension and then one value in it, or Unallocated, and the note beside them says it applies to every column. This is the answer to "show me just the stall's profit and loss, over several years side by side".
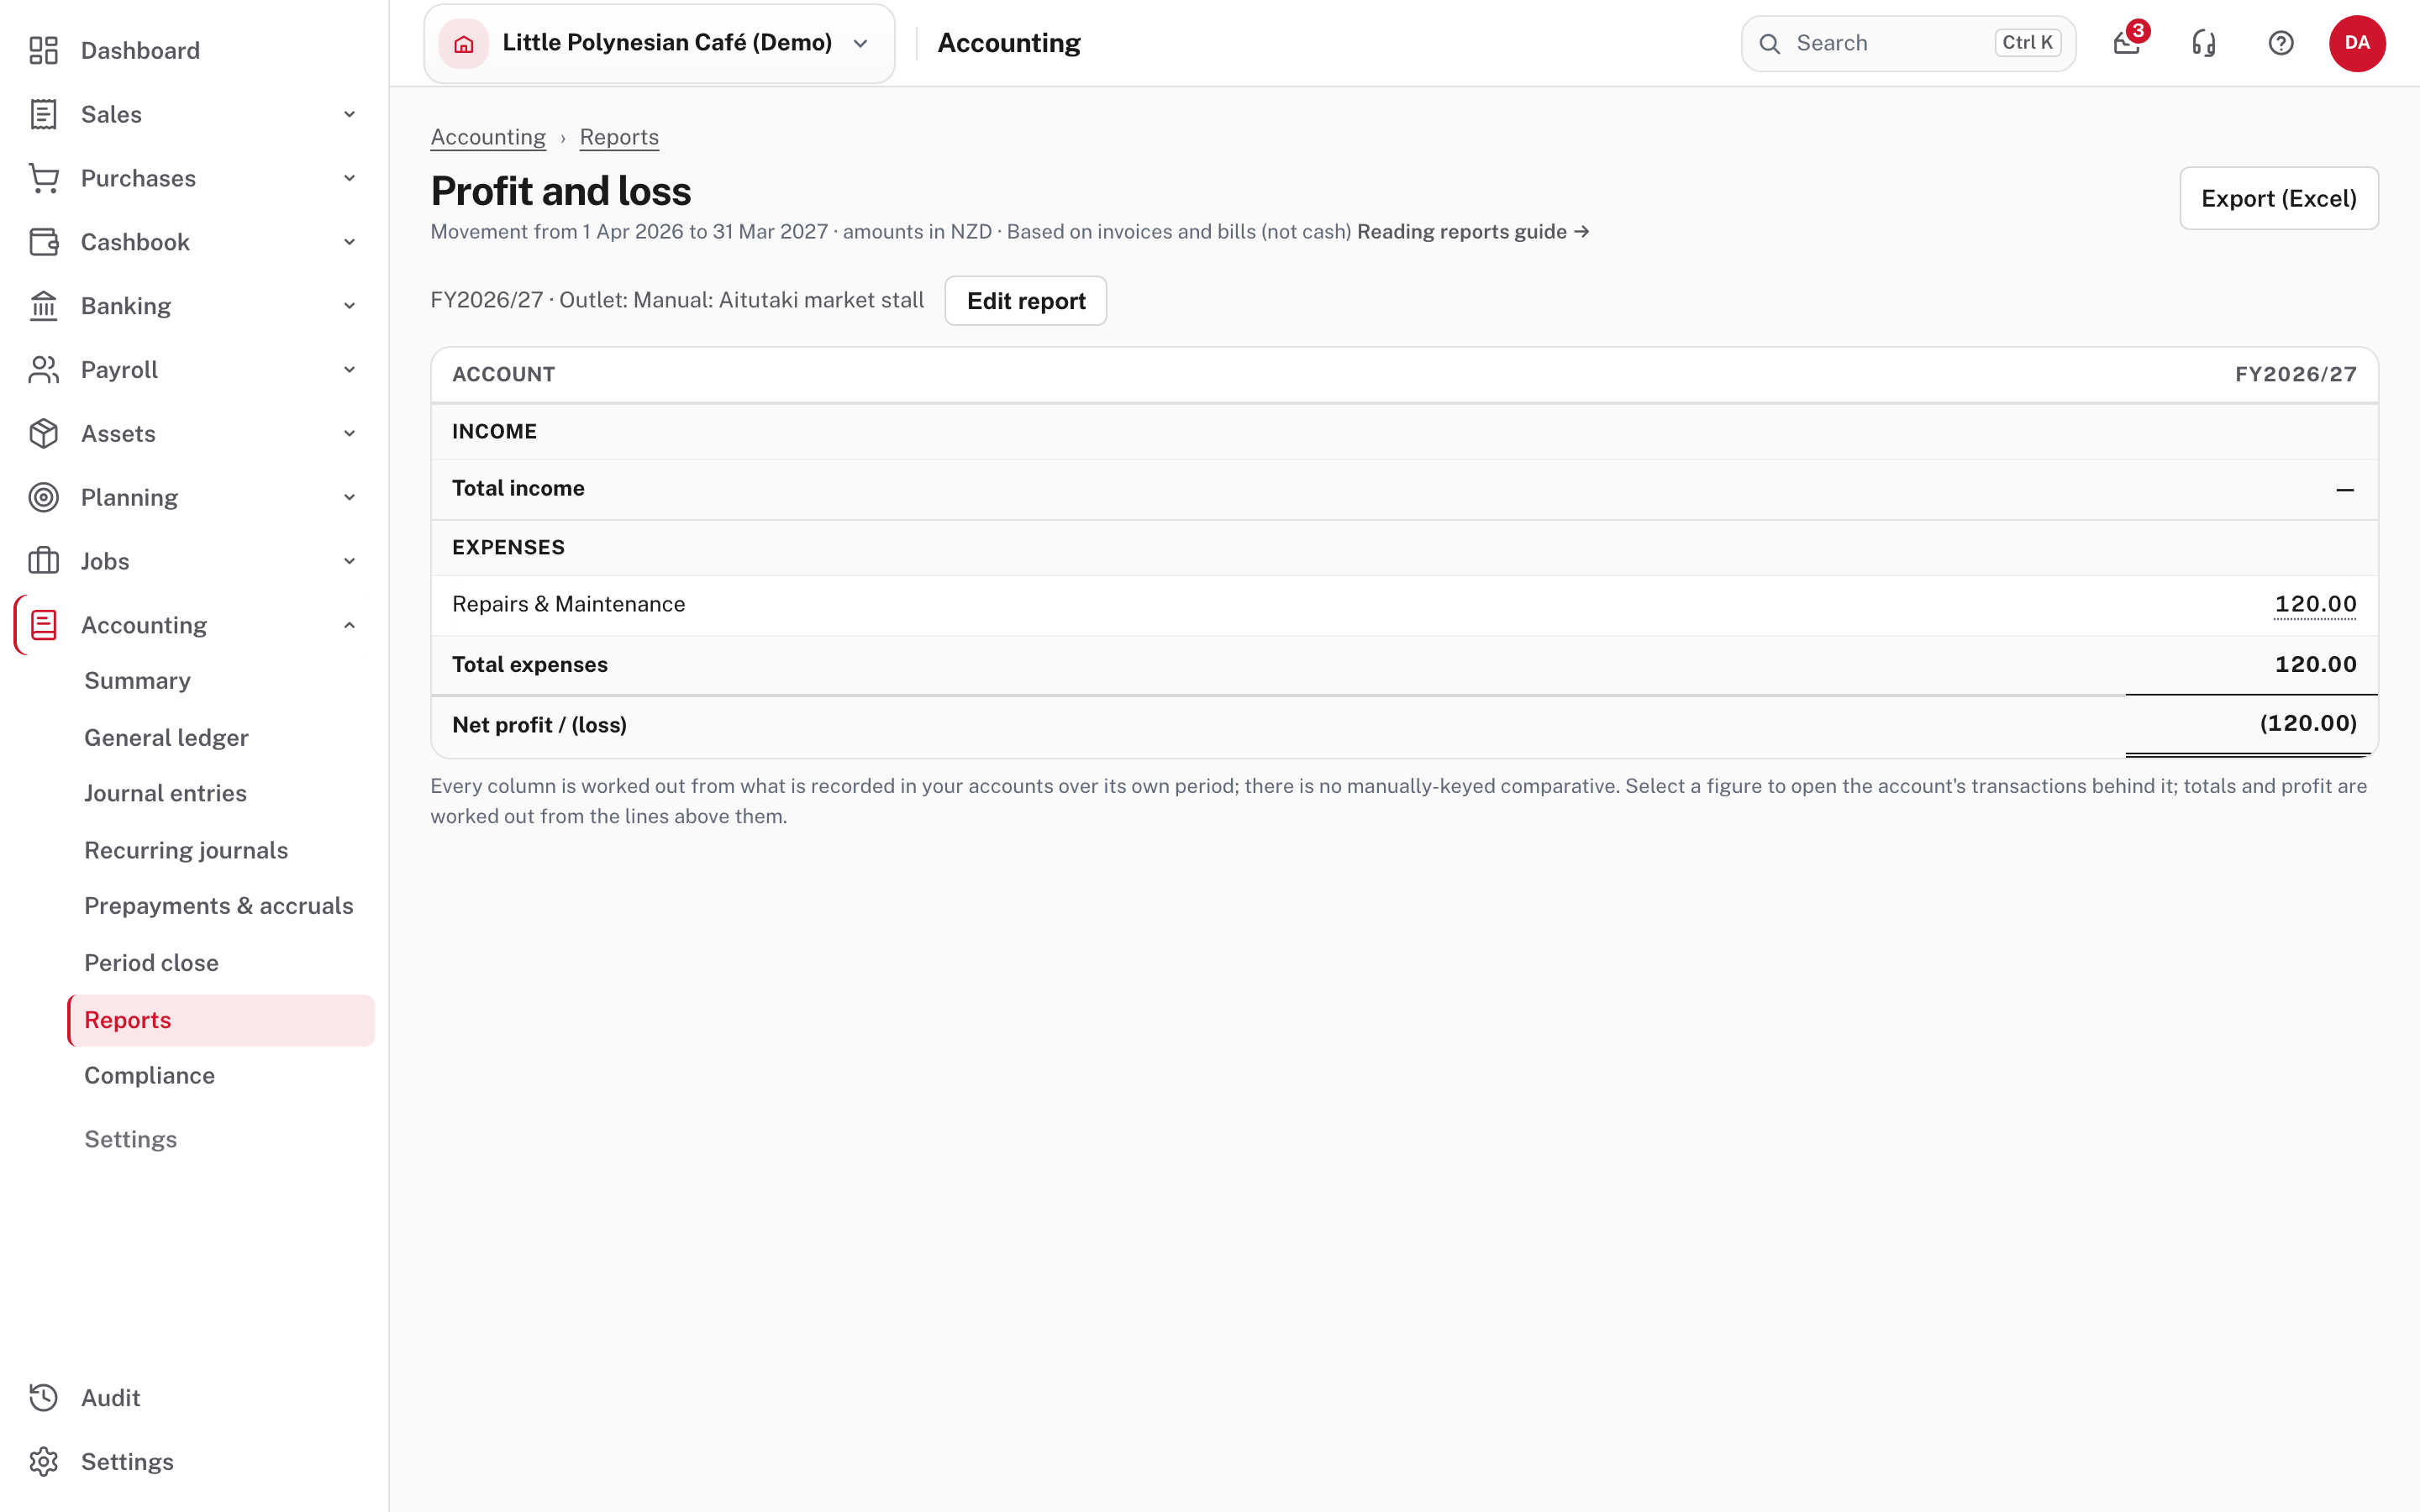
The line under the title now names it (FY2026/27 · Outlet: Manual: Aitutaki market stall). The trial balance has the same Dimension choice (not shown in the demo).
More detail: Reporting dimensions and Reading the reports.
Common mistakes
- Tagging income but not costs (or the reverse). The report then shows income-only or cost-only columns. Decide which accounts a dimension is for and tag all of them, or make it required.
- Making a dimension for something that is already an account. If you only ever want the total for it, an account is simpler.
- A new value for every small thing. Each is a column. Use Rolls up to to group values.
- Deleting a value you meant to retire. Once used it can't be deleted anyway; switch it off.
Check before you continue
Check before you continue
- Each dimension answers a question you ask, and the three slots are not spent on ones you will not tag.
- Applies to covers the accounts you want to report on, and Required is on only if every such line has a value.
- Everyone who enters bills, invoices and payments knows which values to pick, and the editors show the boxes.
- Unallocated is small in the report for the accounts that matter; if it is large, find the untagged lines.
- The columns add across to the whole-business profit and loss.